
Bowl of the bathroom - the main piece of the toilet room. It is necessary to choose it, carefully thinking the details of the design of the rest of the space. From how correctly the bath is chosen, it depends in the future comfort during hygienic procedures. No less attention is required by the installation process, because it is it affects the quality and duration of future operation.
Content
What bath to choose?

Several options are presented on the market:
- Acrylic. Recently on sale, but enjoy a fairly wide demand. They are distinguished by light weight, practically silent operation and inexpensive price. But pay attention to the choice of plastic molding and wall thickness.

- Cast iron. The most robust, time-tested. Such bath will last long enough for more than 25 years. She is an excellent retains heat, so if you like a long time to luxuriate in a bath full of water - this is the best option, but will have to provide for expenses. The only caveat - the severity of material, which makes the installation process more time-consuming.

- Steel. It is less commonly used, since, in spite of the light weight and a reasonable price, very noisy to use and are much smaller than models made of plastic and cast iron.
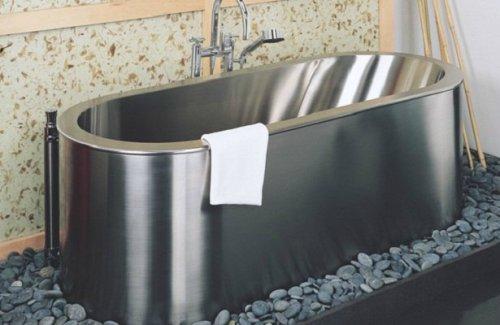
Important! The choice is made on the basis of personal preference, but, consider accompanying its registration in addition to the material of the cup, the screen installation, tiling, shape (straight or angular).


Can I install a bath on their own?
Installing the bath with his hands quite a feasible task, but will require time, care and help at least one person, especially when installing the heavy cast-iron models.

Before you begin to self-install, read the instructions to install and the most bowl summarizing her water line and sewerage.


installation technology corner bath and bowl straight shape is different. The main criterion - the material and the size of a bathtub.
Important! For room small area of \u200b\u200bangulation - a great option that will efficiently delineate all the space.

The sequence of the installation
The whole course of the work is divided into several successive stages:
- Preparatory.
- Skid and mounting cup.
- Connection to the sewer drain.
- Ground.
- Treatment of joints and gaps.
- Setting the screen under the bath.
- Facing.

Preparatory work
This process is very important for correct installation of the bathroom.

Pre-make sure you have all of the tools needed in most cup mounting and fastening it to the engineering systems. Focus on the following list:
- screwdriver
- level
- hammer
- pencil
- ruler or tape measure
- knife
- bulgarian
- saw
- chisel
- wrenches
- mounting foam
- glue or silicone sealant
- adhesive tape
- corrugated drainage pipe (diameter varies depending on the type of material, 40 mm to 50 mm and cast iron to steel, and acrylic)
- drain fittings.


In addition to the preparation of the tools, do the following:
- Measure the parameters required to select a suitable model.
Important! If you plan not to install into an empty room, but replacing the old design indoor with finished repairs, consider the possibility of a neat block of bowls inside, especially if the area is small.
- Check the flatness of the floor surface.
- If the floor is not covered - perform a cement screed, for example, a self-leveling mixture of Ceresit.
Important! Getting Started with a bathroom in the bathroom only on a flat surface to provide it with the necessary stability.
- Prepare water supply and sewage plums.
- Check the pipelines for clogging, eliminate wear of plumbing parts.
Important! When installing a plastic bath, cladding with tiles or other selected material is performed both before and after the process is completed, when installing pig-iron - decorating walls and floor, follow after all installation work.


Bowl and fastening of the bowl
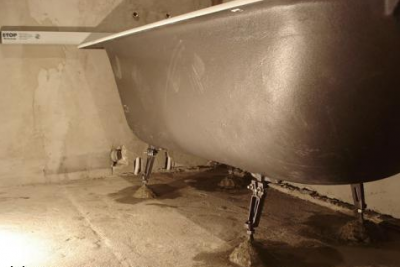
Installation of cast-iron bath
Not only the fitting of the bathroom, but also its skid has its own technology:
- Expand the bath horizontally.
Important! Considering the severity of the bowl, to fulfill work, enlist your help at least 1 person.
- Slide hole immediately deploy in the desired direction.
- Enter the toilet room and put the outside of the bottom to the wall at a distance of approximately 70 cm from it.

- Attach two support racks with bolts at the top.
Important! Most often a bath on legs is installed, although there are several more ways. One of them is to install a bathroom on bricks. If they decided to perform their bricks, create a pre-two block of the desired height on the alleged edges of the bowl with a small indent.
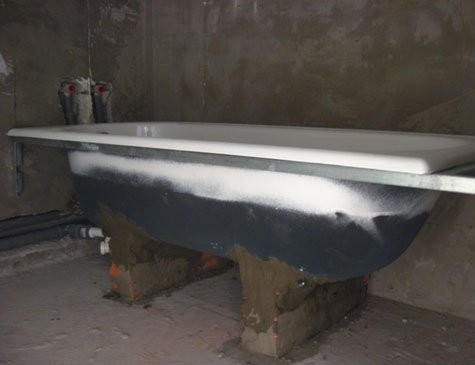
- Turn over the other side.
- Attach the legs in the opposite side.
Important! When tightening the bolts, be careful not to drag and do not break the mechanism. Otherwise, the mount will be fragile and constantly breaking out. In this case, the bath will be unstable.
- Install the bowl on the supports.
- Adjust its position by tightening the screws on the legs in the right direction.

Important! To prevent stagnation of water in the bathroom, make a small bias toward the drain, but not more than 3-5 degrees.
- Check the horizontal side level.

- Check stability, it should not be fused.
Important! Use special rubber or plastic linings if the surface of the racks is smooth, slippery, or secure their position by polymer glue or cement.
- View cast-iron bath mounting video.


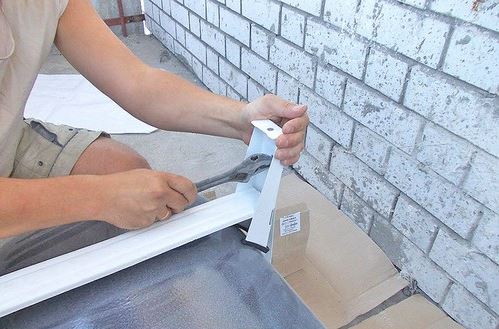
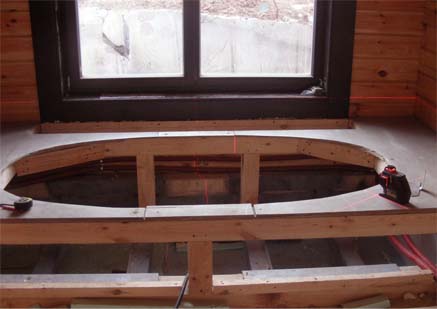
Installation of acrylic bath on factory frame
Mounting technology of plastic bowl differs from cast-iron. To install it, you must need a framework for which the whole severity will have to have.

When buying, pick up an additional configuration for installation:
- Details for fastening bowls baths to the wall
- Fasteners for mounting the panel to the bath
- Set for connecting the drain hole with sewage
- Decorative panels
- Frame.
In this case, the entire installation process will be fast enough and easy.

Consider carefully the installation of the bath and the frame assembly applied to the instructions.

Instructions for installing a bath with a finished frame:
- Measure the height of the drain hole of the sewage.
- Check that it coincides with the bowl height.
- Make on the wall markup mounting panels for the frame.
- Secure on all adjacent to the wall to the parties.
Important! Considering the ease of the bath, it is desirable that support accounted for three sides.
- Install frame-frame.
- Enter the bath horizontally with the right plum direction.
- Screw alternate support.
- Install the bath on the frame.
- Align the horizontal line by level.

Important! Remove the protective film only after the end of all installation and facing works.
- Watch a video on the frame assembly for acrylic baths.


Installation of plastic bath on a frame created by your own hands
The technology of self-creating a frame will require more time, effort and consumables. It is used in the absence of factory parts, as well as if the specified plum height does not match the altitude of the bowl.

Important! Installation of the steel bath occurs in the same principle.
Prepare in advance:
- wooden bars
- olif or antiseptic solution for wood
- waterproof plywood sheets, not less than 15 mm thick
- self-tapping screws and concrete
- adhesive mix
- fastening corners.
Perform work, sticking to the following scheme:
- Make the markup of the place where you plan to install.

- Treat with a protective solution before starting all the parts of the tree.
- Wait for drying.
- Stay around the perimeter of the frame base board.
- Secure them with self-assemblies to the floor.
- Cut racks.
Important! The length of the racks must correspond to the height of the installation of the bath, taking into account the thickness of the bars of the bottom and the upper crossbar, plywood thickness and sufficient distance to accommodate the drain system.
- Secure yourself with self-taps and corners to the base of the frame in the corners and every 50 cm of length.
- Check the level of horizontal line at the height of all racks.
- Mock the upper horizontal line of the frame at the top of the racks.
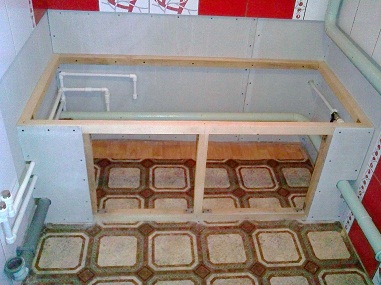
- Firmly secure self-stakes.
- Put the plafhone on the finished frame of the plywood sheet corresponding to the size.
- Slide the Phaneur inside the size of the bath.
- Install the bath in the finished frame.


Connecting plumbing

Call the following recommendations in the installation process in the bathroom:
- When installing the system of the drain hole, be sure to first read the scheme.

- Install all parts in a clear sequence of instructions.
- Check at the end of the installation of pipes in the bathroom and all other components of the connection with the bathroom. No leaks in the joints of the joints.
- Tighten the attachments or disassemble and re-place the place of the junction, repaid the gasket.


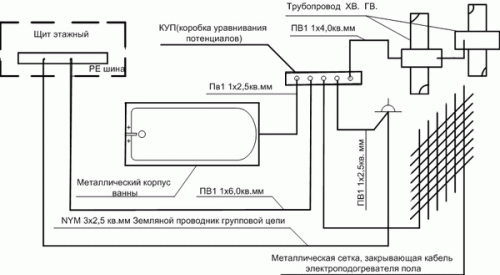
Grounding
This process is required when installing a bath of steel and cast iron.

Grounding is better to trust a specialist, but if you decided to do all the work with your own hands, then consider the nuances of technology:
- Be sure to pull the wiring from the shield, and not from the outlet.
- Use for this wire, 4 mm thick, preferably with additional insulation.
- Do not lay the cable on the floor and in the places of possible leaks of water.
- Consider the scheme of possible grounding.

Sealing seams when installing the bathroom
All the seams, joints of the drain system and the gaps in the places of contact of the bowl and walls at the end of all installation works thoroughly close. For clearance, use the cement mixture if the joints with the bathroom sides are insignificant, or silicone sealant, which is perfectly suitable for sealing the seams of the drain system.

In the case when the gaps between the wall and side of the bowl of more than 5 cm:
- Fill them in their mounting foam.
- Wait for drying.
- Gently cut down with a knife.
- Enclose silicone strips of the appropriate width over foam.
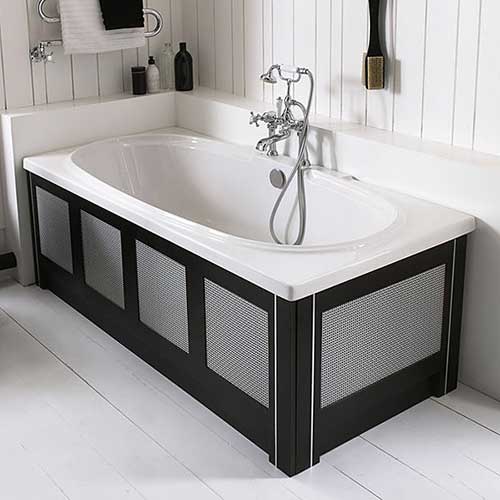

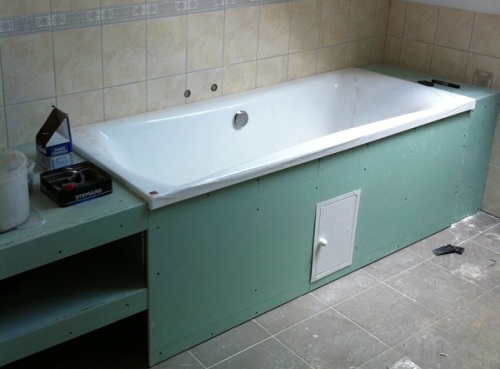
Installing the screen under the bath
In order to give an attractive and finished type of design of the bathroom with an excellent solution will be to install the screen. The simplest is the installation of the finished set.

But to perform cutting parts quite under the power itself, only picking up the material to your liking and a more suitable scheme.
Most popular options for screen design:
- brick

- plasterton
- plastic
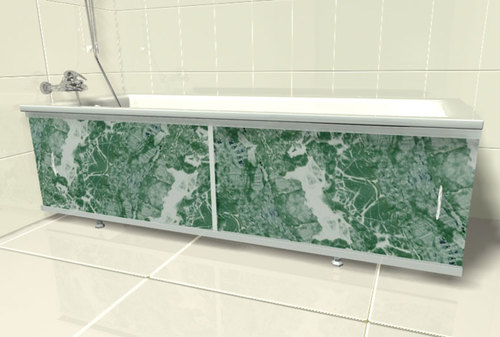
- moisture-resistant chipboard or plywood.


When forming it, follow the following recommendations:
- Exclude the load on the screen.
- Gently and tightly place the opening.
- Separate the floor under the bathroom from the rest of the floor of the room to eliminate the flow of water.
- Leave access to the drain system and other plumbing systems passing under the bathroom using a small door setting.
- Carefully measure all the details, observing the accuracy of the parameters
- Fastening Machine to a pre-created frame or special panels.
- When making a screen from chipboard, plywood or plastic. Slide the vent hole in 2 * 5 cm or 2 * 10 cm as well as the opposite technical opening.

Facing
Facing the walls - the final stage of the decorative design of the bathroom. Make it only after a reliable fastening of the bath and other plumbing items. Regardless of the selected facing material, be sure to save free access to the pipes and junctions of the joints.

Bathroom repair
In order to repair the surface of the bathtop wear or losing the attractiveness and smoothness, it is not necessary to change the bowl for a new one. An excellent alternative will be * installing inserts in the bath *.

Most often they are made of acrylic, which makes the process less laborious due to the ease of material.

Installing the acrylic liner in the bath will quickly return to it with a proper look without excessive effort.

Perform all work in the following sequence:
- Measure the bath and select the model of the respective parameters.

- Clean the entire surface of the old thicket of fine-grained emery paper.

Important! From how carefully this process is made, the degree of adhesion depends between the surface of the old bathroom and the new liner.
- Wash the bath, remove all the garbage and dust.
- Wait for the surface drying.
- Remove the plum siphon.
- Install the insert inside the bath.
- Mark the marker an extra protrusion on board the bowl and place of drain holes, overflow.
Important! Circle of plum and overflow, for example, using a siphon removed.
- Cut everything too much clearly along the lines.

- Apply to the inner surface of the bath sealant on sides and foam throughout the rest of the area.

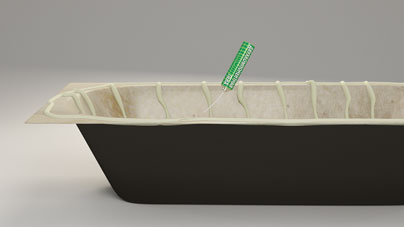
- Insert the liner.

- Press it tight on all sides.
- On sides for the maximum dense clutch, press the clamps by putting the wooden bars under them.
- Immediately install the siphon.
- Close the drain hole with a plug.
- Pour the water in the bath just below the overflowing hole.

Important! Water will become the necessary cargo, and over the entire area of \u200b\u200bthe bowl, without empty intervals.
- Leave in this position for a day.
- Drain the water and start exploiting the bathroom in normal mode.

- View video on the installation of the bath in the bath.


Conclusion
As you have already seen, the entire installation process is not particularly difficult. The main thing is to be consistent, perform all the work gently and carefully. The result of the correct installation of the bathroom is convenience and comfort during water procedures over the years.


Tell me which pipe is here http://stroi-avf.ru/catalog/ Select for sewage.