Walls occupy most of the room and always draw attention. Therefore, their finishing is very important for any room. One of the options for finishing them is pasting walls with vinyl wallpaper.
Content
- Views and features of vinyl wallpaper
- How to paint material
- Preparation of walls for vinyl wallpaper
- How to cook glue
- Casting walls
- Several useful tips
- Wallpaper sticking in the corners of the room
- Glowing near doors
- Glowing around window openings
- Punning wallpaper for radiators
- Plotchka Wallpaper at Plinth and Ceiling
- Stowing the wallpaper on the ceiling
- Bordeur sticking
- Wallpaper sticking near switches and sockets
The history of vinyl wallpaper begins with the middle of the last century. It was then that one American engineer opened the unique properties of polyvinyl chloride. Later another resident of America tried to apply this substance on paper. So the vinyl wallpaper appeared on the light, and later vinyl stickers on the walls. Today it is a very popular finishing material. Therefore, the question is how to glue vinyl wallpaper occurs quite often.
Views and features of vinyl wallpaper
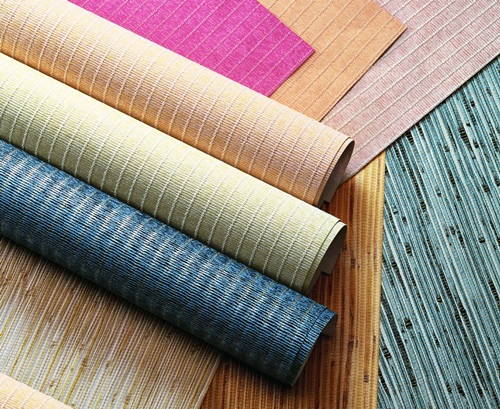
Today there are two options for such wallpapers - these are paper and phliselin. These options differ only in their basis. These varieties of wallpaper have both advantages and disadvantages.
Vinyl wallpaper on a flieslinic basis
Advantages:
- Dense structure, allowing to hide small irregularities and wall defects.
- Versatility. It can be used in almost any rooms and on any types of surface (putty, concrete, wood, plaster, etc.).
- Do not be afraid of shrinkage at home, so they can be saved by the walls even in new buildings.
- Easy to use. Easy pasted.
- Shoot on horizontal and vertical surface. Suitable for both the ceiling and walls.
- There are various textures, due to which, you can choose the appropriate option exclusively for the desired room.
- It is possible to stick and under the painting of the walls.
Disadvantages:
- For their smoothing requires a special rubber trunks.
- Have airtightness, as rather dense.
- Have a fairly high price.
Vinyl wallpaper on paper basis
Advantages:
- Have a low price.
- Possess breathability.
- There are several varieties (relief, smooth, heat-grinding), thanks to which you can choose the appropriate option.
- Pretty durable.
Disadvantages:
- It is not suitable for all types of premises (you can not stick in the bathroom and kitchen). May be deformed with high humidity.
- The process of salary is quite laborious.
For the production of vinyl wallpaper today used foamed polyvinyl. This material is quite dense and a different texture can be attached. Thanks to the last quality, vinyl wallpaper can hide various small wall defects. In addition, this allows not to apply the finishing putty layer during preparatory work.
On the packaging of any vinyl wallpaper, icons displaying certain characteristics should be applied. It is for them first to pay attention to the selection of this finishing material. One of the important characteristics of vinyl wallpaper is a glue carrying. So, there are types of wallpaper, where glue is applied directly to wallpaper or wall. There are even those where the glue has already been applied at the factory.
In addition, when choosing vinyl wallpaper, you should pay attention to which category of humidity of the room is designed material. There are five such categories in total.
- The first category is waterproof during operation.
- The second category includes wallpapers that are stable with wet processing.
- The third is a highly resistant material with a wet processing.
- The fourth category is a material that is resistant to mechanical exposure.
- Finally, the fifth category of vinyl wallpaper includes highly resistant material to mechanical effects.
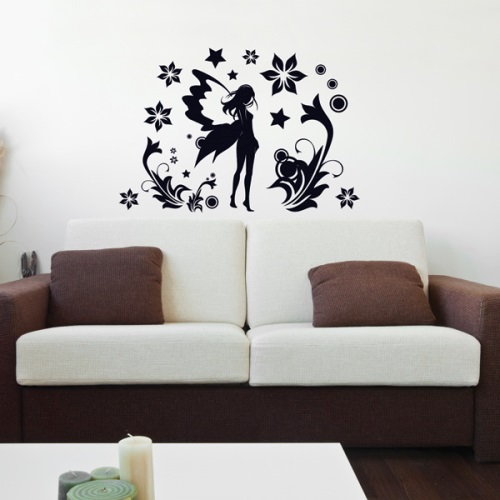
The same applies to the vinyl stickers on the walls. The photo represents one of these stickers.
How to paint material
Before painting wallpaper, you need to pay attention to the fact that the drawing on the purchased party is identical. In addition, there must be identical color and number of the party. It is easiest to build wallpapers that have no drawing. In this case, it will not be necessary to take into account the combination of the pattern. In any case, it is easier to scroll from the roll the desired length and carefully cut off. If you have chosen wallpaper with a pattern, you will have to go to each other. In this case, before cutting wallpaper, you need to combine images. If the figure is shifted, it should be closely monitored that on each next strip the pattern is shifted only by half. Therefore, strips through one should be the same. It is important that the cut from the roll will be overwhelmed each time in the same direction.
Preparation of walls for vinyl wallpaper
- If necessary, you should remove the old finish from the walls. It does not have to be wallpaper. This work can be done with your own hands. In order for old wallpaper to be easier to be easier, it is recommended to pre-moisten with warm water with a painting roller. They should get wet very well. Such material can be easily removed from the wall with a spatula.
- Water-emulsion paint can be applied as a wall on the wall. It can be removed using a wet sponge. If oil paint or enamel was used to finish, it is possible to remove it with a metal brush nozzle.
- When the old finish is removed, the work surface should be examined for the presence of defects. If they are detected, they can be seen by plaster or putty.
- When defects are mainly eliminated, then the wall should be projected using deep penetration primer, after which the treated surface should be given time to dry, and then it must be aligned with putty.
- Preparing the walls to the sticker of vinyl wallpaper, only one layer of putty is usually applied. When this layer is dry, it should be processed using sandpaper. Then the work surface is necessarily ground. As for primers, today the market offers a fairly large selection. For sticking vinyl wallpapers, special glue is recommended, but if not, it is allowed to use the usual, diluted with water and brought to a liquid state.
- If the wallpaper is planned to be pasted on smooth surfaces, for example, on plastic, they should be pre-sanded. According to the same scheme, if vinyl wall stickers are used. The tree of such processing does not require.
- When everything is ready for the wallpaper sticker, you should apply a strictly vertical line with a plumb to the work surface. It is from this line that it is necessary to start glue vinyl wallpaper for walls. The photo presented in the article clearly shows how to visually look the wallpaper covered correctly. To do this, install a plumb at the ceiling itself and read it with the help of a conventional pencil and line line. It is best to do it as close as possible to the corner of the room.
How to cook glue
For each type of wallpaper, its type of glue is often used. Usually the necessary type of glue is indicated on the wallpaper packaging.
After mixing the glue, you need to leave for a while so that it is Nabuch. As already mentioned, depending on the type of wallpaper, the glue can be applied both on the walls and on the wallpapers themselves. This is also worth considering when mixing the adhesive solution.
Casting walls
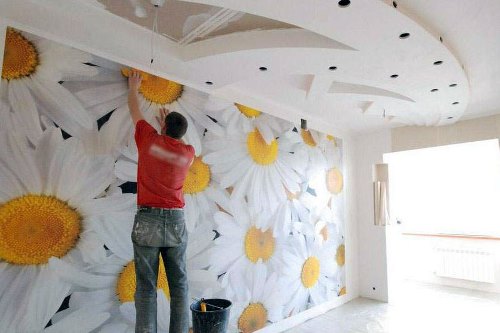
When all preparatory work is completed, you can start the main work, i.e. Casting walls with vinyl wallpaper. From other types of material, they differ in that they have a rather large width. Therefore, the jokes will be much smaller.
- The roll is cut into stripes, the length of which is equal to the height of the room plus five to ten centimeters for the allowance. It is advisable to cut several such bands at once so that they are enough for pasting the whole room.
- Before applying glue, pay attention to the label, which indicates where to apply it. So, if the icon says that the glue is applied to the wall, then the working surfaces should be sampled by means of a roller. In this case, the glue must be applied not immediately on the entire wall, but only on the site where the wallpaper strip will be glued. Then you should take this strip, climb with a stepladder to the ceiling and put it strictly along the line, which was applied before. For the remaining bands, the beacted part will be the glitched part.
- When the wallpaper was glued, you need to take a rubber roller, a plastic spatula and with a special thoroughness to align the surface so that there are no air bubbles on it. It is from the quality of this leveling that the overall quality of the stickers of vinyl wallpaper depends.
- The technology of pasting walls with vinyl wallpaper is as follows. Each strip must be pasted to each other joints in the junction. Sometimes vinyl wallpapers are glued with a marker with a size of 2-3 centimeters. When the second cloth is laid, it is necessary to make a strictly vertical section of exactly in the middle of the wallpapers, which are stacked on top of each other. After that, it is necessary to cut off the vertical cutting strip. Then remove the lower strip, which was under the second strip. Then you need to put the edges of the second strip. As a result, it turns out a smooth and almost imperceptible junction.
If the icon says that the glue needs to be applied to the wallpaper, then the rolls of the material should be deployed on the floor, cutting into stripes of the same length as in the previous version and rinse them with glue. This is the most convenient to do with roller. It is important that the glue is applied to the canvas evenly. When this is done, let the stripes lie down and impregnate with glue. The main thing is not to reap, and then the glue dries off and the material will be already unsuitable. Five minutes is usually enough. All other actions are the same as in the previous case.
While working you can use a clean rag. Therefore, you should prepare it in advance. With this cloth, you can remove the glue, which accidentally hit the front surface of the wallpaper. If you do not remove this glue, it will dry and stains will remain on the wallpaper, which will spoil the appearance of the room. Decorative vinyl stickers on the wall are usually glued like vinyl wallpaper.
Several useful tips
- For blowing vinyl wallpaper, the temperature regime in the room is important. Temperature should not exceed 23 degrees Celsius.
- In addition, in the room where the repair is planned, there should be no draft. Therefore, at the time of the wamp of the walls, vinyl wallpapers close all windows and doors.
- If you have little experience in sticking wallpapers, the first of your room should not be a living room. It is best to try to shove wallpaper on walls that cannot pay attention, for example, in the corridor or on the wall, which is closed with carpet or furniture.
- Before work, be sure to prepare all the necessary material and the tool. Everything should be at hand. When the glue is diluted, it is first necessary to pour water into the container, and only after that fall asleep dry mixture into it. Only in this order, and not somehow differently.
Wallpaper sticking in the corners of the room
Walking wallpapers in the corners do not really have to cause any difficulties. It is necessary to remember only about some nuances. So, in the place of docking of the two walls is not recommended to be bending the whole wallpaper canvas. In addition, the joint is not strongly noticeable, it is not recommended to combine in the corners of the room two whole wall-mounted cloths. It is best to kill one-piece strip of material with a flip of an angle about 3-5 centimeters.
Glowing near doors
In the area of \u200b\u200bthe door, it is recommended to produce wallpaper shots only on the one hand. Do not glue from two sides. The material of the material that captures the door frame must be fed from the bottom to the top door frame. After which it should be tightly pressing to the surface. All is excessive cut off. The next strip is already needed to be adjusted under the protrusion remaining above the window frame. After that, the surplus is removed. Colored vinyl stickers on the walls near doors is better not to glue.
Glowing around window openings
In this case, you will need a plumb. It is according to it that the wallpapers should be aligned in such a way that the canvas when sticking to one of the sides of the window opening with a small tolerance was imposed on the window frame. After the bands are pasted above the upper edge of the windows and at the level of the window sill, they are trimmed. The existing protrusion should be turned inside the window opening. The protrusions existing on the window frame on the windowsill must be cut off. After that, you should stick the wallpaper under the windowsill, as well as on the opposite side of the window and above it.
Punning wallpaper for radiators
Do not try to stick with wallpaper all the space behind the radiator. This is not advisable. It should be glued only at about twenty centimeters. You can press the wall of the band with a small roller, which is attached to a long handle. It is best not to shit this area at all, but only paint. At the same time, the paint should be one tone with wallpaper.
Plotchka Wallpaper at Plinth and Ceiling
To gently glue the wallpaper in these areas, you should use a ruler intended for cutting edges. This tool looks like a special triangular profile. It is with the help of it that it is best to cut the edges of the material, as well as its fit.
Stowing the wallpaper on the ceiling
Today, the wallpaper began to glue even on the surface of the ceiling. It turns out very beautiful and at the same time original. For sticking material on the ceiling, the very first canvas should be pasted on the previous markup. And you need to start from the window in the direction of the center of the room. This work is better not to perform alone. One person at the same time imposes a canvas of the ceiling wallpapers, and the second should maintain the remaining part of the strip from the ceiling. This can be done with the help of a conventional mop.
Bordeur sticking
If there is a relief on the surface of the wallpaper, then the border is preferably installed even before the wallpaper is glued. After that, in accordance with the finish, it is necessary to adjust the wallpapers. In this case, a special ruler will help to cut edges.
In the event that the surface of the material is smooth, the borders can be glued on top of the wallpaper cloves. To do this, it is best to make pre-marking first. The curb should be moistened from the back of the way with the help of water and leave for five minutes to get wet. Then it is necessary to apply the adhesive composition. After that, the decorating finish should be fixed in the right place. In the other case, the border glue is best used for sticking.
Wallpaper sticking near switches and sockets
This case has difficulties. In fact, everything is simple. So, first of all, you need to do so that there is no current in the outlet or switch, i.e. The room must be de-energized. After that, in places of wallpapers, switches and sockets should be removed. After that, the wallpaper is already pasted. Materials in this area are cut crosswise, the criss formed corners should be adjusted inwards. Then they are installed on its own sockets and switches.


