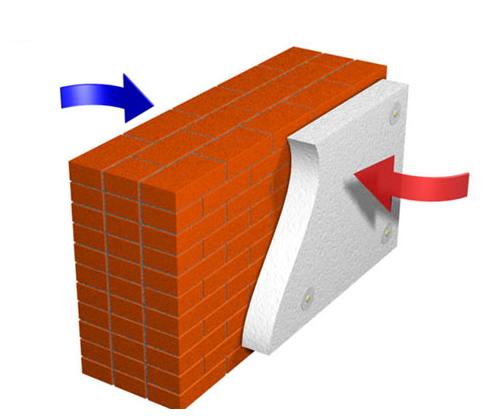
The insulation of the walls of the house from within the foam is a great method of heat insulation, which allows to maintain the optimal temperature indoors and save on heating.
Content
Polyfoam: unique properties
Polyfoam is a fairly lightweight building material that can be cutting and small deformation, which allows it to be used for insulation on any architectural forms.
Benefits of insulation of walls from the inside by foam
- Significantly increases noise insulation.
- Reduced heat loss.
- Easy mounted.
- The foam is not formed by fungus and other parasitizing organisms.
- Extends the operational period of the building.
- You can make installation with your own hands.
- It is an environmentally friendly building material.
- It has a wide color gamut and thickness.
- The cost of insulation of walls by foam is considered acceptable.
Disadvantages of insulation of foam from inside
- Polyfoam - combustible building materials.
- The area of \u200b\u200bthe room is reduced when the walls are insulated from the inside.
- The cost of color material is slightly higher than white.
Technology of insulation walls by foam
The insulation of the walls of the foam with its own hands includes a number of stages:
1. Initially, it is necessary to make sure the reliability of the supporting structure and, if necessary, take measures to eliminate defects.
Recommendations:
- the surface of the walls should be clean and not to have mechanical damage (voids, chips, cracks);
- the maximum difference in the level of the plane should not be higher than 0.5 cm
2. Next is the primer of the walls with the help of a special composition of deep penetration. It is possible to produce such a procedure to be mechanically either using a sprayer.
3. The next stage of work involves the installation of beacons. This is done so that the sheets of the insulation lay on the surface with a minimum deviation:
- we stretch the reinforcing cords from one angle of the wall to another with an indentation equal to the thickness of the foam and adhesive composition;
- in the future, on the established beacons will create a row of a series of insulation.
4. We prepare in a small container adhesive solution. The resulting mass should resemble a creamy consistency.
5. Installation work:
- equally applied to the surface of the insulation of the glue composition with a comb;
- exhibit the slab according to pre-prepared beacons;
- the second series of foam places with displacement relative to the first row;
- formed clearances more than 1 cm are insulated with mounting foam.
After installing each plate, experts recommend walking along it with a rubber roller, which will contribute to more reliable fixation.
6. In order to improve the reliability of the design, it is necessary to make mechanical fixation of the plates. In this case, special fasteners are used - fungi (umbrellas). Their length should be chosen based on the thickness of the foam. So, if a 3 cm plate with an adhesive layer is used in 1 m, then the length of the leg should be 8 cm:
- we create in places in the installation of umbrellas a deepening with a perforator;
- insert fungi in them;
- we bleed the locking elements to the complete contact of their caps with a sheet of foam;
- drive a nail into the hole.
Recommendations:
- it is advisable to use umbrellas with metal nails;
- each plate is fixed with five details;
- it is recommended to drown a fungus into a cavity of the foam by 1-2 mm.
7. Then follows the seams with the use of a special tool for foam.
8. Upon completion of the grout, the wall reinforcement is performed using a painting mesh:
- we apply to the surface of the plates of primer;
- we are waiting for her complete drying;
- we stick the mesh flashes (we use the same glue that when installing foam).
9. Putty wall.
After a few hours you can begin to putten the walls. If you are planning to use decorative plaster in the future, you can apply 1 layer of material if painting, then 2 layers. If necessary, perform the finishing wall finishing using secondary putty.
Features of the insulation of walls from the inside:
1. Sometimes experts recommend on top of foam plastic to install a vapor insulation layer. This is necessary if there is an increased humidity in the room (for example, a kitchen, bathroom).
In this case, it is necessary to leave a small ventilation gap between the plates and a vaporizolator, and the room itself is equipped with a forced ventilation system.
2. Today for the inner heat insulation of the walls produced a rolled foam. Its thickness is usually 5 mm. Building material is fixed on glue and makes it possible to create a putty surface, as well as immediately make a salable with wallpaper.
3. The modern modification of foam is the extrusion foamed polystyrene - Penoplex. Its main advantage is high strength indicators and low water treatment characteristics.
4. Since quite often the owners are limited to putty, the subsequent painting walls or labeling wallpaper, then specialists are recommended after the final layer of primer to install on the finished surface of the plasterboard. Thanks to him, you will create additional protection for foam, which may suffer during mechanical damage, and the wall is perfectly smooth.
Wall insulation with foam video:


