
Watching the facade walls is considered an integral part of the construction work. It is from this stage that the extraction of its own housing begins outside, which will continue to create an attractive picture of the appearance of the building that attracts the eyes of others.
Content
The coating of outer walls is performed at the stage of preparation of the base for the decorative coating, and also used as the main solution to decorate the surface. In order for you to quickly and competently fulfill this part of the work when arranging your own home, familiarize yourself with the following rules for choosing a suitable solution and plastering technology.
Benefits of plaster finish

In addition to creating a noble appearance in accordance with all modern trends, the outer plaster walls has a lot of advantages:
- serves as a barrier from the penetration of moisture, but at the same time passes the air inside the room;
- special components that are part of the plaster mixture contribute to increasing the level of noise and thermal insulation;
- the manifold of the texture of finishing, which makes it possible to give any structure to the top layer of the facade plaster;
- allows you to change the color and texture of the facing.

Important! Separately, we note that the outer plaster of the walls is quite acceptable due to the simplicity of technology and the absence of the need to purchase expensive equipment to perform the full amount of work.
Types of surface suitable for plaster
The quality and reliability of the plaster layer directly depends on the material of the surface of the facade, on which finishing works will be carried out.

Surfaces are suitable for plastering:
- stone;
- reinforced concrete plates;
- wood;
- monolithic concrete.

Important! Depending on the type of base, selected consumables and the estimated surface area will also be varied and the price of plaster outdoor walls.
Sequence of performance

The entire process of finishing the walls in this way is schematically divided into 4 consecutive stages:
- Choosing a suitable plaster solution.
- Preparation of a plastered surface.
- Correct mounting of lighthouses.
- Application layer plaster on the surface of the facade.

Important! Performing the plaster of external walls with their own hands, be sure to stick to this conditional sequence to organize themselves correctly and reduce the costs of time.
Types of solutions of facade plaster
The profile stores present a wide range of modern plaster materials, which are based on the composition, functional properties and the preferred method of applying.

To decide on the appropriate material for performing plaster outdoor walls of the house, read the most common types of compositions:
- Mineral plaster. This species is perhaps the most durable and cheap option due to the astringent composition, the basis of which is lime or cement. Mineral plaster is a dry mixture of binding material, fillers and various additives, which serve as a water-repellent barrier, and also prevent mold and fungus.
Important! The only drawback of such plaster is the limited color variations, which is easy to fix by applying a mixture of silicate paint and a special mineral coating.
- Acrylic plaster. Such a solution for plastering outdoor walls is sold already in the finished form. The main component of this type of mixture is an aqueous dispersion based on acrylic polymers, which has a unique ability to pass steam through itself. The walls of the room, which tend to miss evaporation, give an excess of moisture that penetrate them.
Important! The main advantages of acrylic plaster include resistance to sharp temperature differences and elasticity. Any contamination with an acrylic surface with ease is removed due to its low absorption.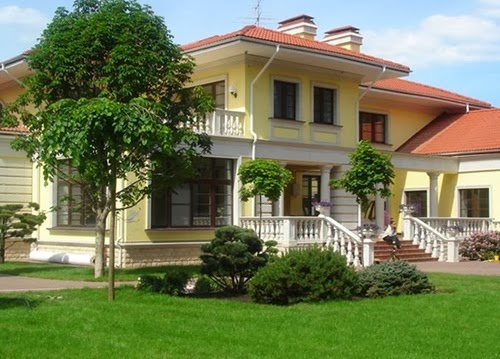
- Silicate plaster is known as a kind of mineral. The main binder component is the potassium liquid glass. Plastering mixture is sold in the finished condition. An important advantage of silicate plaster is distinguished by a parpropuscular function. This quality allows it to be used in those places that cannot be accepted with acrylic composition, for example, walls built from cellular concrete slabs.
Important! Separately, we note that the silicate outdoor plaster of the walls, the price of which is not very different from the main mineral species, is resistant to pollution and dust due to neutral electrostaticity. - Silicone plaster is considered the most expensive type of finishing based on polymer binding components. This material is inherent in the set of advantages, among which they allocate a high level of steam-resistant and elasticity. The silicone plaster layer is easy to give a unique appearance due to the possibility of painting it into different colors.


Rules for the preparation of the plastered surface
We are extremely serious to the preparation of the walls, since it is precisely from their state that the quality of all the plastered works carried out is directly dependent.

Preparatory work follow as follows:
- Disassembling the old plaster when using a perforator configured to shock or chisel and a hammer.
- After removing the old layer of finishing, clean the surface from pollution, dust and oily oil spots.
- If the walls are made of bricks, make the screening of the seams, that is, expand the joints and make recesses.
Important! In the process of performing work, this will allow the plaster is denser with the surface of the base. Sometimes brick laying is initially made with empty seams to significantly speed up the process of preparing the base under the plaster.
- Extended surface open the primer layer and wait for complete drying.
Important! In the case when the walls are made of foam blocks, the extension is not required, since the seams between the plates are located much less frequently than with a masonry. - If the walls are erected from reinforced concrete slabs, then such a surface is treated with primer deep penetration.
- Click on the base plaster grid with medium secting cells.
Important! If you have discovered on the surface of the wall of irregularities, cracks or tubercles, align them with a putty, otherwise it will have to impose quite thick layers of plaster, which will entail the overrun of the material and perhaps even its subsequent detachment in problem places.

Montage of Mayakov
Lighthouses for plaster are the guides of the metal structures, mounted into the walls in a certain sequence, passing by which the rule smoothes the plaster solution, giving the surface smoothness and evenness.

Even the most inexperienced builder will make it easy to make the most inexperienced builder if it is clearly followed by all the recommendations below:
- With the help of a plumb, determine the level of the vertical surface of the wall.
Important! If there were deviations from the level, then the beacons should be installed on a pre-applied larger layer of plastering solution in places of depression. - Squeeze the respective lighthouse size and cut down, adhering to standard sizes:
- length - 3-4 meters;
- 0.6-1 cm thick.
Important! Highly qualified builders recommend purchasing beacons with a greater thickness, as they are less flexible, but the layer of plastering in this case will also have to increase to 0.5 cm.
- Return 0.2-0.3 meters from the angle and squeeze along an even line of point marks, in advance prepared by the thick-concentrated plastering solution.
Important! The distance between the marks is approximately 50-60 cm. The diameter of the applied tag is about 10-15 cm.
- Cut the beacon to the labels and press it with the wall, having it into the solution.
- Using a level, configure beacons strictly vertically by pulling or pressing.
- Summaries of the solution on the lighthouse instantly read, and the places discovering over the level are neatly scattered with a spatula.
- After the solution slightly snacks and grabbing, the voids under the beam fill in the same solution.
Important! Comfortable for further leveling distance between beacons - 170-180 cm, but permissible and smaller. When determining the appropriate indicator, focus on the total surface area.
- If the wall length exceeds 2 meters, which is characteristic of the facade side, then between the angular mounted beacons, deliver the guides in the same way.
Important! So that the lighthouses have been strictly in the same plane, periodically, in the process of performing work, check the literature of the line. To do this, pull the lace between the extreme two lighthouses and check, protrudes or placing the average element.


Technology applying plaster

Elevate the process of applying plaster is divided into 3 consecutive stages:
- Splashing.
- Applying the main layer.
- Grout.
Important! Be sure to stick to all the following rules for each process to achieve the desired result.

Splashing
- Prepare a solution whose consistency resembles a discharge sour cream.
- Add a little PVA glue to the plaster mix - it will give a solution the best properties of adhesion.
- Using a small bucket, spray the solution on the plastered surface.
- Wait for complete drying.
Important! The more roughness forms a filtered layer of plaster, the better the next layer to clutch with the surface of the base.

Application of the main layer of plaster
- Solution sketch on the walls between beacons.
- Make sure that the thickness of the plaster layer does not exceed 5 cm.
- Put the tracking rule with a narrow side to beacons and shift it into different directions, gradually rising up.
Important! With the help of such manipulations, you crush the surplus of the solution and give the wall evenness of the lines.

Put
- With the help of a special grater of wood or foam plastic with spiral movements, wear the surface of the plaster.
Important! So you will smooth all the smallest irregularities and get the cracks. - Start moving from a small circle, gradually forming a big one.
Important! Circular streaming movements, moving from a large circle to small, lead to the stretch of plaster and formation of tubercles. - Lose 3-5 days until complete drying .


Plaster Outdoor Walls - Video
Browse the video example in which the entire process of plastering the facade of the house is sequentially shown.
Conclusion
The whole process of independent plastering of the facade walls is easily performed if you adhere to the above rules and recommendations. Only with this condition you will certainly achieve a positive result, the appearance of the facade will look adequately and efficiently, and the time to preserve its integrity will please you with a duration.


