Walking walls are considered an initial stage of refining their own housing from the inside. The beauty of the internal interior of the room depends on the quality of such works. Each homeowner wishes that the uniqueness of the inner space of his house creates a warm atmosphere and comfort. If you have decided to repair and update old walls, you will certainly have to restore the coating. To do this, it is necessary to remove the old plaster - in whole or in part, adhering to the established rules and recommendations for the performance of work. The following information will certainly help you with a quality restoration of old plaster, as well as prepare the walls for a new decorative facing.
Content
When is it necessary to remove the old plaster?
Update plaster Perform defects when detected. 
Depending on the nature of the deformations, all defects are schematically divided into two main groups:
- Technological - appear in the process of improper application of the solution on the surface of the wall and with the poor quality of the knead itself.
- Operational - arising during operation.
Important! Regardless of what exactly was the reason for the restoration of the coating, the dismantling of the old plaster is performed correctly and efficiently. 
Types of damage to plaster
The defects include:
- Cracks - appear on the walls if the consistency of the solution was pretty fat, that is, the composition was an excessive amount of binder. The formation of cracks is also explained by the fact that the components of the applied solution were poorly mixed or a rapid drying of the plaster layer occurred. As the prevention of the formation of cracks, it is recommended to diligently mix the plaster composition and strictly observe the dosing of the binder component. If shuttering in a hot summer period, then spend the walls periodically with water or close them with a wet cloth. This method will prevent the rapid drying of the applied layer and in the future the appearance of cracks.
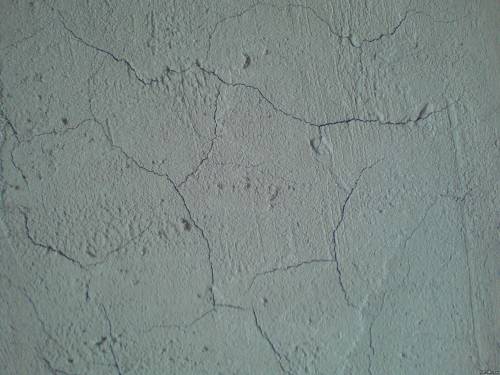
Important! Formed large-sized cracks, cut, carefully set up using a metal brush, weanly moisten with water and re-treat with a solution. Minor small cracks remove the chipper of the gypsum test with the additives of the chalk. - Dutiques - tubercles on the surface of the dried layer of plaster, appear due to the use of a lime plastering solution, which includes outstanding particles.
Important! To remove such a defect, it should be removed the layer of plaster with tubercles and apply a new one, pre-waiting for full-fledged lime quenching.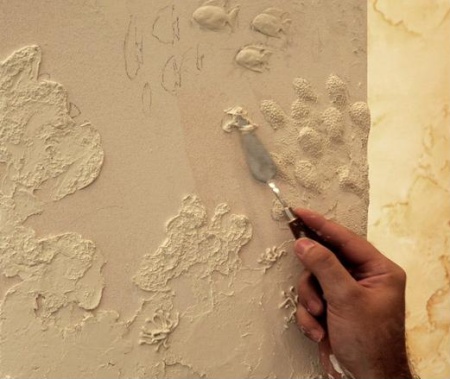
- Pumping - occurs when the moisture is re-published at the base. To eliminate the swelling, remove the layer of plaster or a damaged area completely, pre-dry the wall and boldly proceed to apply new.

- Slashing is a defect, which is the consequence of an excessively undergraded base or is formed when applying a solid solution to a weaker. The solution to this problem will be the removal of the deformed area of \u200b\u200bplaster and apply a new layer on a pre-moistened basis.

Important! Be sure to follow the applied solution to the base to be stronger than the subsequent layer.


Why still need to remove old plaster?
- Residential buildings, erected in the post-war period, almost all are lined with plaster inappropriate quality. Such a material does not contain cement, has low strength characteristics, peeling and hanging out. In this case, the option one is to completely remove the old plaster and replace it with a new one.
- If it is decided to reflect the wall with decorative stone or ceramic tiles, then initially make sure that the previous plaster is reliable. If its quality causes at least the slightest doubts, boldly proceed to her dismantling.

- In some buildings of the type "Stalinka", the composition of the plaster has a large number of cement, which could entail the formation of cracks. If such a cladding is firmly held on the basis, then the defects are permissible to close the plaster mortar.
- If during the operation you have detected the seepage of dampness, then such a facing must be removed, capturing the radius of about 0.5 m from the raw place.
- And parts of plaster on which fat stains appear, also remove and close up with a new solution.
Important! Browse the video in which it is shown how to remove the old plaster with a scraper and water.


How to determine the strength of plaster?
Before removing the old plaster, initially appreciate its condition and how hard it holds on the wall. To check this, apply such simple tools:
- scraper;
- putty knife.
Important! If the shrinking of plaster is observed only in some places, bringing the seal using the spalement or squeeze the mixture of fine sand. If you observe in the process of removing wallpaper or other decorative coating, that plaster based on lime or cement disappears, then correct this situation with a full replacement of plastering cladding.

To make sure the strength of the plaster layer on the walls, ceilings and slopes, catchy completely all surfaces with a rubber hammer - where you hear empty sound, feel free to remove the facing. 
Materials and tools for installation work
To dismantle the old plaster, you will certainly need a certain set of tools:
- construction gloves;
- axe;
- respiratory protective mask;
- tightly adjacent glasses to protect the eyes;
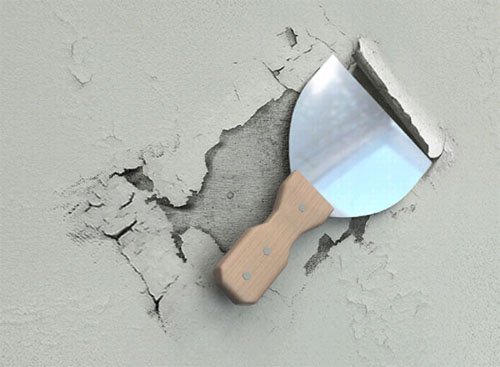
- putty knife;
- hammer or kirk;
- chisel with an elongated handle;
- manual metal brush;
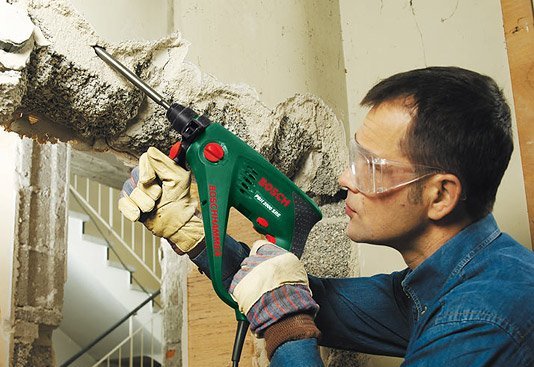
- perforator with an SDS nozzle;
- scoop, broom or broom;
- bags for construction garbage;
- wide brush and bucket or garden sprayer.
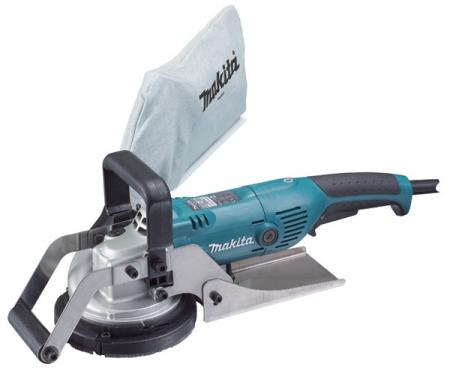
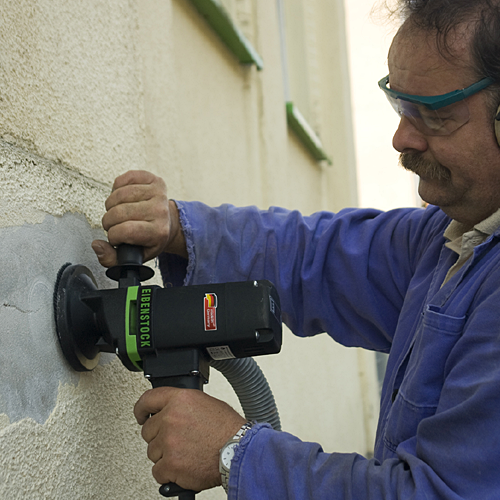
Important! Significantly simplifies the work. The presence of an electrical encryption machine - ESM, LSHM, PSHM or special fixture to remove plaster, such as Flex, AGP. When choosing a suitable tool, focus on such criteria:- the thickness of the removable layer;
- type of plaster;
- requirements for the purity of the processing of the base.


Precautionary measures
In order to dismantle the plaster, do not harm your health, be sure to follow the following recommendations:
- Wear a gauze bandage or a respirator to prevent building dust in the respiratory tract.
- Before carrying out work, put on building gloves and safety glasses.
- Determine the location of the electrical outlets, and if necessary, turn off the power supply.


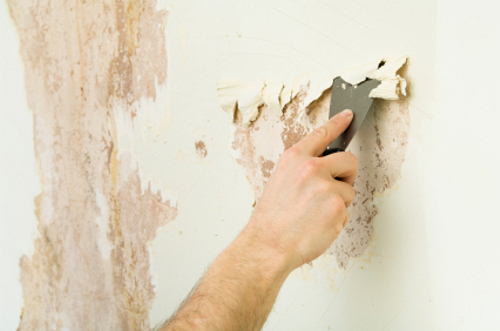
How to remove old plaster?
Removing the old plaster - the process is not complicated performed if the rules followed below:
- Carefully moisten the hot water dismantled surfaces.
Important! Such an action you reduce the amount of dust and soften the old plaster. Perform such a procedure with some periodicity during operation so that the walls are constantly wet.
- Strongly catch up with a hammer or sledge hammer the entire surface of the wall or ceiling for the presence of weak points.
Important! Where the plaster holds badly, it will fall off on their own. - After you bring the plot of plaster with the help of a chisel and a hammer, carefully uphold and remove the subsequent layers of plaster.
Important! Removing the plaster from the walls in the direction from the ceiling to the bottom.
- If the plaster is tightly removed, use the perforator in the "shock" mode.
- In case the cladding does not want to move away at all from the walls, apply the bracket with a disc on concrete.
- Cut the surface on the sector and remove them alternately.

Important! The smaller the sector is, the easier it is to remove the plaster. - Carefully clean the base with a spatula, taking into account the seams and joints in blocks and bricks.
Important! From the quality of stripping will depend on the quality of setting the new cladding with the surface of the wall or ceiling.
- After the main stripping, pass through the wall with a metal brush to remove small elements of the old plaster.
Important! To simplify the task, use a grinder or perforator with a brush-nozzle.
- Collect all the construction trash in building bags and dispose of.
- Wash the wall to remove the construction dust from the surface.
Important! For this work, use a metal brush and hot water.


Video
Review the video, which shows the process of removing the old plaster with the perforator.
Conclusion
Perform my own dismantling of old plaster is quite easily independently, without the involvement of specialists, besides, for a very short time. Under the observance of the above rules, the work you spent necessarily justify the expected result, and you can complete all restoration work in a clearly meaningful period.


