The veranda is the perfect place of family and friendly pastime. In the summer, it becomes a favorite part of the house and an excellent opportunity to enjoy fresh air. However, with the onset of winter, Idilly stops. But the situation is corrected - it is enough to insulate it. In this case, competent isolation is capable not only to maintain comfort, but to protect the corners of the structure from the occurrence of ferrous spots formed under the action of low temperatures.
Content
Types of materials for insulation veranda
Today the range of thermal insulation building materials is quite large, so the choice always remains for you. However, there are samples on the market, which have proven themselves in the best possible way. It is necessary to give preference that.
Development leaders intended for thermal insulation:
- Styrofoam;
- glass gaming;
- penophol.
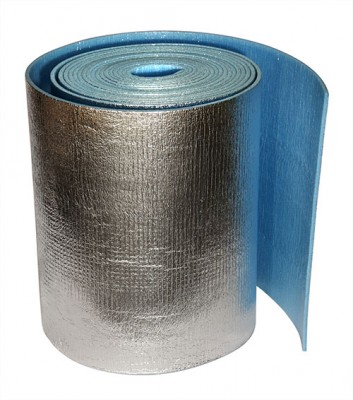
The first two options are the most profitable method to insulate the terrace. And to improve the effect, a foam pad is used. Its metallized sheets are capable of reflecting street cold air and do not give the opportunity to proceed with precious warmth. Penofol is an innovative thermal insulator, which consists of a foamed polyethylene coated with aluminum foil. This material can be used both in jointly with other thermal insulators and independently. Of course, the first option will be more efficient, as it allows the most advantage of the advantages of protective raw materials.
Warming wooden veranda
Materials and tools that may need:
- putty knife;
- brushes;
- dye;
- Malyary Scotch;
- roulette;
- pencil;
- Hoven for metal;
- scissors;
- nodzemer;
- hammer;
- nails;
- Polyfoam (thickness from 10 cm);
- Heater (polystyrene foam, mineral wool, foam, etc.).
Heat insulation floor
Before starting the insulation of the wooden veranda, experts recommend initially protecting the floor:
- First, the seams should be copied between the boards;
- then paint them and beaten from the bottom side of the foam;
- Inside the floor can be isolated with a linoleum with a base of polypropylene or carpet on felt.
The most difficult, but the most reliable method is considered the structure of the second floor. It is used in the form of a draft variant, followed by masonry thermal insulation and finishing flooring.
Wall insulation
The insulation of the veranda with their own hands implies a complete replacement of wall sheaving:
- Initially, it is necessary to remove the boards using a naughty (the more careful you do it, the easier it will be to mount new);
- Further on the wooden brackets the insulation is attached, having a foil layer (up to 1-1.5 cm thick);
- Then the walls are separated from the top of the MDF panels.
If the walls are brick veranda, then you first need to make a crate of wooden transverse bars with a cross section of 2.5x4.0 cm. In this case, the thermal insulator should be thicker - 250-300 mm. It should be cut into stripes and put between bars without gaps.
Another popular method is the following:
- after detailed measurement of the territory, it is necessary to cut into pieces of foam;
- from above and below there are several centimeters for bend;
- the walls are covered with this material, and the edges are fixed with scotch;
- over the foam is superimposed on top of the foam (the panels must fit tightly to each other. In hard-to-reach and narrow places, it is possible to use pieces of non-standard sizes, which are cut by knife for metal);
- next, the cover is nailed, which is subsequently painted.
Heat ceiling
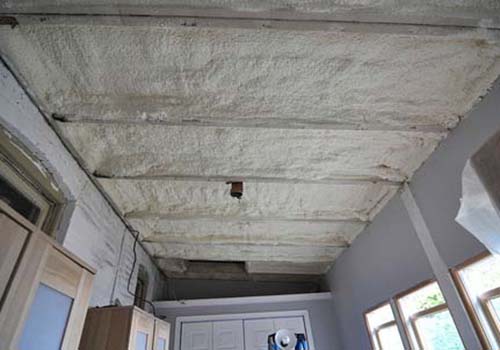
An important stage with the insulation of the veranda insulation with their own hands is the insulation of the ceiling:
- a hydrobrier is installed on it;
- the surface is then shedding 2.7x2.7 cm with bars (leaving the gap between them more than 0.8 mm should not be);
- the hydrobrier is mounted horizontally;
- seams are fixed with metallic scotch;
- the bars of the trim are installed vertically;
- between them are inserted sheets of polystyrene foams, fixed by dowels;
- the heat transferserler on top is mounted (it is initially fixed by the stapler, and later it is pressed by block mobile);
- installation of blockhause is carried out by concentric rows to create a smooth surface.
If desired, the block key can be replaced with OSB or clapboard.
Warming up the summer veranda with their own hands
If your veranda has an extension type - this does not mean that it is impossible to heat insulating it. If there is a roof or canopy, it is quite real.
Progress:
1. Start the insulation of the veranda follows from the floor:
- around the perimeter, powerful stone or concrete, the veranda is not created a very large fence of bricks or building blocks;
- next, the floor is covered in two layers in rubberoid (creating steam and waterproofing);
- the insulation is mounted on top (for less than 10 cm thick);
- then the membrane of a vapor insulation and finishing coating.
2. The next stage is double-glazed windows that are bred under the roof.
The roof is cut by layers:
- waterproofing film on rafters;
- insulation;
- vaporizolytor;
- decorative coating.
If your terrace has wooden floors, it is insulated a little differently:
- first, open the floors;
- between lags, lay waterproofing and insulation;
- the perimeter is mounted a brusade fence that is used in the form of a framework for double-glazed windows.
Warming a veranda outside
If you have finished repair work so long ago and starting these events do not really want, you can warm the terrace outside. This will create an excellent opportunity to improve the facade of the building and give the construction a modern appearance.
Stages of work:
- Originally vertically or horizontally on the walls is mounted;
- The gaps between the guides are filled with moisture insulating material and insulation;
- Then the facing is fixed.
Recommendations when warming up a bundled veranda
Creating insulation of the foam veranda, be sure to follow the safety technique, use a good tool and personal protective equipment. During the work with the mounting foam, it is good to ventilate the room.

