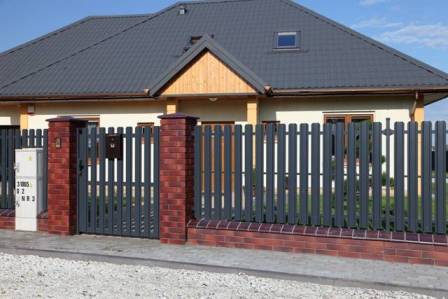
For the fence of the household site or other territory there are many ways. The most simple, cheap and aesthetically attractive is a fence from the stakeholder.
Content
Benefits of the fence from the stake
- The variety of material used for the construction of the stakenice: they are wooden, metal, plastic.
- Aesthetic attractiveness: Beautiful fences from the stakenice are well combined with the landscape of the household territory. They can be of different heights, with different width of the lumen, painted in any color.
- Installing the fence from the stakenice is possible in combination with elements of stone, concrete or brick.
- Such a fence has a long service life and is a reliable obstacle to unauthorized penetration into the territory.
- Installation such a fence is technically not difficult.
- Caring for the stakenant is simple: to maintain it in proper condition, it is enough to periodically paint the wooden and metal parts of the fence.
For those who are important to know how to install a fence from a stakenice with your own hands, the following information will be useful.
Selecting a stakeholder for fence
The stakenik is wooden, made of their profiled metal sheet and plastic. When purchasing or ordering a stakenice, the purpose of the fence should be taken into account. Fences of this type differ:
- According to the material from which they are made;
- in color, height and width of staketing;
- in the form of the vertex;
- on the variety and type of wood (for wooden);
- According to strength characteristics.
Installation of wooden stakenika
The fence from the wooden stake is the most common. It is explained by this cheap, availability of material and convenience of mounting. Work is performed using a conventional manual tool, you will need ax, hammer, wood-hacksaw, electric lobby, chisel, roulette, shovel, construction level, disk saw, drill, sandpaper. We also need nails and screws. Phased the entire process of installing such a fence can be described as follows.
- The territory along the installation line of the fence must be cleaned from garbage, trees and shrubs and, if possible, align.
- The workpiece required for the work of materials. We will need a bars of wood or metal pipes for support columns, as well as rails for the very stakeholder. And bars, and a stake for the fence can be purchased in a construction store or order in a joinery workshop. The last option is preferable: it is possible to select the shape of the top of the boards. It can be a dome (rounded vertex), tulip (resembles a trident) and an arrow (pointed end). The breed of wood does not matter much, since after mounting the fence is painted.
- Metal support columns before entering into the ground are processed by an anti-corrosion composition. In the case of the use of wooden columns, it is necessary to protect against posting, which can be done in two ways. The first implies the burning of the bottom of the supports in the fire to the state of char harness. The second is based on the processing of wood by antiseptic means.
- After performing the markup with the help of a cord, pegs are rush in places of installation of support columns.
- In the marked places (the distance between them should not exceed 3 m) moate or the pits of a depth of about 0.7 m at the bottom of which is a sand pillow with a thickness of 0.1 m and gravel beats are performed.
- After installing wooden supports and orientation of them in terms of level, it is filled with broken bricks to half. After adding clay for the water shutter device, the trimmer is performed. It is necessary to protect wood from close contact with wet soil. Metal poles are strengthened by simple concrete.
- The relief support is performed using 6-meter wooden run. In the wooden columns, the grooves are cut into two places, and special plates with holes for fastening are welded to metallic.
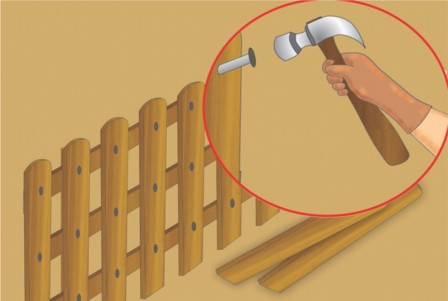
- Standing boards Staketin with decorated tops are fixed to leaving nails or self-drawing. Set the boards should be at one level and at some distance from the Earth (the latter - to prevent wetting from rain and snow).
- The distance between the boards should be strictly the same.
- Staketins are aligned, after which they are cleaned with sandpaper and painted.
Metal Stakenice Fence
An alternative wooden fence is a metal stakenik for fences. It is durable and can be applied:
- to protect the territory of the industrial enterprise;
- for the fence of the household territory;
- as fences for giving from the stakeholder;
- in public places (squares, parks, etc.).
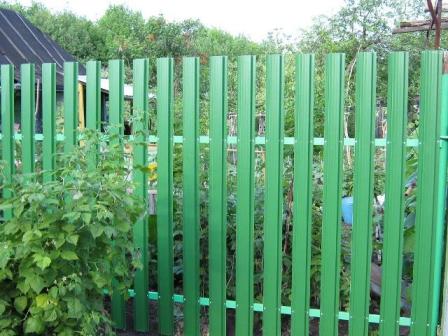
The advantage of such fences is their lower cost compared to forged and sectional. Installation of a metal stakenice can be performed on stone columns, concrete or brick. A set of tools used, besides those that are needed for the installation of a wooden stakenist, expands: a welding machine and a scab with disk for metal are needed. In addition to the odds themselves, metal corners or profiles are needed: they are used as a run. For supports, columns made of metal pipes are usually used.
Such a fence can be used to distinguish between related territories. Protective functions are understated due to the low thickness of metal sheets and insufficient mechanical strength. The advantage of such a fence is a long service life and ease of installation.
The stakenik from the corrugated floor is well combined with a landscape of a nice or cottage plot. It is important to choose the right color of the elements of the fence and shape.
Plastic stakenik
This type of fence is becoming increasingly popular. It is used for the decorative fence of flower beds, flower beds, lawns and barisades near the cottages. Plastic stakenik looks good next to garden bears and park sculptures.
Useful advice
Before planning the installation of fences from the stakenik, you should familiarize yourself with the following advice:
- The shape of the tops of low, decorative stakenists should not be chosen sharp: it will help to avoid injuries;
- The distance from Staketin to Earth should not be less than 150 mm;
- High grass near the fence should be cut;
- The paint layer of a wooden stakenice must be updated every three years;
- Before staining, the cracks of the boards are required to sharpen and clean the sandpaper;
- Loops wickets must be lubricated.
Finally, we propose to view a training video.


