In the process of carrying out repair work in the bathroom, questions arise related to seams. In particular, how to close the junction between the bathroom and the wall.
Content
- Causes of joints between the bathroom and the wall
- Close up the junction between the bathroom and the edge of the wall. The need for work
- Close up the junction between the bathroom and the edge of the wall with cement mortar
- Close up of the junction between the bathroom and the edge of the wall by mounting foam
- Close up the junction between the bathroom and the edge of the wall with silicone sealant
- Close up the junction between the bathroom and the edge of the wall with plastic plinth
- Close up the junction between the bathroom and the edge of the wall border ribbon
- Close up the junction between the bathroom and the edge of the wall with ceramic tiles
- Useful advice
- Video about how to seal joints in the bathroom
Causes of joints between the bathroom and the wall
In the bathroom, the walls should come into contact with each other and with a floor at an angle of 90º. Otherwise, the presence of a poor-quality junction is guaranteed. Uneven walls are the main cause of the occurrence of gaps between the inhibited elements of the room.
In addition, the reasons for the appearance of the gap are:
- incorrect installation of the bath;
- discrepancy between the bath size of the room;
- uneven floor.
Close up the junction between the bathroom and the edge of the wall. The need for work
Any seam in the bathroom or bathroom should be acted with increased tightness. This directly applies to the junction between the bathroom (shower) and the wall. Water should not fall into it, as it is fraught with:
- high humidity in the room;
- the emergence of chronic dampness;
- the presence of fungi and mold.
An excess of a wet environment leads to the fact that building materials (waterproofing, insulation, finish coating) are moat. Their technical characteristics deteriorate. The tile becomes porous and fragile, and the wooden elements - swell and deform. Some materials are covered by cracks.
Water is capable of penetrating any crack. And it will not always help natural evaporation. This fact becomes the cause of even the solid coating. As a result of the penetration of moisture under the bathroom, mold appears, the corners and joints become black.
In addition to low-attractive appearance, such seams are harmful to children, allergic and sensitive people. In this regard, high-quality sealing of joints in the bathroom is an integral attribute of a healthy lifestyle.
There are several embodiments of junction using such materials:
- cement mortar;
- mounting foam;
- silicone sealant;
- plastic plinth;
- border tape;
- ceramic tile.
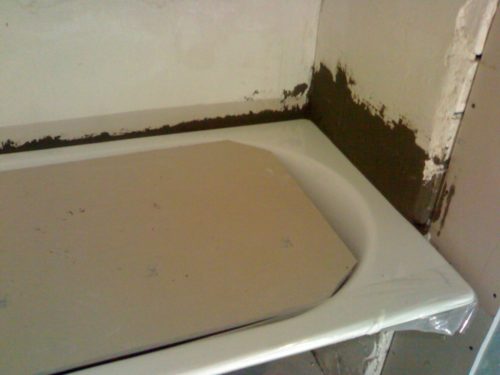
Close up the junction between the bathroom and the edge of the wall with cement mortar
It is a versatile material. Despite the reliability, the use of concrete will not be able to improve the appearance of the joint. For this reason, after completion of work with a cement solution of seam, it is necessary to close with a more beautiful material.
Stages of work:
- cleaning the junction is cleaned of dirt and old coating;
- preparation of the solution;
- filling seam concrete;
- decorative interface (plastic panels, border from tile or tape, paint).
And what to close the junctions between the bathroom and the wall in the presence of too broad clearance? In this case, first rags are stacked in it, which are soaked with concrete. After drying, the seam cloth is moisturized and gradually filled with cement mortar.
Alternative concrete option - Application of grouts for a tile. After rubbing in the seam and drying, the surface is grinding sandpaper and covered paint.
Close up of the junction between the bathroom and the edge of the wall by mounting foam
The main advantage of this material is a shorter sealing deadlines. The only requirement - the seam should be dry.
Stages of work:
- the junction is cleared of dust and garbage;
- the cylinder shakes several times;
- the installation foam is neatly filled with seam;
- for 3-4 hours, the foam dries;
- excess foam is cut into a sharp knife;
- seam is covered with facing material.
For the bathroom it is recommended to use moisture-resistant mounting foam. Qualitative material contains such information on the cylinder.
It is necessary to consider that the mounting foam has an extension property (6-10 times). Foaming the foam clearance is carried out in gloves, since it is difficult to clean hands. For the same reason, when performing work, make sure that the material does not enter the bath and walls.
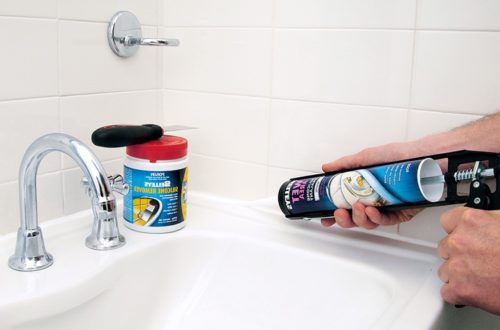
Close up the junction between the bathroom and the edge of the wall with silicone sealant
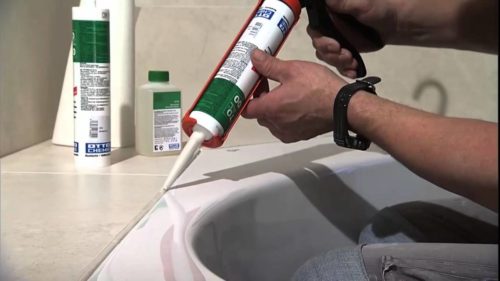
Sealant for embeding joints - a modern product. Thanks to a huge assortment, you can purchase such a material that simultaneously has moisture-resistant and antibacterial properties. In addition, you can converge the sealant of any color.
Stages of work:
- cleaning seam from dirt and garbage;
- acetone junction treatment;
- drying surface;
- filling the clearance with a sealant;
- alignment of the seam of the finger, moistened in the water (the material should not dry);
- decorative interface.
The width of the layer depends on the cutting angle of a tube with a sealant. The narrow band will turn out if there is a sharp corner. In the process of applying material, it is necessary to ensure that a continuous band is obtained.
We close the joints, whose width does not exceed 10 mm. So that silicone does not hit the wall and bath, their extreme part is sick with painting scotch. To facilitate the task, you can use a mounting gun. The sealant must dry during the day, after which you can take a bath.
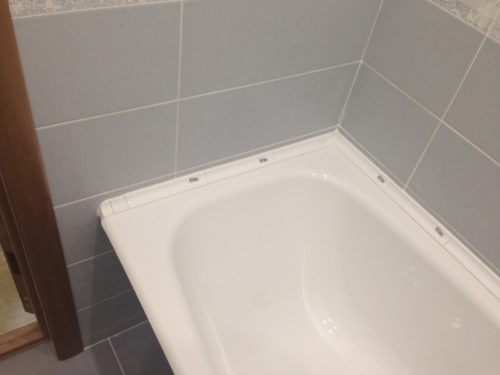
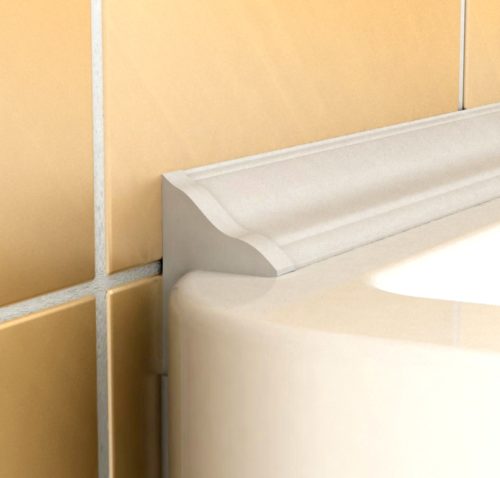
Close up the junction between the bathroom and the edge of the wall with plastic plinth
The use of this material allows you to hide the seams whose thickness exceeds 2 cm. In addition, the advantages of plastic plinth include:
- simplicity and speed of installation and dismantling work;
- elasticity and exposure to cut (convenient for fitting under the size of the bath).
Some plinths around the edges are equipped with rubber overlays, which additionally protect the seam from moisture. It happens the material that is mounted under the tile. Such plinths are suitable for an acrylic bath, which is subjected to a small deformation when heating, cooled and filling with water.
Also plastic plinths are on adhesive basis. But they are not recommended to be applied, because due to excessive moisture in the bathroom, the material may turn out. It is better to use moisture-resistant colorless and quick-drying glue for plastic products.
Stages of work:
- the joke is cleared, degreases and dried;
- the length of the seam is measured;
- the blocking of the plinth is trimmed at an angle of 45º;
- plinth is applied to the wall;
- there are places of the bath and walls in contact with the plinth, which is pasted with gregarh tape;
- plinth is cleaned;
- the joke is filled with glue;
- plinth is pressed and held for 5-6 minutes;
- scotch removed from the wall and bath;
- the upper and lower part of the plinth is covered with a transparent sealant (if the plinth is used without rubber linings).
Close up the junction between the bathroom and the edge of the wall border ribbon
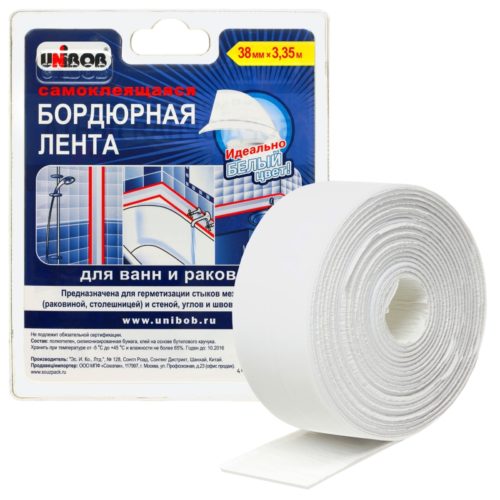
The use of this material also does not require the use of special equipment for imposing joints. For the manufacture of border ribbons, polypropylene, impregnated with mold composition, is used.
The "pluses" of the material are the increased moisture resistance and the insensitiveness of additional design, disadvantage - a short service life (2-3 years).
Stages of work:
- cleaning and degreasing surface;
- cutting tape required length;
- filling seam sealant;
- removal from the tape of the protective film;
- heating the material by the usual hairdryer;
- print ribbon to wall and bath.
In the corners, the border ribbon is glued with the allen, and the extra part is cut. This material can be placed on the joint, which is closed with concrete or mounting foam. Enjoy the bathroom recommended 24-30 hours after gluing the tape.
Close up the junction between the bathroom and the edge of the wall with ceramic tiles
This finishing material is used if there is a joint, the width of which exceeds 3 cm. The tile is selected of the same color as the walls.
Stages of work:
- installation of container under the gap (concrete should not fall on the floor);
- impregnation of old rags with cement mortar;
- laying of the vehicle in the gap;
- pouring concrete;
- drying surface;
- laying ceramic tile;
- stev processing grout.
Useful advice
It should be noted that not only the width of the joint between the bathroom and the wall affects the choice of material for its sealing. Although this indicator is the main one.
The secondary factors include:
- room finishing material;
- bath configuration;
- type of ventilation system;
- the presence of temperature differences;
- interior of the room.
Special attention is paid to the material manufacturing material. It is difficult to close the jack between the wall and the acrylic bath. Capacity can not be covered with coarse material. And the use of silicone or mounting foam is not always appropriate. The joke will be deformed under the load of the acrylic bath, filled with water. In such cases, you need to resort to additional reservoir fastening (securely connect with the wall).

