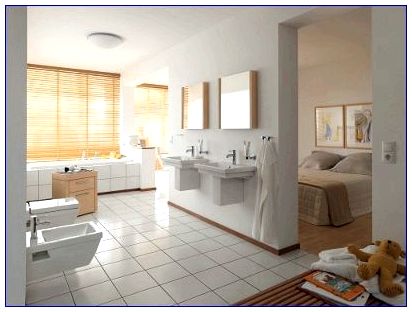
Each of us, a landscaping bathroom, wants to make it most comfortable and cozy, since this room is as visited as other places of our house.
Content
By purchasing ceramic tiles, the following characteristics should be taken into account:

- operational data;
- appointment;
- wear resistance;
- practicality, etc.
Select tile

Today, stores selling ceramics offer several options for the wear-resistant products that are divided into five groups:
- I - represents a rather fragile building material for cladding of walls;
- II and III - floor bathroom and kitchen tiles;
- IV and V is a tile for facing surfaces that are subject to aggressive chemical effects and temperature drops.
Recommendations:
- by purchasing ceramic tiles for the bathroom, consider the fact that the glossy and dark surfaces will be much more noticeable to look scratches, and in light - pollution;
- for an entrance hall, bathroom and kitchen it is not recommended to take a smooth tile, because when wetting it starts to slide.
Advantages of installing ceramic tiles:
- increases the aesthetic attractiveness of the room;
- thanks to her, you will make the surface perfectly smooth and smooth;
- it can create cladding of walls, ceiling and floor;
- increases the fire safety of the room;
- not subject to corrosion;
- almost does not fade;
- does not highlight toxins.
Laying ceramic tile

Installation of ceramic tiles includes a number of stages:
1. Preparatory:
- purification of the floor from the former flooring;
- alignment of the floor surface.

As for the second procedure, it should be approached as responsibly as possible, since, with an uneven surface, the high-quality cladding with ceramic tiles is almost impossible. Alignment is carried out with the help of plaster or construction special compositions.
2. Preparation of adhesive composition

When the surface is ready, you can proceed to the preparation of the adhesive basis, which is divorced according to the manufacturer's recommendations.
3. Laying ceramic tiles on the floor

Ceramic floor tiles placed from a long corner towards exit. At the same time, small gaps should be left between the cafeter, which at the final stage are filled with grout.

Outdoor tile laying options:
- "In the disintegration" - in each row, the tile shifts on the seam;
- "Seam in seam" - placed symmetrically relative to each other and has no shifts;
- diagonally;
- laying from the center of the room.

These masonry methods allow combining a variety of tiles on the texture and color, receiving non-standard and original surfaces.
The most complex is the facing of the mosaic tile, since the pattern is formed by combinations of different tiles of small size.
Facing a bathroom with floor tiles
The tool that will need:

1. To prepare:
- marking cord;
- corolnic;
- roulette;
- levelover;
- ruler;
- pencil.
2. For cladding:
- irregular shape forceps for cutting material;
- rubber spatula;
- rubber hammer;
- slab;
- plastic crosses;
- knee pads;
- master OK;
- pelvis;
- toothed spatula;
- barbed wooden;
- sponge;
- bucket.
3. For mounting work:
- grout;
- additive;
- tile glue;
- leveling composition;
- primer.
Basic options for laying tiles
There are several types of laying outdoor tiles:
- on flooring from chipboard (tree);
- on top of the old tile;
- on a concrete basis.
Progress:
- before starting installation work, we must spend the floor and wash it out with it, which contains alkali;
- then you should primed the surface.
Recommendations:
- for masonry tile on top of the old tile, it is necessary to apply specially intended glue, and also to observe the old seams do not coincide with new;

- if the surface of the floor is not sufficiently smooth, it must be aligned with the leveled composition;
- engaged in a wooden surface facing, use tile glue into which a special substance is added that enhances its softness;
- when cladding the tile of the concrete surface, tile glue and grout will be needed.
Preparatory markup
Since the tile is sprinkled from a long corner to the door, you need to do the following:
- marking cord draw on the floor surface axis passing through the central part of the room or the center of the doorway;
- then perpendicular to her, draw the second line;
- make a trial masonry without using glue along the lines, given the amount of seams;
- next you can proceed to normal facing.
Remember that the first tile is placed near the wall, which is opposite to the door to the door. For the 1st row, take exceptionally whole tiles.
Installation tile

Recommendations:
- when laying a tile with a size of more than 200х200 mm, the glue is covered by the floor surface and the finishing material itself;
- create cladding with tiles, it is recommended that separating the floor to zone 700x700 mm;
- so that the size of the seams does not fluctuate, use plastic crosses;
- the raised tile can be returned to the place with a rubber hammer;
- cross and surplus glue should be removed before it is hardening.

Progress:
- apply the glue by the workshop to the first plot and go through the toothed spatula along its surface;
- put the tile.
Thus, after 24 hours, it is possible to start grouting seams.
Cutting ceramic tile
To obtain the desired size of the ceramic tile, it should be made of its cut:
- the last tile that needs to be glued near the wall must be put on the previous one, and it is still one;
- next, the tile located in the middle, move to the wall and make marking on it, given the width of the seam.
Recommendations:
- to carry out the cutting in direct can be used;
- to form a rounded form, fix the adhesive tape on the tile and drill a pair of holes along the perimeter of the markup;
- then with forceps or nippers cut off the excess part;
- control the edges with a file.
Grouting of intercutric seams:

- before the start of the grout, all the crosses should be eliminated and wipe the tiles with a wet sponge;
- then the rubber spatula must be applied to a small area and distribute it on the surface of 1 sq.m.;
- after a couple of minutes, wipe the tile.
That seam, which stretches around the perimeter of the bathroom (compensation), it is not necessary to rub it, because it is covered with a plinth.
How to do the installation of ceramic tiles for the floor in the bathroom video:


