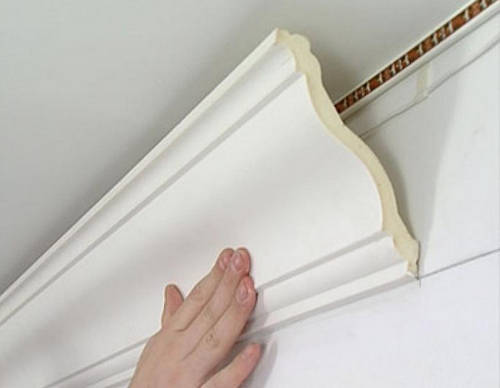
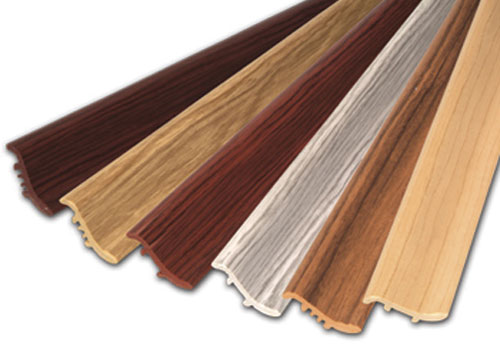
Installing a baguette for stretch ceilings, in fact, is the final stage of the decoration of the room. But because no less important than the rest. The average man has a number of questions in this regard: "What exactly to buy ceiling baguettes, what dimensions are optimal for standard apartments?" etc.
Content
Types of plinths for the ceiling
The building materials market offers many options for the cutting of the ceiling. All materials have advantages and disadvantages. Sometimes the quality of the ceiling design depends on the competent selection, because the plinths emphasize the plane and determine the interior of the entire room.
Polystyrene.
Polystyrene plinths have a clear relief, smooth and matte surface. The advantages of the material include:
- ease;
- environmental friendliness;
- simplicity in the installation;
- lack of smell;
- low price tag.
The disadvantages are fairly attribution. Plinth is easily damaged during transportation, directly installation. When pressed the average force on the product, traces remain.
Council from professionals: choosing a ceiling plinth, keep in mind the height of the ceilings. So, the more the indicator, the wider there should be a plinth.
Polyurethane
Polyurethane baguette is more expensive than the previous version. But in contrast to fragile polystyrene, polyurethane can boast flexibility and durability. The material includes rubber, which makes a flexible material from a polyurethane baguette for stretch ceilings. Photo with intricate ceilings amazing imagination. The advantages of such a decision include:
- tolerability of temperature differences;
- moisture resistance;
- flexibility;
- strength.
The only disadvantage is considered expensive relatively with a polystyrene price.
Polyvinyl chloride (PVC)
Polyvinyl chloride baguettes are famous for versatility. Material is used in many industries. Plastic plinths are not broken with significant efforts, resistant to temperature differences, humidity. Pros:
- flexibility;
- strength;
- resistance to temperature differences;
- easy installation (the material is drilled, nits, easily attached).
Minus: price.
Wood
Modern wooden plinths for the ceiling are the most expensive from this row. Despite the high price, many inhabitants prefer the installation of a baguette for stretch ceilings precisely from a natural material. This solution looks exquisitely and stylish.
Advantages of a wooden baguette:
- environmental friendliness;
- durability;
- naturalness.
Among the minuses allocate a high price and the need for additional processing before installing.
Baguette
Having understood with materials from which the plinths are made, you can move to the installation options for structures. So, today the plinth is conventionally divided by the type of installation on:
- Wall. The mount is made directly on the wall panels.
- Baguette for stretch ceilings. The price depends on the material, size and manufacturer. For this type of ceiling, experts recommend a negligent durable material that is not able to spoil the cloth.
- Aluminum plinths, fastened directly on the ceiling. Constructions are mounted in places where there are no connections with wall panels. Aluminum profile is distinguished by universality. Plinths from this material are perfect for those who do not know how to glue baguettes to the ceiling. With the help of profiles for fastening, there is a connection of several canvases in stretch ceilings. For large premises, this is a find.
Tips of professionals for choosing a plinth
- Experts recommend not to be led by advertising foreign manufacturers, but to trust domestic suppliers. Their products have many cheaper, but not inferior to quality and service criteria. In a free sale there are baguettes for the ceiling, the price of which will be a pleasant surprise.
- When choosing, pay attention to the height of the ceiling. Wide profiles are excellent at high ceilings, narrow - at low respectively. Otherwise, narrow plinths are alive with the ceiling, and the excessive width of the tension ceiling baguette will lead to a decrease in space.
- Subject to uneven walls and the ceiling, it is recommended to refer to flexible plinths. Such constructions are collected by the transition, clog gaps and gaps.
- Polystyrene baguettes are suitable for small office space and residential apartments. The fastening of the baguette for stretch ceilings is carried out using a simple glue of "liquid nails". The only thing that does not press the material, otherwise it will come or deform.
- There is a prerequisite for the coloring of the outer part after installation, as well as a regular car wash (otherwise the surface will yellow).
- Polystyrene plinths set easier simple. It is enough to apply the glue "Liquid nails" on the inner side of the material and put to the surface for a while, pressed throughout the area.
Now you know that it is a ceiling plinth. It remains only to choose baguettes for the ceiling, the photos of which flooded glossy building logs.
Installation rules
Aluminum baguette is attached according to a clear instruction. Basic installation rules include the following operations:
- Measurement and cutting the required profile. Use hacksaw for cutting.
- Holes hardening with drills for fasteners. They must be located at a distance of 20 cm from each other. The weight of the aluminum baguette is significant, so the mount should be stable.
- Applying the plinth to the wall panel using the level and pointing points for the holes.
- Drilling holes with a powerful perforator (for a concrete surface, use drills with a winning tip).
- Installing a design with a dowel.
Polyvinyl chloride baguette installation rules
PVC profiles set a little easier than aluminum. Although the process is largely similar. So how to glue PVC baguettes to the ceiling?
- Measurement and cutting the required profile.
- Holes hardening with drills for fasteners. Step 40 cm.
- Applying the plinth to the wall panel using the level and pointing points for the holes. If the wall is wooden, the design is fixed with the help of screws.
- Drilling holes with a powerful perforator (for a concrete surface, use drills with a winning tip).
- Installing a design with a dowel.
As an alternative installation, you can use the furniture stapler for large clips. The pistol must simply shoot the baguette to the surface. Such fasteners are unstable, therefore it is advisable to make several dowel fasteners.
Lightweight materials
Having under hand lightweight materials (polyurethane, polystyrene), the question is: "How to stick a baguette on the ceiling?" Not worthwhile. To do this, you will need:
- liquid nails or glue;
- knife;
- stuslo;
- hoven for metal;
- brush;
- sandpaper;
- building level;
- pencil;
- sponge;
- soap solution.
The process of sticking is advisable to carry out to the wallpaper, otherwise you will have to jewelry to putting out with a putty when the gaps and gaps will be disposed. How to make sticker baguettes on the ceiling?
- Align the places using the level.
- Cover the surface of the soil paint.
- Make markup at the installation site.
- Use the stubble to cut the material under the degree. This is done to dock profiles in the corners (internal and external).
- Cut the metal with the metal with the size of the size profile. If necessary, catch the edge.
- Apply the glue "Liquid nails" along the edges of the profile and press to the surface. How to glue baguettes on the ceiling, read from the instructions on the package.
- Surplus glue remove sponge moistened in soapy water.
- After drying the mask slits and gaps putty, align sandpaper.
- After two hours, you can begin to paint moldings.
Conclusion
Regardless of the material, and the interior of your skills, attentiveness and caution will provide the expected result. Explore all the features of the installation, observe the nuances of the process and the manufacturer's recommendations - all this will delight to spend time repairing the ceiling.


