To date, there is a huge amount of finishing materials for the walls, however, the most popular type of decoration is the walls of walls by wallpaper. A wide range of this finishing material makes it easy and to taste to revive the room and transform the interior. To do this, it is only necessary to choose the right wallpaper and qualitatively and by the rules to punish them.
Content
- How to choose wallpaper: species and their features
- Preparation of walls to shook wallpaper with your own hands
- Required tools and materials for sticking wallpapers with their own hands
- How to calculate wallpaper
- Preparing wallpaper for sticking
- Rules for sticking wallpaper on a flieslinic basis with their own hands
- How to glue vinyl wallpaper with your own hands
- How to punish paper wallpaper with your own hands
- Rules for sticking wallpapers in the corners
- How to beat the glass wallpaper
- Rules for sticking different types of wallpaper with your own hands
- How to break the wallpaper near the window and doors do it yourself
- How to remove flaws after wall pasting wallpaper
- How to glue the ceiling with wallpaper: video
How to choose wallpaper: species and their features
Preparation for repair work begins with the choice of optimal materials. Wallpaper species are quite a lot, and each of them has special characteristics that are suitable for certain operating conditions.
Paper wallpaper
This is perhaps the most popular appearance with a large number of positive qualities. However, there are disadvantages.
Pros:
- Low price.
- Large range of colors.
- Material hypoallergen and environmental. Often this species is used for children.
- Double-permeable, which does not allow to develop mold and fungi.
Minuses:
- Subjected to sunshine, in connection with which it is fast enough and lose the primordial appearance. After a while they abridge.
- You can not be worn.
- Wet premises are not a place for this type of wallpaper.
If you plan to use this species, it is best to buy two-layer paper wallpapers, they are much stronger and high quality one-layer. In addition, they are less polluted, and some can even be washed with a sponge.
Vinyl wallpapers
Pros:
- Externally look more expensive and beautiful.
- Resistant to moisture.
- Do not let the sun rays.
- Repulse dust.
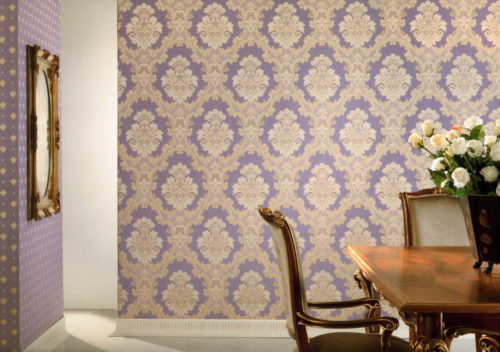
The basis of this species may be paper or phlizelin, and their top layer producers are subjected to polyvinyl chloride processing. Vinyl wallpapers are sold in a large assortment with various patterns, embossing and drawings, so the choice is rich enough.
Minuses:
- The air is poorly passed, so the climate in the room is broken. It is recommended to be a room where the walls are saved with such wallpaper, as often as possible to air.
Knowing the minuses of this material, manufacturers go to the cunning and some species are covered with vinyl, which creates a certain porosity for passing air through them. However, such wallpapers will be slightly expensive.
The price of vinyl wallpaper is quite high, but this moment is explained by their service life, this type of finish will delight you up to 10 years.
Vinyl wallpapers are divided into several types:
- With solid vinyl coating. This kind is withstanding mechanical damage.
- With a smooth vinyl coating. Such a type of susceptible to damage, but their structure is smooth.
- Vinyl wallpaper with silk screen. Amazingly look at the room, the special technique of production creates the impression that the wallpaper is made of silk threads.
- Foamed vinyl wallpapers. Particularly durable. They have a deep, very dense relief.
Fliselinova wallpaper
Made in 2 layers: phlizelin and polymer. The basis is cellulose. Thanks to this composition, the advantages are obvious:
- Very durable, in contrast to the same paper or textile.
- Allowed to hide the shortcomings of walls, irregularities, crack.
- Easy to glue with your own hands, if you do everything according to the rules, bubbles will not form and deform.
- Breathable.
- There is an absolutely smooth structure and relief - to choose a buyer.
- Perfectly lay on different surfaces: cement, plaster, stoves, wooden surface, etc.
The peculiarity of this species is that they need to be glued onto the wall, for which glue is applied in advance.
Textile wallpaper
Inside consist of paper and fliesline, and outside are covered with various textile material, it can be polyester, cotton, jute or flax. Often it is the upper coating that is the basis for the price of this finishing material.
Pros:
- Magnificent decorative properties.
- Noise insulating properties.
- Heat insulation properties.
Minuses:
- Demanding of the technical part of the pasting. These wallpapers can only punish a professional only. The newcomer in this matter will be difficult.
- Do not tolerate moisture, they can not be washed.
Wintering Wallpaper
The basis of the wallpaper data is different in the thickness of the glass beam, which is then applied by a special impregnation.
Pros:
- Surrounded by burning.
- Natural material.
- Durable and resistant to mechanical damage.
- High service life - about 30 years.
- Dust-repellent properties.
- Undemanding in care.
- Breathable.
Preparation of walls to shook wallpaper with your own hands
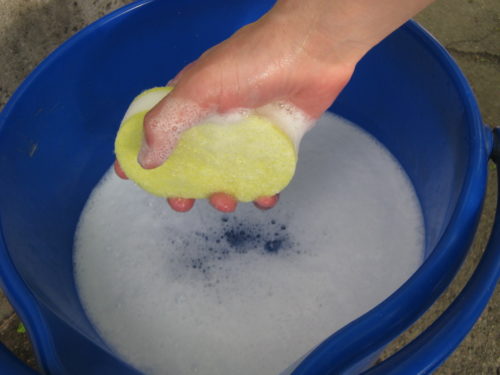
- Remove old wallpaper from the surface. First you need to soften the coating with the help of a soap solution, so old wallpapers will be faster and easier. A small amount of wallpaper glue in soap solution will only improve the effect. If you take off the washing wallpaper, they are better to start a slightly cut, and after moistening. After applying the solution, wait a few minutes, let the wallpaper wake up and soften, and then carefully uphold them with a spatula and pull. If you see that the wallpaper was not softened enough - repeat the action.
- We remove old paint or enamel. Very often in the old Soviet houses wall covered in paint. If the surface is well discovered, then just work with a spatula. But usually old paint is very difficult. The coating of enamel must first catch a slightly hammer, and then shoot with the help of chisel.
- Removing whims from the walls. The soap solution is applied to the surface, after which they remove the spatula. If the glasses are applied with a thin layer, it can be easily washed with hot water.
- Align the walls before sticking wallpaper. Walls plaster and screaming. Especially in places of cracks and irregularities to compose these places and they did not stand out after. If the surface of the wall is old and crumbs, then it is fixed by primer.
Required tools and materials for sticking wallpapers with their own hands
What will take:
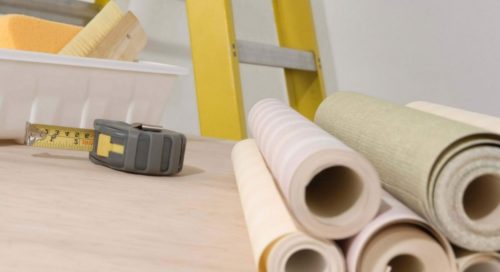
- Roulette or meter.
- Level.
- Roller with a pile.
- Special rubber wallpaper brush.
- Plastic spatula for wallpaper.
- Stationery knife.
- Metal spatula.
- Sponge for washing dishes.
- Capacity for glue.
- A stepladder or staircase.
- Simple pencil.
How to calculate wallpaper
To understand how much the wallpaper is on the room, you need to remove the measurements of the room. Usually the height of the floor of the floor to the ceiling is from 2.5 to 3 m. Roll length is 10 m. It follows from this that 1 roll is 3 bands. You also need to measure the width of all the walls of the room, based on this, you can easily calculate the perimeter of the room, and with it the number of rolls to the room.
Most wallpapers are properly glued to glue, so that the surface of the walls looks in one whole. To facilitate yourself the task, make a markup on the wall on the wall. The width of the roll is usually from 0.5 m to 1.2, so, starting from the corner of the room, mark the width of the wallpaper and apply a vertical line with a pencil. To get smooth marking, you can use the level. In this way, put marks throughout the room.
Preparing wallpaper for sticking
- Make hobs of honeycomb cloths for the entire room. If the wallpaper with a pattern or patterns - take into account their layout.
Before preparing each canvase, you need to measure the height of each segment of the wall with marking. A frequent situation becomes a different height of the wall in different places, as there are significant differences.
- If the wallpaper with a large pattern, it must first pick up so that the picture is whole. Often there is a tip on a label from wallpaper for a convenient collection of drawing. Clearly control the coincidence of the image on the canvas so that later I did not have to cross or deliver wallpaper with pieces.
Professionals are advised when preparing wallpaper cloths make a stock of 10 cm. If a room with high ceilings, 3 m, this stock must be increased. Example: The height of the floor of the floor to the ceiling is 2.5 m. Then make a blank of 2.8-2.9 m.
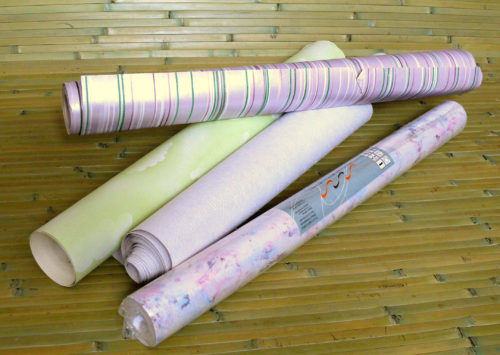
- When you spent all the calculations, you can start cutting cloths. Save the floor to the floor, roll off the wallpaper roll down on it. Measure the required length for the cut, we do in place the name of the stationery by the stationery knife. Make a smooth fold, then cut off the roll at the place of this fold.
Establish the next sheet, check it on the fitting of the pattern or pattern with the previous one. As soon as combine - we make a fold, cut off. Etc.
Rules for sticking wallpaper on a flieslinic basis with their own hands
Cooking glue for shook wallpaper
You need to buy glue specifically for fliesline wallpaper. Check out the instructions.
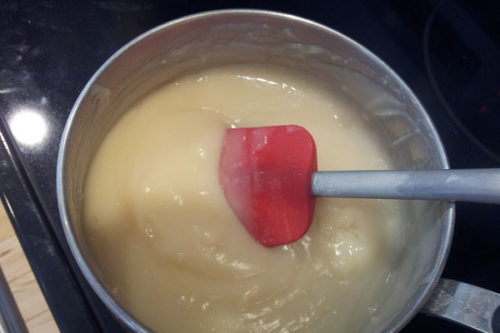
- We prepare a bowl for glue, pour into it dry powder adhesive mixture.
- We pour it to it with a slow and thin flowing, parallel to stirring.
- We leave a mixture to swell 10 minutes, after which we again mix the composition so that there are no lumps.
Glue wallpaper with your own hands
- Read the instructions for the roll. Perhaps there are special recommendations that you need to adhere to.
- Glue wallpapers online, so without any difference, from which room the room you start. Professionals advise start from the door or window.
- We apply the glue base with a roller on the wall, wake the area more than the width of the wallpaper strips, so you have a stock and hitch of the edges better.
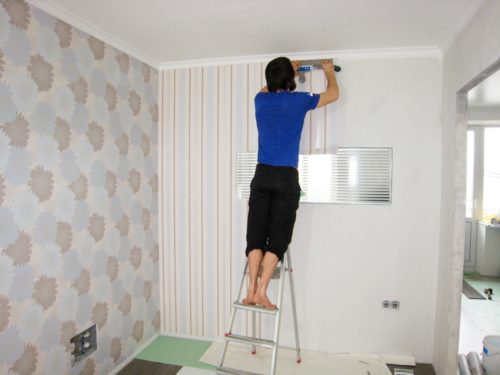
- We have a canvas smoothly vertically, fix the upper edge. From how exactly you will do it, and will depend on the further course of work. After fastening the top edge, we carefully seize the canvas with a spatula with a rubber band, while not particularly press the wall. Movement with a spatula must be on the sides to drive out the excess glue from under the canvas.
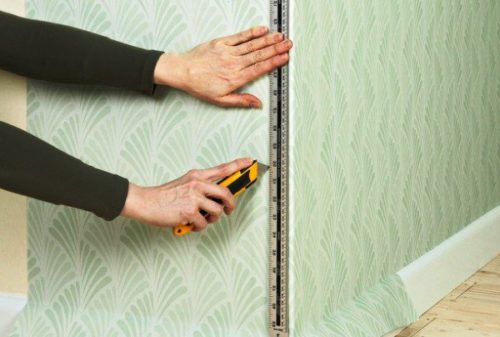
- Wallpapers left at the bottom - cut off the stationery knife. Cut is not too high to the floor, taking into account the size of the plinth, so that the wallpaper for it came. Plinth you will be attached to wallpaper.
- If there is extra wallpaper on top of the wall, then they are also neatly cut off.
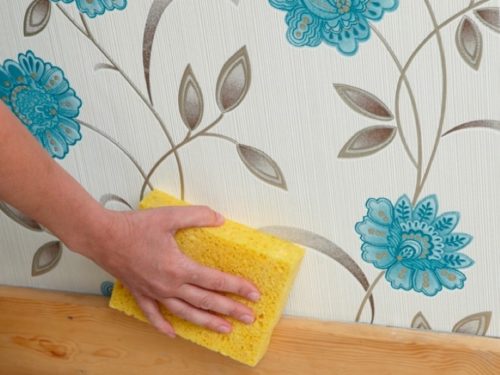
- Very often, the ceiling remains traces of glue - remove them with a wet sponge.
- Next, we take the second piece of the canvas, it needs to be glued clearly to the first. Since phlizelin-based wallpaper is not compressed, you will not have gaps after drying. We apply the adhesive base on the wall with a roller, again vertically trying to the canvas, secure it on top and cheer the drawings, if there is so that they are sharpened.
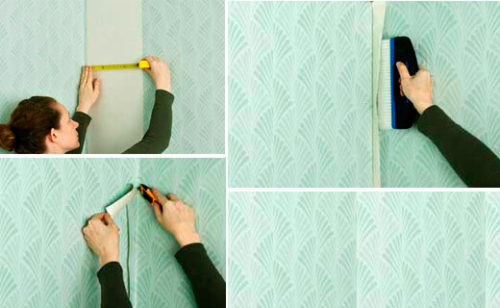
- We connect a gently second web in the junction grounds.
- We take a roller on the junction of two wallpapers, after which they stroke the spatula second cloth aside to drive the glue and air.
- Sut extra wallpaper from below and on top. Excess glue we remove the sponge.
- In the same way, we act with all subsequent canvases.
How to glue vinyl wallpaper with your own hands
The principle of sticking vinyl wallpapers is exactly the same as Flizelinov. But there are several moments and recommendations that should be taken into account when performing work with this type of material:
- Glue for vinyl wallpaper needs to be bought strictly specialized, it is for this type of cloth. Since their distinctive feature is that they are deformed in the process of repair work. During the applying of the adhesive basis, this type of wallpaper is stretched, and after drying it - compress. Special glue will not give the wallpaper to break on the seams.
- It is not necessary to apply too much glue on the wall, as the larger the adhesive base you apply, the stronger the wallpaper will take it into yourself and stretch out.
- Sometimes you can apply glue and on the wall itself, and on the roll.
- Carefully rectify to the gluing of the seams between the wallpaper. It is best to impose a seam of one roll to another, going by 5 mm. After gluing, be sure to go around the neck with a roller so that it is well closed.
How to punish paper wallpaper with your own hands
- The rules of pasting paper wallpapers varies depending on their type - single-layer wallpaper or two-layer. As a rule, single-layer wallpapers are used for perfect walls where there are no irregularities and roughness. This is explained by the fact that the canvas is very thin and all the flaws of the wall will be visible to the naked eye. Single-layered wallpapers are glued to the penetration of approximately 5 mm to the previous canvase.
- Two-layer wallpapers are glued with a previous web.
- The main requirement to work on the sticking of paper wallpapers is to be applied to the adhesive basis on itself, then we leave it for 3-4 minutes, only after that time can be glued.
- At the stage of cutting rolls, you need to pay attention whether there is a edge. Foreign manufacturers have a practice to produce material with the edge one by one edge, while domestic - on both sides. Two-layer wallpapers that glue an approach, the edge must be trimmed from both sides, and at one-layer - with one. Therefore, before glueing such wallpapers, each canvas will have to trim gently, only after that you can work with the material.
- If you plan to decorate the walls by curbs, then they must be glued in two days after plating wallpaper. It is determined by the fact that the paper canvases dry from 12 to 32 hours.
Rules for sticking wallpapers in the corners
Exterior angle:
- We measure the distance between the last cored canvas and angle.
- Cut off the web wallpaper of the measured width + 2.5 cm.
- We begin to glue the strip on top, excessably bend on the angle.
- If the angle in the room is smooth and direct, you can stick the wallpaper strip, if at least a little curve, then only the mustache.
- We apply to the outer corner the line and we go through the stationery knife along it. At the same time, it is necessary to press the edges. Excess trimming needs to be removed.
The main rule for pasting corners is not needed to glue it with a whole piece of web, otherwise you risk creating folds and bubbles.
Internal angle:
- In the same way, as in the first case, we measure the distance between the last web and angle and + 2.5 cm.
- Measure the desired size of the web, cut off excess.
- We glue a piece of canvas on the wall, while capturing the angle.
- Highly press wallpaper to the wall with a rubber spatula.
- A segment that stayed, glue on the adjacent wall so that there is a small science. Excess material we remove the stationery knife.
How to glue the wallpaper on the corners: video
How to beat the glass wallpaper
Consider the basic rules of work with this material:
- The glue for this type of material should be applied exclusively on the wall, it is not necessary to the canvas itself.
- We buy glue for heavy and dense wallpaper, the other will not fit.
- At first glance, it seems that the fiberglass wallpapers are facial and the wrong side does not have differences, but it is not. According to the rules, the front side is that in the roll rolled inward. For convenience, some manufacturers mark the purl side with a blue or gray stripe.
- Wallpapers dry not quickly, during the day.
- Only after complete drying can be applied to wallpaper decorative elements or produce staining.
Rules for sticking different types of wallpaper with your own hands
General recommendations for any type of wallpaper:
- If glue wallpaper in a wet room, then it is necessary to walk along the surface of the walls of the fungicidal mixture. This will create protection against mold and fungus.
- Check whether the walls are ready to be ready as follows: A small piece of polyethylene is attached to the Wall of Scotch tape, leave for 24 hours, then check whether the Hispanic appeared under the film, if it is, the walls are not sufficiently prepared for operation. If under the film is dry, then you can start working.
- In order for the wallpaper when the wallpapers there were no air bubbles and the folds were not formed, you need:
- carry out repair work at a room temperature from 22 to 25 degrees;
- after the walls of the walls with wallpaper in no case open the windows and do not create drafts, otherwise the web will not be completely dry and after some time they can move away from the wall;
- whether the walls from the sun rays after pasting.
How to break the wallpaper near the window and doors do it yourself
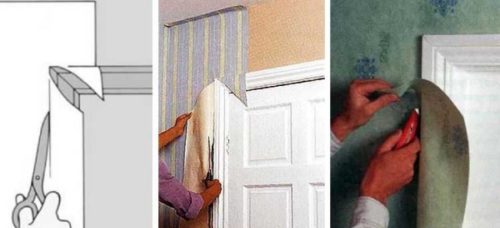
When the windows and doors are in the same plane with the wall, then there should be no problems with the wallpaper blowing. Another thing is if the slope is not at the same level with the wall, in this case the wallpaper canvas glue directly to the slope, so that it goes to 2 cm on it. So, the canvas should go a little on the platband or the window frame, we make cutters in the corners, in 45 degrees. The resulting parts bend along the doorway or windows along the opening of the door or window, and then carefully cut off with scissors.
How to remove flaws after wall pasting wallpaper
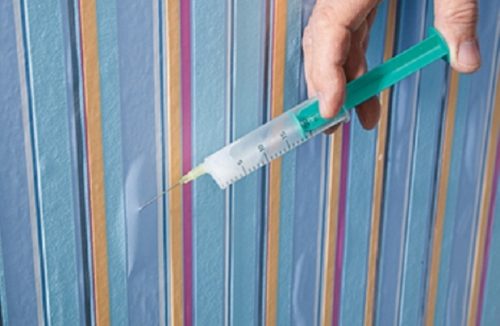
If you do not have much experience in the walls of walls with wallpaper, then after the work done, small flaws may appear, for example, in the form of air bubbles under the canvas.
- We take the syringe, you pick up the glue composition, put a needle on the syringe.
- Sanctuate with a needle on the syringe bubble, and begin to slowly enter into it a small amount of glue.
- Then you need to walk with a roller or a spatula to drive out the excess air from the bubble.

