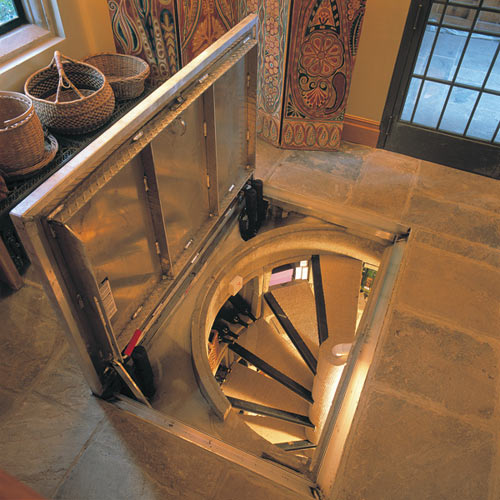
The basement is a multifunctional room that can be a full-fledged floor and significantly increase the useful area of \u200b\u200bthe house. It is important that proper microclumatic conditions are respected in the basement, depending on what is the purpose of the structure. With the basics of the construction technology, the basement should be found at the stage of designing the cottage.
Content
Functional purpose of basement
By drawing up the basement project, it is necessary to take into account its functional feature.
- The basement as a celler for storing products should not be heated, which adversely affects the service life of the foundation. The level of humidity required for vegetables and fruit should be maintained in the cellar, which is ensured by waterproofing and ventilation of the room.
- Bowl-boiler (it is installed boilers, filter systems, etc.) also requires compliance with the above requirements, but this room should be heated.
- Basement as a base of the house: it can be equipped with an office, tennis or billiard room, gym, art workshop.
- Workshop: In such a basement, it should be dry and warm, and ventilation should provide a flow of fresh air.
- Underground garage: With this method of use, a gentle entrance should be equipped and the gate is installed. It should be provided for fixtures for repair and maintenance of a vehicle: a viewing pit, a place for racks.
Tip: If the project provides a device of several, functionally different premises from each other, it is recommended to build a septum at the construction site of the first floor of the house.
Earthworks in the construction of the basement
Choosing a place for the cellar, it is necessary to explore the soil, removing its upper layer to the depth to half a meter. Experts recommend paying attention to the following:
- soil samples should not contain an excessive amount of moisture, which can evidence its adhesion to the instrument;
- stony soil is not unsuitable for the basement, but manually earthworks will be difficult;
- the soil should not smell the marsh: it is a sign of a high level of groundwater, which is characteristic of a swampy terrain, where it is not recommended to build;
- sand and clay soil is not the best choice: the cellar can be unstable.
Preparations for the beginning of the construction of the basement with their own hands lies in the markup of the site, release it from trees and bushes. At first, in the corners of the external perimeter of the basement (according to the dimensions specified in the project), pegs are rush, between which the cord is tensioned. After that, proceed to clean the territory.
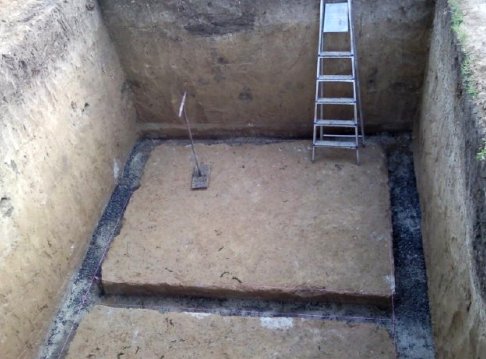
It is necessary to know how to dull the pit under the cellar properly with your own hands. At this stage, it is important to consider the following:
- The dimensions of the belligence depend on the planned basement sizes, taking into account the volume required for the device of a concrete base, gender and ground ground walls.
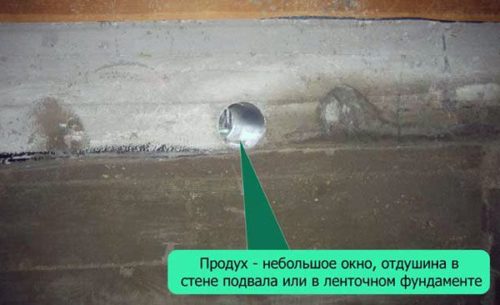
- It is recommended to plan the basement overlap at a height of at least 0.5 m: This will allow you to install the windows or arrange a product for ventilation.
- The base of the basement should be planned as high as possible: it will reduce the effect of groundwater. The optimal depth of the pit for technical basement is in the range of 0.2-0.22 m, for residential - 0.26-0.27 m.
- In order to protect the walls of the pit from the destruction of rainwater, they should be under the slope to the center. At the bottom there are grooves for the water removal in the buried capacity (barrel, bucket). When filling out of the tank, water is pumped out, cautiously dried.
- At the bottom of the pit, a layer of rubble is 100-150 mm, which is tamped, after which the sand is embanked by the layer of the same thickness. Sand moisturizes and tamper.
- 2-3 layers of rubberoid or similar material for waterproofing are placed on top of the intake. The canvas of the neighboring rows overlap each other by 10 cm, the place of the joint is flooded with molten bitumen.
- In order for the basement to be warm, the insulation is placed on top of the waterproofing - the plates of extruded polystyrene foam 40-60 mm thickness.
- On the perimeter of the bottom, the formwork for concrete floor in the basement is mounted. Boards are installed at 0.25 m.
How to pour the foundation and the basement base is erected
Technology provides a specific sequence of actions:
- On top of the waterproofing and plates of the insulation laid the reinforcement, welding it in the shape of a grid with a cell size of 150 × 150 or 250 × 250 mm (depends on the thickness of the roth). The lattice should be bunk, its ends around the perimeter bend up to communicate with the reinforcement of the foundation walls.
- The concrete solution in which the cement of the brand 500 is used, is poured into one reception by a uniform layer, the thickness of which is 200 mm and more. Concrete hard time - 28 days. To avoid cracking surface, it should be covered with a plastic film or periodically moisturize. Preparatory work (reinforcement, installation of formwork) for the walls of the basement can be started on the next day.
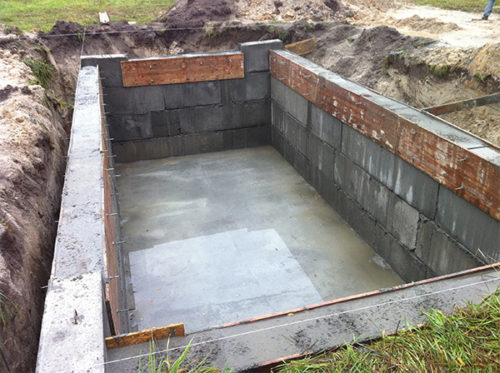
- The construction of the basement walls (recommendations of specialists) can also be carried out with the help of concrete fill. It is better to use brick and concrete blocks if the groundwater level is low enough.
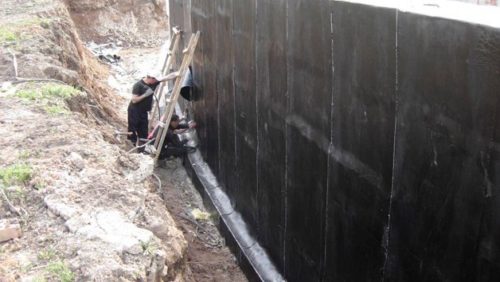
Important: After the construction of the walls of the basement to reverse, it is necessary to perform the outer vertical waterproofing and insulation of the walls. The main materials should not absorb moisture, which eliminates the use of mineral wool.
Choosing materials for the arrangement of the basement
Alternative to the monolithic concrete walls can be the walls of the basement isolated from bricks or concrete blocks. In the first case, it is recommended to choose a dark, checked brick: it is more resistant to moisture. Concrete blocks should be dark color, which indicates a high brand of concrete and its strength.
The laying is performed by the following technology:
- The brick of the first row is located across (that is, "tych").
- Give corners from a smaller side.
- The following bricks are placed by the "Spoon".
- Bricks and blocks are laid with dressing and mandatory reinforcement every 3-4 rows. Walls must have a small slope to the center of the room.
- Stacking blocks start from corners.
- For the "hiking" staircase from the brick, there are pillars opposite the entrance.
The following materials are used for the concrete cellar device for the manufacture of concrete:
- cement brand 500 - 1 part;
- sand clean, medium and large fraction - 2 parts;
- crushed stone fraction 20-40 mm - 4 parts;
- water is about 200 l per 1 m³ of solution.
Stages of the construction of concrete walls basement:
- A sand-gravel pillow is suitable for a thickness of about 200 mm. It must be moistened and tamper.
- The "sweeping" is poured from a solution with a plasticizer. Layer thickness - 50 mm.
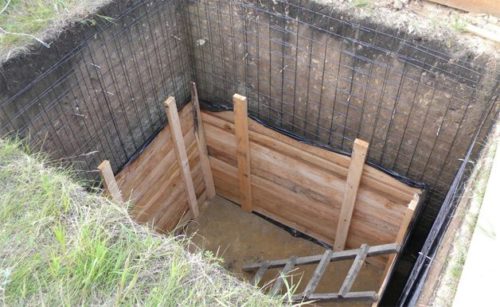
- After the frozen of the "concrete", reinforcement is performed. The reinforcement frame is mounted in the form of a multi-tiered grid of steel rods with fins (diameter - 16 and 20 mm). Mesh cell - 150 × 150 mm.
- Formwork is mounted from boards, sheet material (plywood, USB plates) and BRUSEV.
- The concrete is poured into the formwork. So that concrete is uniform, without aircases, a special vibrator is used. The upper edge of the fill must be on the same level throughout the perimeter.
Important: Pouring of the walls should be performed immediately after filling the floor in the basement, otherwise the design will not be monolithic.
Waterproofing and insulation of basement walls
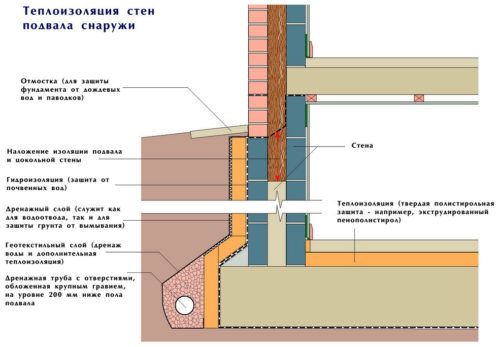
Waterproofing walls and floor can be external, internal and combined. At the construction stage, external protection against groundwater is mounted as follows:
- With the help of a chisel, sharp protrusions are knocked down - casting defects, cutting sticking fittings. The wall surface is cleaned from dust, processed by primer deep penetration.
- Bituminous mastic is applied to the walls with the help of a car.
- Starting from the bottom on the mastic pasted rolled insulation. The canvas are oriented horizontally so that the upper rows overlap the lower per 100 mm. The joints are additionally missed by bitumen.
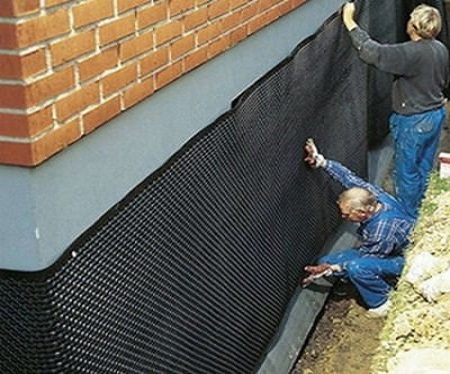
- The plates of extruded polystyrene foam are glued onto the walls using bitumen. An inverse swelling of the clay is performed for the device of a clay castle that prevents the penetration of moisture to the walls.
- Along the walls around the perimeter, a concrete breakdown is mounted to protect the basement from groundwater. Under the breakfast must be laid insulation.
Important: A foam cannot be used as insulation. This material is hygroscopic. The moisture will accumulate, destroy the insulation during freezing and promote the development of mold fungi.
With a high level of groundwater, the construction of a drainage system is recommended, with the help of which an excess moisture will be discharged from the walls of the basement into the cumulative container. Drainage pipes are stacked under the floor of the basement and along its external perimeter.
Installation of ventilation in the basement
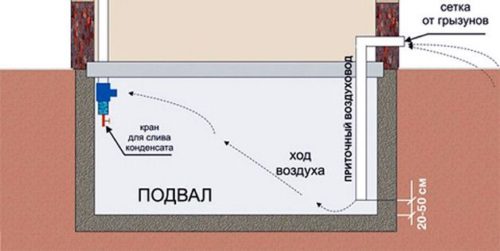
The organization of the basement of the ventilation system is necessary to maintain the necessary level of humidity. Ventilation systems are two types:
- forced;
- natural.
The last system is simple, its installation is reduced to the installation of the supply pipe and exhaust. They must be located in different sides of the room so that the air is stirred throughout its volume. The supply pipe is lowered to the floor (the gap should be no more than 300 mm, and the exhaust remains under the ceiling. Other ends of the pipes are displayed out. The heated air rises and goes to the street, and with it an extra moisture goes out. On another pipe in the basement, fresh air comes .
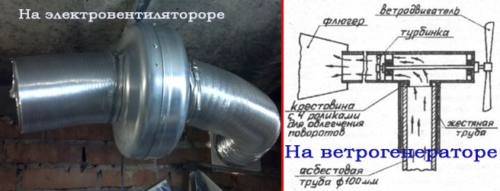
Forced ventilation is a system based on the operation of the supply or exhaust fan. Recommended power - 90-120 m³ / h. The advantages of such ventilation:
- reliability: its work does not depend on weather conditions;
- functioning and performance depends only on the power of the fan;
- easy installation.
The lack of forced ventilation is in the need to spend electricity to ensure the work of the electric fan. You can save by installing the wind generator.
Tip: When installing the ventilation of the supply type in the exhaust pipe, the check valve is installed. It is necessary to prevent air from entering the exhaust channel to the basement, which is likely with severe wind gusts.
Graveyard improvement tips
The cellar is usually used to store preservation. The arrangement of the cellar from the inside with their own hands implies the installation of shelves around the perimeter of the room, the installation of the drawer for potatoes and rootfields. The staircase must be comfortable, with railings, and the entrance to the cellar is safe.
Important: For the lighting device, it is impossible to use electrical appliances from the network 220 V. There is a possibility of accumulating explosive gas, and in addition, air humidity in the cellar is always higher than in other rooms.
In conclusion of the article on how to build a cellar with their own hands - video with comments by a specialist.


