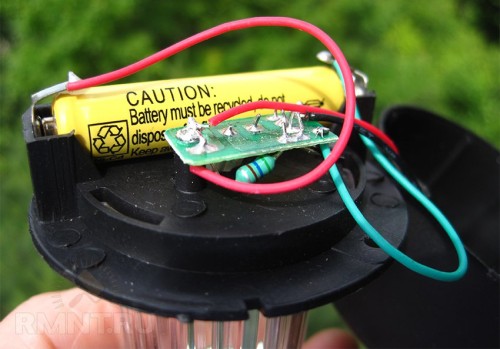
Many things that we often simply notice around ourselves are at a certain point in demand and very helpful. One of these things is the usual lantern. After all, if the lighting on the street is turned off the electricity in the apartment, the flashlight will always correct the situation at hand. This thing can be useful both in a tourist campaign or fishing and in the household site.
To date, there is a large number of different lanterns from a small pocket to searchlights to illuminate large areas that work from solar energy. In any construction store you can choose a flashlight for your needs and in your capabilities. In some cases, if you purchase a ready-made lantern is not possible, it can be made independently from the girlfriend. It can save not only tools, but also the time when the flashlight will be an urgent need. About how to make a simple flashlight with your own hands - hereinafter.
Content
Production of a simple diode lantern with their own hands
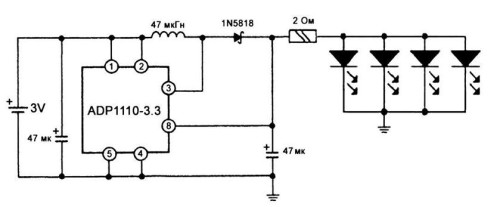
LED lanterns have more advantages in comparison with the usual incandescent lamp. First, they serve much longer, and secondly, they consume less energy. This means that the battery in the flashlight will last longer. Make a mini flashlight based on a bright LED is quite simple. For this you will need:
- "Pocket" for the battery. An ideal option can be a battery pocket on the old motherboard.
- The battery (the usual tablet will be enough).
- Small button to turn on the flashlight.
- Over bright LED.
- Soldering iron, solder, glue, gun for glue.
Procedure for work:
- First you need to remove the pocket of the battery from the old motherboard. This is not too complex lesson for those who at least once kept a soldering iron. Making the falling did you need carefully, so as not to damage the contacts.
- Next, you need to solder the button to the positive pole pole, and one leg of the LED is sold to it. The second of his leg is soldered to the minus pole. Thus, a simple electrical circuit is assembled, which will close when you press the button. After assembling the chain, you must install the battery and check its performance. If the LED is shining when the button is pressed, the assembly is made correctly. In order for the flashlight to do not break during operation and the moisture did not hit the electric spike, its top, except the button, can be poured with hot glue.
- After cooling and solidifying glue, the flashlight can be used.
Such a simple and cheap device guaranteed to help in an abnormal situation. Everything necessary for its production details can be easily found at home or buy on the radio. Its undoubted advantage are small overall dimensions. It is almost impaired in his pocket and will not take a lot of space in the car's glide.
Lantern from spent gas discharge lamp and lighters
Gas discharge lamps were greatly distributed and popularity due to its effectiveness. On the same light flow as the usual incandescent lamp, the "housekeeper" spends almost 4 times less electricity. The most common reason for the failure of such a lamp is a breakdown of the controller card, which is between the lamp itself and the basement. In this case, the lamp itself can still be used to make a flashlight.
To do this, you will need:
- Old gas-discharge lamp.
- Unnecessary electricity.
- Glue, Hoven for metal.
Procedure for work:
- First of all, it is necessary to separate the base of the lamp from its enclosure. To do this, use hacksaw for metal. The lamp housing is then neatly revealed and the controller is removed from it. When removing the wire controller, which connects it to the flask, cannot be tear off, they are gently biled with bodies.
- Then the old electric gas tip is scolded. On its handle, the lower part of the lama body is dressed and glued with hot glue. Next, the lighters are connected to the lamp wires, after which it is screwed to the body.
The result is a pretty cute lantern on the handle that runs from the battery when the button is pressed. Shines such a product is quite bright, however, it produces non-focused, but scattered light. With such a lantern, it will be convenient to highlight the dark plots of the garage. If you set the button with the retainer, the product can be used as a candle in the absence of electricity.
When making a flashlight from a gas-discharge lamp, it is necessary to remember that, the smaller its power, the brighter it will shine. The fact is that the batteries may not be enough for normal luminescence of a large number of mercury vapors, therefore the lapse of the lamp in this case is preferable.
Street lamp do it yourself
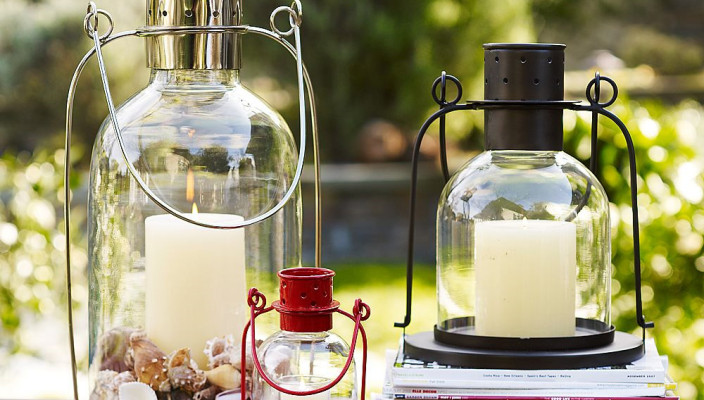
It often happens that at a unjustified place it is necessary to make the lighting of the site. This problem is especially important for those who are just beginning to build a house in the conditions of the "pure field".
For the manufacture of a simple lantern for the garden, it will be necessary to make some girlfriend materials:
- Bank 2 liter with a twisting hermetic lid.
- Standard bulb chuck (E27 base).
- A piece of copper wire in double isolation.
- A small piece of wire for the manufacture of suspension. You can use a decorative chain, then the lantern will look better in the garden.
- Electrician tools, tape (you can use a heat shrink tube).
Procedure for work:
- Initially, a hole for fastening the cartridge is neatly done in the lid. To do this, it is necessary to disassemble the cartridge and place the diameter of the hole under the threads of the cartridge. After that, it is necessary to cut hole with a knife or scissors.
- Next, the wire is taken and soldered to the base of the lamp. The compound must be strong so that the wire under the influence of the wind did not break away from the cartridge.
- Then the cartridge is screwed to the lid of the can. Now, if you close the jar, the light bulb will be securely protected inside from moisture or mechanical impact. The wire is connected to the network through the switch.
- Next, you need to make a ring for which the lantern will be suspended. To do this, you can use copper wire. A small chain is joined to the ring, for which a new lamp and hangs in the right place.
- For better insulation, part of the cartridge that comes out, it is better to exhibit. You can do this with the help of isol or polyethylene.
You can use steel banks from baby food as a flashlight, having done thin holes in them with a nail or sewn. Many designers resort to this way to create a garland from such cans, knocking interesting pictures on them. Looks like this product is simply amazing. However, it is worth noting that such a lantern cannot be used in conditions of high humidity, since it may simply burst from water on the lamp.
Sunlight lamp do it yourself
Lanterns using solar batteries have become quite popular in places where there are problems with connecting to the power supply network. Thanks to the energy of the Sun during the daytime, such a lantern charges located inside the rechargeable battery, which, upon occurrence of dark time, supplies energy to LEDs that illuminated the territory.
It's pretty difficult to make such a lantern for the garden, because for normal luminescence it is necessary to solder a small scheme, and for this you need to have certain knowledge in electronics. Therefore, if there are no skills in the assembly of electrical circuits, it is better to buy such a lantern in the store.
If there is such an experience, you can make a small lamp on the sunny element. To do this, you will need:
- Bright LED 3B, 1 W.
- The battery voltage is 3.7V and a box for it.
- Solar cell voltage 5.5V, current 90 mA.
- Resistors with resistance of 10 ohms and 50 com.
- Transistor IRF 7832.
- Diode.
- Case for the lamp. You can use a small plastic container.
Procedure for work:
- The first thing on the sides and in the lid of the container is made by one hole. Mounting bolts are installed on the sides, and the LED is mounted in the cover, which is fixed using the sealant. In the bottom of the box there is a small hole in which the wire from the solar cell is started.
- Next, the electrical circuit is collected. All connections are carefully disappeared and insulated with a shrink tube.
- The entire collected scheme is placed in the box. All holes and the covers are embarrassed by a sealant to eliminate moisture from entering the design.
Due to the bright LED, such a flashlight can highlight a fairly large area. Thanks to the photocell, the device will turn on at a time when the intensity of natural lighting will fall. The role of the photocell will perform the solar battery, which is controlled by the transistor. When the current from it ceases to enter the network, the transistor will turn on the power from the battery and will apply it to the LED. When you turn on the solar battery, the transistor will send energy not to the LED, but on the battery.
Tightening the flashlight in such a way that the sun's rays fall as much as possible to its surface. Such a flashlight with its proper use can serve more than seven years.
For its maintenance and repair, it is enough to remove the sealant layer and disassemble the design. After repair or replacing the battery, the case is collected again and seal. A small cost and simplicity of assembling such a design allows you to easily make multiple lanterns that will cover the area exactly where it is necessary.

