Among the facing materials, the clinker tile occupies a special place. It is produced from natural refractory clay with the addition of quartz sand, field spat and coloring components by extrusion by either by pressing with subsequent firing.
Content
The advantages of clinker tile
Thanks to this manufacturing technology, this material has high strength and durability (its service life of up to 50 years). In addition, clinker has other advantages:
- low porosity;
- wear resistance;
- frost resistance;
- antistaticity;
- good thermal conductivity;
- refractory;
- resistance to rotting processes and chemical agents;
- unpretentious care;
- ecology and many others.
The clinker facade tile does not fade in the sun and retains its appearance for a long time. The extrusion method makes it possible to obtain a tile of the most complex and unusual geometric shape, various structural elements (corners, drains, steps, connecting elements).
Therefore, this material has a wide range of applications.
- It is used for concrete and foam concrete, frame and even wooden surfaces, facades of buildings, paving floors, garden tracks, sites, steps, pools, etc.
- Clinker tile, the price of which is lower than on the natural stone, is its good alternative.
- A high parry permeability coefficient makes it possible to use clinker tiles also in the systems of outdoor insulation of buildings.
Types of clinker tile
The clinker tile presented today on the market varies between them in shape, color, sizes and texture. It is smooth, rough, imitating natural stone, brick and other materials.
Depending on its purpose, clinker tiles are accepted for such types:
- Tile for outdoor and interior decoration of buildings (including clinker tiles under brick and thermopanel with clinker tiles). Thermopanels Facade with clinker tiles represent facing structures consisting of combined clinker tiles, polyurethane foam and sand. This is a modern energy-saving material for the exterior decoration of facades of buildings.

- Technical clinker tiles for paving roads and floors;
By their decorative properties, clinker tiles happens:
- The glazed or glazed (it meets or without a pattern) is a tile, covered with a layer of colored glass, which gives it color, gloss, ornament, as well as waterproof and hardness.
- The unhappy tile is a tile that has a homogeneous thickness without pattern and decorative coating.
Installation of clinker tile
In addition to the above advantages, one more, which is certainly worth mentioning, is the simplicity of mounting the clinker tiles, which can be held all year round. The laying process is made according to special technology and consists of such stages:
Preparatory stage
- Before starting the installation of clinker tiles, it is necessary to thoroughly prepare the base, which should be dry and clean, have a bearing capacity, and also to be smooth. Experts note that a reinforced concrete with a thickness of 10 cm for garden tracks can be a better option for garden tracks or from 20 cm for highways.
- The clinker tile is placed on a special glue composition or a cement solution consisting of three sand parts and one part of the M-500 cement.
- In addition, at this stage, it is also necessary to prepare all the tools and materials that we need in the work, namely: pencil, cutter, knife, rubber and toothed spatula, rubber hammer, water capacity, level, crossbars for tiles, sponge and others .
Installation of clinker tile
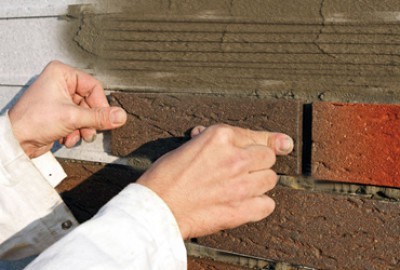
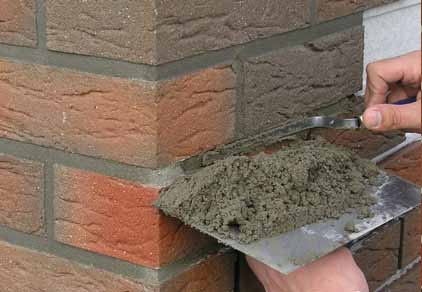
- We apply to the base with the help of a gear spatula and a cement mixture.
- First, we put the first row of tiles, slightly pressing it to the surface and inserting inside, after which we continue to apply the rest of the material.
- Clinker tiles for facades stacked from angular tile
- . To control horizontal use level.
- Between adjacent tiles, we put plastic crosses that will save the desired seam width. It should be about 4-5 mm, if it is an extruded clinker tile, for pressing tiles - seam should be greater than - 8-10 mm.
- In addition, you should not forget about the compensation seam about 10 mm, which should be every 5 meters (for tracks), in 25 meters (for sites) and 70 meters (inside buildings).
Shutdown of seams
- After the process of laying the tile and the complete drying of the adhesive can be moved to the stripping of the seams from the fractions.
- Then, armed with a rubber spatula produced grouting seams, moving diagonally. Do it twice until the seams are completely drying.
- When the grout dry, take a rigid brush, which we remove from the surface of the residues of the grout.
- After a day, we wipe the damp cloth if there is a need.
More details on the mounting of the front tile can be found in the video:
Installation of thermopanel with clinker tiles
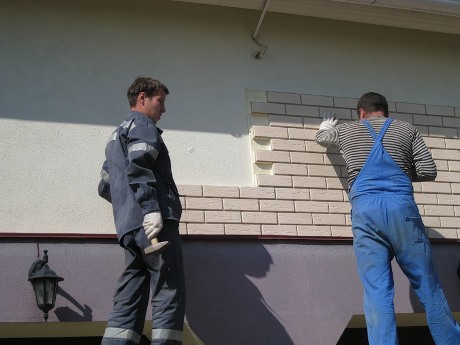
- Thermopannels, unlike conventional clinker tiles, are attached to the bearing wall surfaces with special self-tapping screws, which eliminates the use of wet works in this process. This, in turn, increases the speed of facade facing. In addition, installation can be carried out at any time of the year.
- The laying of thermopanels start from the corner of the building and then continue to rows around the house.
- The first row of thermopanels around the base, as well as window sills, must be separated by metal sings.
- After the end of the installation, the seams are grouting with a metal brush with cement-sandy solution.
- If work is held in winter, then a special non-freezing mixture is used.


