The smell of freshly baked bread causes pleasant feelings for each person, especially if it is made of useful whole grain flour, but to pamper himself with such a treat it is very rare. In stores you can find flour of any grinding, but its quality sometimes does not fit the high cost. The most faithful and logical solution of this problem will be made by your own mill, and if after reading these words, you have an image of a huge building and massive travelers in your head, we hurry you to console - today you can make a compact machine that will fit in any kitchen. In this article we will tell you how to build a homemade mill for grain with your own hands.
Content
Specifications of the device
Any hostess, who wants to feed her family with healthy and delicious dishes. The manufacture of this device is not such a difficult from a technical point of view, however, it will take from the master of the skills to handle turning equipment and drilling tools.
The homemade mill for grain allows you to get flour of any grinding - rough, medium or very small (depending on the settings given). It sounds rather tempting, especially if you consider that the cost of whole grain flour is incommensurable with the cost of its production. If you figure it out, then the whole milling "real" flour is a grain that has passed coarse treatment without removing the grain shells. They are also known as bran. White flour, on the contrary, is subjected to multiple processing, filtering and other procedures, as a result of which, in fact, all useful components are deleted. It is logical that the cost of production of white flour is higher, however, it is for some reason it is cheaper than "crude." This is a visual example of skillful marketing, which is subject to modern trends in a healthy lifestyle. Want to eat useful organic food - to waste more money.
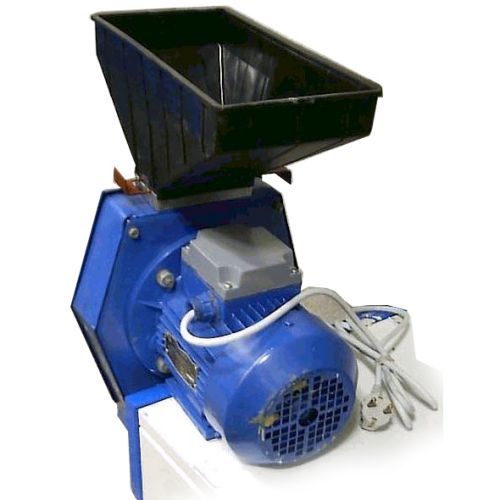
The grain itself is worth a kopeck, so for the production of flour at home with the help of a household mill you will spend a minimum of money. The most common model is the Mini Mill "Baby". It was invented many years ago in Udmurtia with two engineers. With the help of "Baby", it is possible not only to grind the grain to the desired size, but also make animal feed for homemade cattle, birds, produce corn, buckwheat and any other flour. Agree, an indispensable device for a family living in a private house and holding homework.
The dimensions of such a homemade mill for grain are very modest, but the productivity is truly impressive - for some 5 minutes you can cast a whole bucket of corn, and with a bucket of wheat it will cope in 2-3 minutes.
Technical characteristics "Baby":
- the size of the housing without a hopper and nozzle - 320x160x170 mm;
- capable of issuing 2 types of grinding (large and small);
- the small power of the engine is 180 W (high performance with substantial energy savings. For comparison, a regular electric kettle or tanning electric stove consume 2000 W / h);
- productivity: Corn - 0.2 buckets / min, wheat, oats and other cultures - 0.5 buckets / min;
- rototor's chopper, reversible;
- the total mass of the device is assembled - 15 kg.
The most responsible task, on which the efficiency and durability of the mill depends is the manufacture of the rotor and the stator.
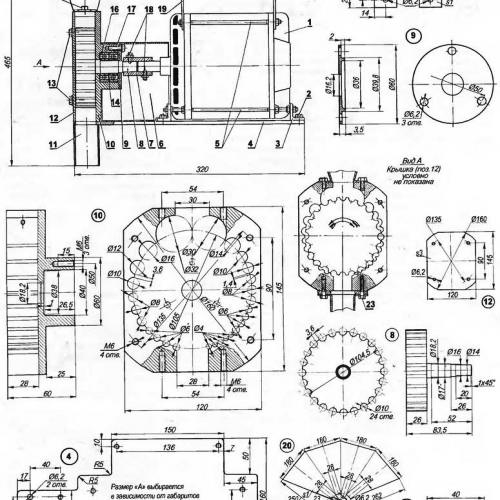
Mill scheme
In the image below, you can see a detailed scheme for creating a compact mill "Baby" with all the components used. Before assembly, prepare a complete list of necessary parts.
Details for the assembly of "Baby":
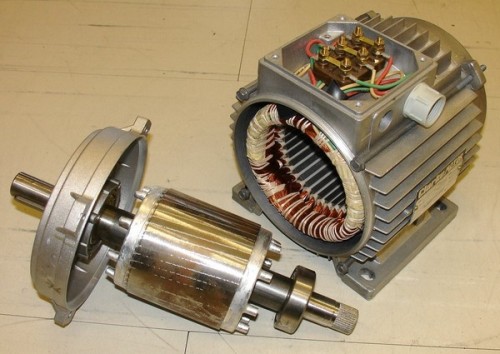
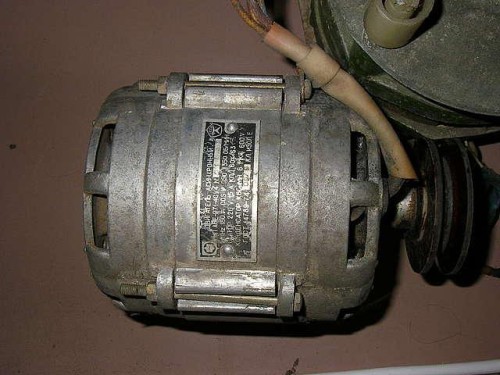
- Electric engine (you can take the engine from the old washing machine, since the power is needed small).
- Mounting places of the electric motor (you need 12 pieces of M6 bolts with spring washers).
- Support for the engine of two steel corners 45x45 mm.
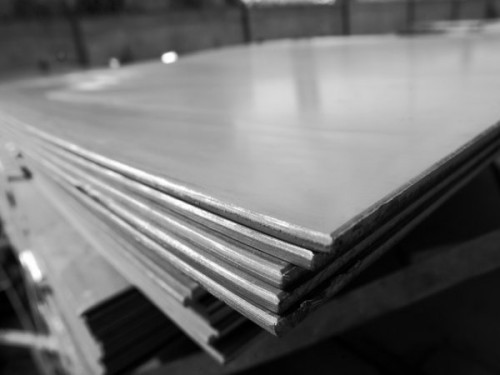
- The bed (the base of the mechanism) from sheet steel is 6-8 mm thick.
- Screeds (hairpins with nuts).
- Reception box from roofing iron.
- Connecting coupling for the transmission of rotation of the shafts.
- Rotor.
- Cover for bearing assembly.
- Stator.
- Iron nozzle.
- Sheet cover 3 mm thick.
- Fastening for the lid (4 screw M6).
- Remote Ring.
- Fasteners of the receiving box (2 bolts M6).
- Two bearings №203.
- Places of fasteners of the cover for the bearing assembly (3 screw M6).
- M6 screws with nuts for installation.
- Handle brackets of 2 mm thick.
- Boot box.
- Axis (Stiletto M6 and nuts 2 pcs).
- Wooden pen.
- Places of fixation of the nozzle bolts M6.
Making rotor
The structure of the "Baby" before the disgrace is simple, so anyone will cope with the assembly if desired, but for this you need to be able to handle a lathe and drilling equipment. If you do not have the skills and find them in the near future plans, you can not order the necessary parts in the lathe workshop. You will need a stator, a rotor, as well as the cover of the bearing assembly.
In the event that you want to make everything with your own hands, you should consider several technical nuances:
- Make a rotor immediately with a variable cross section.
- Make the shaft from the patch M45 (length 9 cm, diameter 12 cm) or from the rounder (steel).
- The whole process is divided into several parts: preparation of metal blanks (in a circle of 105 mm at the same remote distance, drill holes with a radius of 5 cm), removal of the outer layer of the circle so that the size of the groove decreased to 104.5 mm, and working teeth opened, after which The rotor must be hardened.
Ordering the rotor should also be correctly: first heat into the furnace to a temperature of 800c, then omit in the oil container. Cool the metal with water in a specifically, this case is not very recommended, as it cracks and becomes very fragile. Then you need to make a vacation, that is, to heat the rotor again, but already up to a temperature of 400C, and leave cool at room temperature. As a result, you will get a very hard and durable item that will serve for many years. To check whether the hardening is done with a qualitatively for the cutting side of the teeth - if it slides easily and leaves the trace, it means that the hardening is good.
In the Melnice "Baby" the rotor will spin on two radial bearings. This will increase the rigidity of the node and the strength of the entire device. There is a remote ring of 0.5 mm between bearings to the shaft - it will allow the bearings to shift slightly and will create a tension that it is necessary that the node adapts to the voltage inside the mechanism.
Making stator
The stator make a little more complicated than the rotor, since this requires extreme accuracy. Work can be divided into several stages. First, catch the workpiece on the machine, then leave a small technological allowance. To do this, serve the opening of the center to 70 mm, make a circle marking with a diameter of 105 mm on the workpiece, apply central points of future openings. Subsequently, they will create a stator working plane. Markup should be applied strictly according to the drawing.
Indicate the contours of the holes at the top and bottom, and then drill the deaf "windows" of about 26 mm deep. On the machine, remove the allowance that you left earlier and waste the location where the working chamber will be located (105 mm). Turn the resulting workpiece and make the seating, where bearings will be inserted. You will also need to sharpen the groove for the sealing cuff if you are installed, but in practice the device works fine and without this item.
When the stator is ready, you can create threaded holes under the lids for bearings and stator, nozzle and boot box. At the end of the stator as well as the rotor, it is necessary to undergo thermal processing according to the technology described above.
In order for the mill for grinding the grain to work properly, it is necessary to put the coordinates of the stator with thorough accuracy. For this, bolts are used. The rotor during operation should walk easily and smoothly, without jerks and jams. Only when you make sure that all the details are moving as it should, you can make a trial launch of the mill. To do this, it must be fixed on the table or stool so that the device does not fall on the floor.
Making beds
Another important detail of the design is the bed, that is, the base plate. For its manufacture, you can use a thick steel sheet in 6-8 mm. The stator is attached to the stator screws M6, which will simultaneously keep the pipe. It can be removable. To do this, it will be necessary to install the nozzle in the opening of the base, which will correspond to the diameter of the part. And it will be kept in the mechanism only by friction.
To make the nozzle, take the segment of the thin-walled pipe, the outer diameter of which is 28 mm. A product with a round or square cross section is suitable, and depending on this factor in the bed, it is necessary to make a hole of the corresponding shape and diameter.
If you coped with the manufacture of all the above details, make the boot box will not be much difficult. It can be made it from the roofing iron, bending it according to the specified form and releasing the seams. The usual sheet iron can also be used, but the roofing is much stronger and more durable. When the box is ready, install it on the stator and fix two M6 bots.
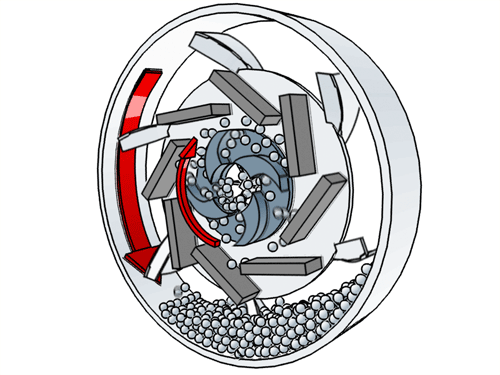
Before you start creating a handmade grain mill, keep in mind that if the rotor is spinning one way, then only the first half of the stator working chamber will be involved. When rotating the rotor, the second part of the camera will turn on the other side. On both sides there is a different number of protrusions, and their dimensions are also different. For this reason, the grinding in the first and in the second case will differ. This allows you to get a flour of coarse or fine grinding depending on your needs. All you have to do is change the direction of the rotor movement.
Installation of electrical equipment
It is clear that to bring all parts in motion you need power. In this case, the power of electricity. Even before proceeding to drinking the components of the mechanism, prepare the necessary electrical equipment. Fortunately, nothing complicated or expensive is required for such a simple design.
You will need an electric motor, a capacitor with a capacity of about 3.8 μF, a fuse and a toggle switch. Install the engine on the plate from the dielectric, and attach the remaining parts there. To make the rotor reversal to the other side, simply switch the capacitor.
Place crushing shafts and motor shaft coaxially. Use a rigid clutch to transmit rotation. In all fasteners, be sure to drill holes-guides under the bolts for adjustment and accurate settings of the shaft position. Make holes also in the bed (base) - they are needed to move.
It remains only to load the grain into the receiving box, substitute the container under the outlet nozzle and make your first grinding of flour at home.
Make such a practical mill under the power not everyone, but this task is quite feasible, even if you have no turning equipment at home. Below is a video of a grain mill, which clearly shows how to make an alternative design option using granite mills and minimal financial investments:
For its manufacture, you will also need special equipment, but even if you order all the details in the workshop, the cost of the device will be significantly lower than the store products.
We told how to make a mill for grain, and we hope that this article will help you to make a flour of our own production for the preparation of delicious and useful food.




Can you make? Phone - eight nine hundred eighty-four, one hundred seventy two, twenty-one, eighty-seven.
Eight, nine hundred eighty-four, one hundred seventy-two, eighty-one, twenty-seven. This is the right number.!
Why make it possible when there are ready-made flour mills for quite sane money? http://vilitek.ru/products/diskovye-melnitsy/diskovye-ekonomichnye-melnitsy-serii-vlm/
Why make it possible when there are mass-produced mills for quite sane money, for example, VLM-2200 per 50 kilogram per hour costs less than sixty thousand rubles, and it serves almost forever