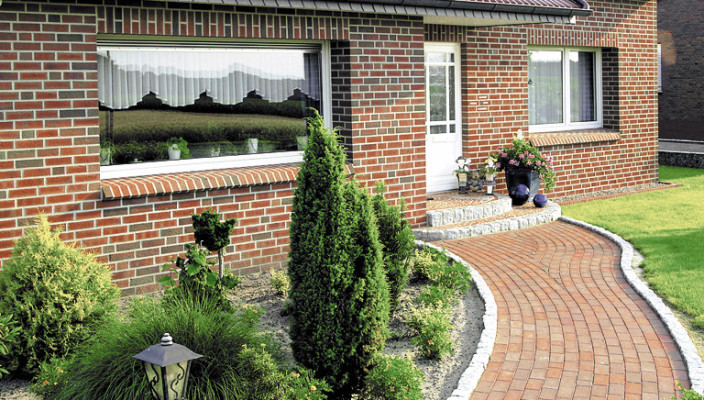
The front part of the building is a business card of the whole house, because It contributes to the formation of impressions of all building. For this reason, the exterior decoration is one of the main stages of construction. At the same time, the finishing material must respond not only to the aesthetic requirements, but also to be practical, perform protective functions. One of the species of finishing materials that meet these requirements are thermopanels. Today, they are divided into four types: PC-1, PK-2, PC-1F and PC-2F. Product data is distinguished with dimensions, color, texture and parameters of frost-resistant tiles. Consider the details of the features of each type, as well as the method of installation of thermopadals.
Content
Composition and features of the material
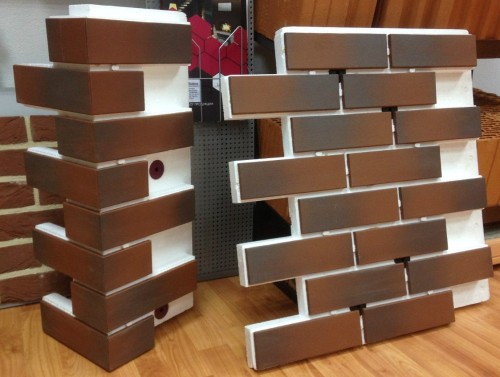
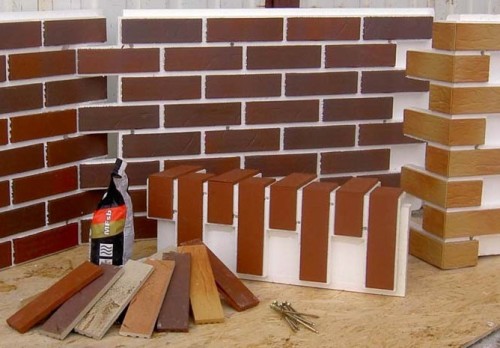
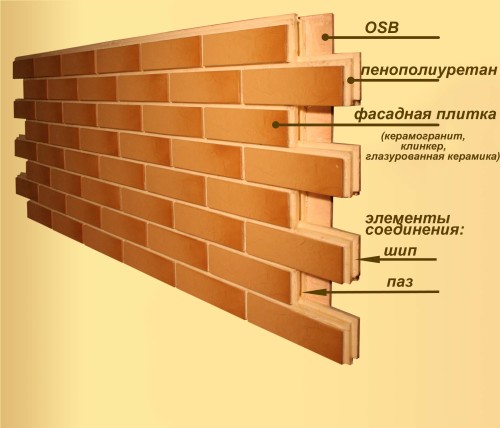
Clinker thermopanels are products that contain in their composition insulating and finishing material, as well as a wooden chip or marble crumb. All layers are tightly tight, resulting in a solid design. Consider composite components in more detail:
- The thermal insulation properties of the panel are purchased due to the presence of polyurethane foam. PPU has resistant to the effects of various dyes, solvents, adhesive compositions. Also, this material is distinguished by a long service life. Over time, it is not amenable to destruction, rotting and damage to fungus. In addition, the PPU is difficult to focus material.
- The second component of the panel is clinker tiles. It is made by two methods:
- by extrusion;
- with the help of dry pressing.
The highest quality is considered a tile, which is made by the second method, since it is characterized by more pronounced functional and aesthetic qualities. A special red or ordinary clay is used as a material for the production of products.
- The third component of the panel is made from marble crumb or compressed wooden chips. Due to the presence of this layer, the finishing material acquires the necessary rigidity. Sheds are made of coniferous wood - larch, pine and ate. This material has good thermal insulation qualities.
When choosing panels, take into account the surface of the walls of the house, as well as the features of the finishing of corners and window openings. On thermopanels, which belong to the types of PC-1 and PC-2, the fasteners are located on the built-in metal profiles. These products should be installed on the crate or on the walls with the maximum smooth surface. Thermal panels of the PC-1F and PC-2F are characterized by more versatile qualities. The presence of the crate is not a prerequisite for the installation of such products. They can also be used on all surfaces.
Clinker thermopanels. Photo:
Advantages of facade panels:
- high strength indicators;
- long service life;
- thermal insulation effect;
- high-quality sound insulation;
- affordable cost;
- wide selection of color scheme;
- a large range of textured variations;
- low weight, which greatly facilitates installation;
- environmental Safety;
- reliable waterproofing of surfaces;
- the presence of special plastic guide panels, which prevent deformation changes of the material.
Clinker facade thermopanels are able to significantly extend the building service period. The application of these finishing elements allows you to save the area inside the house, and the facades decorated with thermocaves do not need additional care. Also these elements protect the walls from moisture. Even with abundant sediments, the integrity of the finish is not disturbed and the material does not lose its protective qualities.
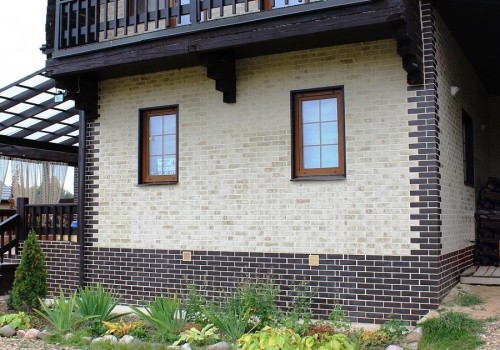
Today, one of the most popular varieties of clinker thermopadals are products in their appearance resembling brickwork. The popularity of such a facing material is explained primarily by its aesthetic properties. The finish made using the imitating brick tile, visually resembles a real masonry.
The installation process does not require much time and is produced in the shortest possible time. An insignificant panel weight makes it possible to perform work on the walls that have a weak bearing capacity. Also, thanks to a small mass of the material, the load on the foundation is practically absent. It is advantageously distinguished by clinker thermopanels from analogs that you lose structure. To finish the base, it is recommended to use special thermopanels.
The installation of clinker panels can be carried out at any time of the year. In the installation technology there are no so-called "wet" processes. At the plus temperature, only the final stage of work is performed - grout. But if necessary, this procedure can be postponed for a certain time.
Montaja technology
Perform the finish of the facade with the help of clinker panels can be completely possible. To do this, you just need to carefully read the sequence of work. Panels are installed on the surface of any material. It can be a wooden wall, brickwork or stone. Thanks to the easy weight of the material in the installation process, reference structures will not be required, as well as carrying out any earthworks.
Tools and materials necessary for installation works:
- perforator;
- bulgarian;
- screwdriver;
- level;
- putty knife;
- dowels;
- mounting foam;
- self-tapping screw;
- strip mixture.
Calculation of material
First of all, it is necessary to determine the required amount of material. This can be done as follows: The area of \u200b\u200bthe working surface should be measured, as well as the dimensions of door and window openings. From the indicator obtained as a result of measuring the walls of the walls, it is necessary to take away the parameters of the openings. As a result, it turns out the total area to be treated.
Focusing on this result, the desired amount of finishing material should be determined. After completing the required calculations, you need to purchase an appropriate amount of mounting foam and silicone sealant. On 20 thermopanels, 1 cylinder foam and 1 packaging sealant are consumed. The grotype mixture should be purchased at the rate of 2 kg / m 2.
Construction of the crate
Installation of clinker thermopanels is carried out in two ways:
- on the crate;
- directly on the wall.
The choice of the mounting option depends on the degree of preparation of the surface of the walls. If the working base is quite smooth, the mount can be carried out without auxiliary structures.
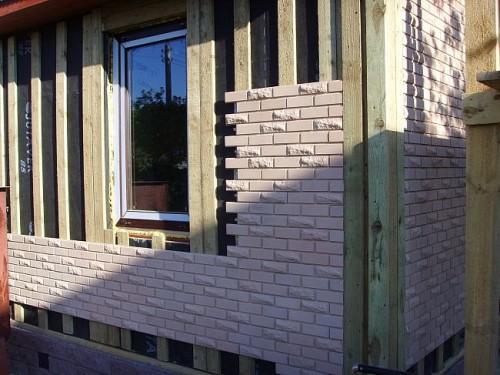
In the presence of irregularities and various deformations on the wall surface, it is necessary to install a lattice of wooden bars. They need to be placed so that each panel is located on three bars. In the process of fastening the bars between them, a distance of 40-45 cm should be observed. Since the wood does not differ resistant to the effects of various negative factors, the bars must be processed by antiseptic and flame assets.
Finishing window openings
It is also necessary to determine the method of finishing the corners of the house and window openings. The finish can be performed in several ways.
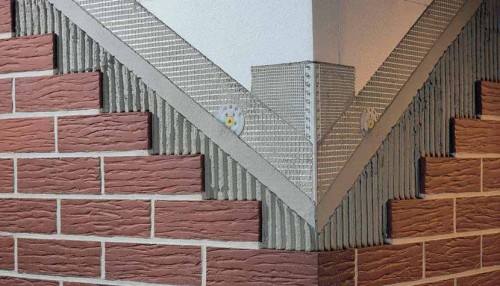
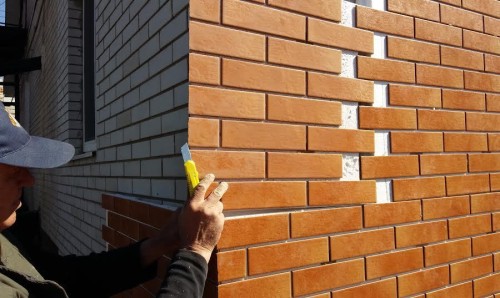
- One of them is the sawing panel under an angle of 45 °. This method is economical, therefore is the most popular. Sawing is performed in production conditions using special equipment. As the advantage of this option, you can also select the achievement in the process of mounting the effect of completed brickwork. In this case, there is no need to install the insert that needs to be attached to using ready-made angular parts. In the process of installing angular elements, the angles are initially mounted, after which the panels.
- Another option is the use of clinker overhead corner parts. In some cases, this method is more preferable, since so corners of the house acquire special aesthetics and relief. To fix overhead clinker elements, a special tile adhesive composition for facades is used. This method of finishing provides the ability to select various textures and colors and achieve the most optimal design solution. Such elements protect the angles from the negative effects of low temperature and prevent the freezing.
- The third way of finishing is the use of elements from small fractions of natural stone or a special decor based on polyurethane foam. Also, for this purpose, special parts are used on polyurethane foam basis, which are made in the form of one brick.
The process of installation of thermopanels
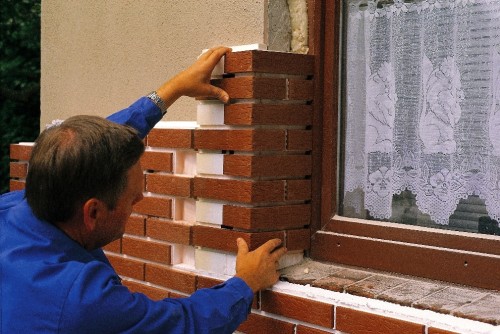
For mounting one thermopanel, six or more screws are required. The panels have a groove-comb connection, so that the docking of the elements is easy enough. If necessary, the material can be cut with a power tool. This allows without much effort to execute the arched elements. Also during the installation of joints it is necessary to process with silicone sealing composition to prevent moisture.
The process of installing thermopanels is carried out in such a sequence of actions:
- Along the base there is a line on which an aluminum profile is mounted. It must be fixed 20 cm below the floor level. In order for the structure in the future, it is not necessary to place the base to be placed close to the breakfast, it is necessary to leave some distance between them.
- Vertical lighthouses are attached on the facade. If you need to put a fragment of the panel itself into the ground, the base profile can not be installed. In this case, a steel corner or wooden bars is used to form a support for the installation time.
- Installation work should be started from the left corner of the house. The panels are placed in rows in the direction from left to right.
- Products are installed at an angle based on the mounting rail or profile. Fixation is carried out by means of dowels or self-tapping screws.
- The seams between the panels are filled with polyurethane foam.
- After the first row of panels space between the wall and the base profile also need to fill the foam. This will help avoid air circulation for finishing materials.
- In a similar sequence, installation of the upper row is carried out.
- The panels are then installed in the same way below up. Fixation is also performed using a dowel, and each element is compacted by mounting foam. If small steps are formed in the joints of the panels, it is possible to eliminate this defect with a special gasket.
- After the installation of the seam is completed, it is necessary to lure a frost-resistant composition. This procedure is the final stage of the installation of thermocaves. But it should be remembered that the grouting cannot be performed at a minus temperature. If weather conditions do not allow the seams right after installation, this can be done after a certain time.
Rules for storage and transportation
Thermopanels are facade with clinker tiles during transportation should be protected from mechanical effects. To do this, it is necessary to observe a few simple rules for handling products:
- Packaging with panels can not be placed on each other. They must be located so that it is possible to read the information on the label.
- The film from the package is removed before assembly work, it is not worth shooting it in advance.
- Store packaging is needed on a flat surface, while they must be located in a horizontal position.
- In the unpacked state, the material can be abide for no longer than 10 days.
- The impact of ultraviolet rays in the panel is extremely undesirable, so in the process of storage, the material should be protected from the sun.
Thus, thermopanels with clinker tiles are a universal finishing material. Along with high aesthetic indicators, these products possess a number of practical qualities. The facade decorated with the use of such panels acquires an attractive appearance, as well as heat-insulating and noise insulating properties. In addition, the finishing material is safe for health and is distinguished by stability to various negative effects. The installation process is affordable and does not require special training or professional knowledge.
How to mount clinker thermopanels on video shown below:

