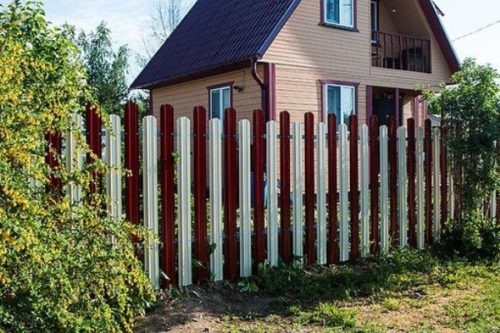
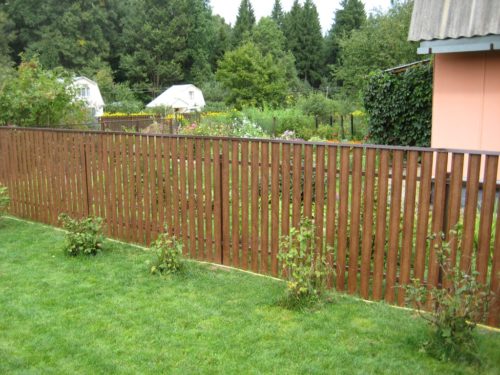
During the construction of a private house, the land fence plays a no less role than the construction of the walls and the overlap device. The fence is the first thing to see visitors to the estate, and on it can be given the first assessment of the quality of construction work. If earlier the fence was a regular stakenik from a low-quality board, which remained after the main construction work, then various materials are currently used to fence the site. On how to set the fence from Ershtrokenik with their own hands, let's tell later in the article.
Content
The advantages and disadvantages of the European
For the production of fences and fences, the following materials are used:
- Concrete plates. Such fences have standard concrete sections. They are installed on special pillars that have a groove.
- Fence from sheets of professional flooring. Refers to one of the most popular designs. Mounted easily, it is inexpensive, has an excellent appearance.
- Ershtroker. Comparatively new material. It is a strip from a galvanized sheet of a small thickness. This sheet is protected by several layers of polymer coating and paint. In principle, the stakenik reminds professional flooring, only has a form not sheet, but planks. This new material has perfectly proven itself and deserved popularity among builders.
This material is manufactured at Metallurgical plants ArcelorMittal and Thyssenkruppp in Belgium and Germany, respectively. Like any other material, the Ershtroker has both advantages and disadvantages.
Of the benefits, you can allocate:
- Large service life. Due to several layers of polymer coating and paint, such material will serve for quite a long time. With proper installation and operation of 50 years - a short time for it.
- Different sizes. Due to the fact that the length of each staketin varies from 0.5 to 3 meters, they can be used to create fences of any height.
- Small weight. Possessing low weight, the Ershrokel is easily transported and installed.
- Beautiful appearance. Due to the fact that in the production of Ershtroker, various coloring options are used, from the usual to imitation of valuable wood, such a fence will look very beautiful and neatly. It is suitable for any design of the house.
The disadvantages of the european practically do not exist, the main among them:
- Weak protection. Naturally, it makes no sense to compare it with a fence from cast concrete or slag blocks. Thin sheet metal is unlikely to stop the one who wants to get into the territory. Therefore, in areas with a bad criminogenic environment, it can only be used as a fence between neighboring sites.
- Clauses between stakes. Due to this, it will not be possible to remain unnoticed for such a fence. If there is no desire for passersby seen the courtyard, you need to install a solid leaf without gaps. However, for those who grow flowers or other cultures on the household plot, it is only on hand. Such a fence will not give a shadow, and will provide normal flowing of flower beds.
Types of European and Mounting Methods
Currently, there are a large number of types of erershther, thanks to which you can make an excellent fence:
- Stakenik "Nova". It is a strip of a width of 115 mm, made of durable galvanized steel with a thickness of 0.5 mm. Each Plank has 16 rigors that allow it to withstand pretty high mechanical loads. The steel is covered with a layer of polymer with a thickness of 25 mkm, which ensures its excellent wear resistance.
- Model "Ekonov". It is a model that is very similar to the previous one. Thanks to a decrease in the width of the plank by 15 mm and rigidity to 12, it was possible to reduce the price of this material without losing the performance characteristics. Staketin length is mainly from 1 to 2 meters. Due to the low price, this material can be used in the country or in a country house. Usually this stakenatnik is mounted with a gap from 10 to 100 mm, but it is possible to install it and skimproof (double-sided installation).
- Stakenik "Light-M". It has a strip width of only 70 mm, and only 6 rigid ribs. It is installed both with a gap and skidding. Due to such dimensions, the material has a low weight, which does not require the construction of a massive design of the fence. Low price makes it possible to use it for the fence of the palisaders, kindergarten sites, etc.
- Stakenik "Barrera". It differs from all the above method of applying a coating on a steel blank. Powder-polymer spraying makes a protective layer very durable and durable. The Staketin length varies from 1.5 to 2 meters, and the width is from 80 to 120 mm.
In addition to the various types of erershther, there are several ways, how to mount the Ershtroker, making it a section of it. The section can be made up of planks of different lengths, creating a fence of various design forms:
- Wave. Stakenists are installed on the span in such a way that their upper end reminds the wave.
- Convex and concave arc. Stakenists are located so that in the middle there are the highest are the lowest, respectively.
- Christmas tree. With this design, the location of the staketin is selected as in the previous versions, and the top edge of the slats has the shape of the Christmas tip.
- Lestenka. This species is the alternation of long and short stakes.
Installation of the fence from Ershtrokenik do it yourself
The main stages of mounting the fence from Evrohhrocket
The process of installing a fence from Ershrokenik is practically no different from the installation of the fence from the professional flooring. The whole process of work can be divided into several stages:
- Development of a fence scheme from erershther. It will help to navigate in construction and choose the desired amount of material.
- Foundation device.
- The construction of support pillars.
- Wire of transverse lag.
Installing the fence from Evro sweeper with your own hands
Many believe that it is not necessary to build a foundation for the installation of the fence. But this is not so. The fact is that in the absence of a foundation under the fence it will be easy to make a subpople. Optionally, it may be a person. Meeting on the threshold of your house with a wild animal or a homeless big dog can bring a lot of trouble. Therefore, before making a fence from Ershtroker himself, it is better to pour a concrete foundation under it.
Installation order:
- The construction of the foundation starts from the trench device. Since the weight of the fence is not too big, the depth of the trench 30 cm is quite enough. The height of the foundation above the zero mark is approximately 30-40 cm. In the field of installation of the column, the foundation width must be increased to be able to lay them with decorative bricks.
- After the trench is dug, a layer of rubble and sand is stacked at its bottom. Next is installed formwork. For its device it is better to use chipboard or OSB plates. Fasten formwork with a wooden bar or fittings.
- Inside, the reinforcing belt from the reinforcement is set, a diameter of 10-12 mm, bound to the wire into a single design.
- Then set the support pillars. For them, they use a profile pipe with a cross section of 50x50 mm with a wall thickness of at least 4 mm. Fix them with welding to the reinforcing belt. When installing a pillar, you must ensure that its position is correct. In order for all of them to stand in the line, first and last install first. Between them stretch 3-4 kapron threads, which will become a reference point for the installation of the rest.
- If the posts are planned to install lighting lights, wiring is turned inside the pipe.
- When the installation of the pillars is over, you can start the pouring of concrete. A solution from a mixture of cement, sand and crushed stone of the middle fraction is prepared in proportion 1: 2: 2. Cement applies 400 grades with slag. It is inexpensive and it will be quite good for this work.
- After the foundation freezes, you can begin to run steel pillars with decorative bricks. The wellwork is applied here. The process itself is not very complex. The only thing you need is to constantly monitor the flattering of masonry. When laying bricks inside, the mortgages are installed to which lags will be welded. They are made independently of the reinforcement and a piece of steel sheet with a thickness of 4 mm.
- After laying a row, the mortgage is welded to the pipe and laid brick. They must be located at one level. Usually, 3-4 lags are used to fasten the stakenice. Accordingly, 3-4 mortgages are installed on each pillar.
- After the pillars are covered with bricks, you can welcome lags to the mortgage. Before you welcome each of them, and the position is checked by level.
- Next you need to paint all the metal parts of the fence in the color of the stake. To begin with, they are ground, and after drying the primer paint in two layers.
How to fix the ereshore on the fence
The next step is mounted by the European passman:
- Each plank is screwed to lagham 2 self-draws. Accordingly, if Lag 3, the attachment points should be 6. The question is, the better to fix the Ershtroker, Discussion. Many make it with the help of self-tapping screws, while some prefer a bolted connection.
- Self-tapping screws should not differ in color from the stakenik. If there were failed to find such on sale, you can paint the usual fastener in the desired color. It is better to use stainless steel screws. They are not subject to corrosion, and will not spoil Staketin. Using usually steel, rust from self-drawing can transmit the bar that will need to be changed.
- Standard gap between stakenis 3 cm, but when installing, it is necessary to calculate its value so that the slats are set uniformly. Before starting the installation on the lags, marks are made for which each staketine will be attached.
- Installation process is quite simple. At the top point, the through hole drill with a diameter of 3.5 mm, which screws up the self-tapping screw. Then its position is adjusted and the lower self-tapping screw is screwed, after which everything else. After that, you can install Ershtroker on the gate with your own hands.


