
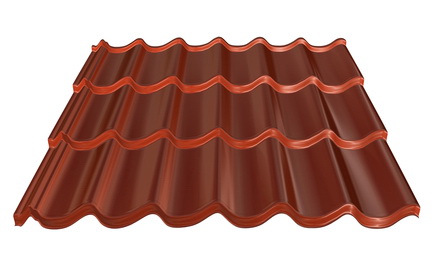
Pronastil - one of the most popular roofing materials. It distinguishes the range of latitude with a large price range, as well as a number of other advantages - environmental friendliness, durability, visual appeal, ease.
Content
Where you can use the profile sheet?
Run Decking floor roof to the easiest country. However, the correct choice of the appropriate category, it is perfect for solving architectural design of the project, and for the creation of an industrial building roof. 
How to choose a suitable profiled?
When choosing a trapezoidal sheet as the main criteria for the type of use of the building, the possibility of financial costs, angle of slope to the strength requirements.
Choosing the type of material
- Black metals. Professional flooring this type is the most affordable in relation to the cost. Most often, it is used to arrange the roof of the garage, utility rooms, but, in principle, it will be suitable and as an economy option for creating a roof of the building on the garden-cottage plot. Mandatory condition - painting to warn corroding.

- Galvanized steel sheet. Production is carried out using cold rolled technology with subsequent hot galvanizing. Most often apply steel galvanized flooring for the design of canopies, roofs of garages, household facilities and inexpensive roofing at home.

- Steel sheet with polymer coating. It has high strength characteristics, so it is perfect for any type of roof.
- Non-ferrous metals. The cost of overlapping the roof of copper and aluminum made up of copper and aluminum. But the technical parameters exceed the indicators of other categories of professional flooring. Used profile sheet of non-ferrous metals for different types of roofs.


Important! A separate group is a braified flooring bent, perforated, embossed used for decorative roof design. The technical characteristics of such material depends on the quality of the feedstock.
Categories of profiled sheet material
In addition to the type of material, pay attention to the category labeling. The following are suitable for the roof:
- C-21 - durable material, thickness and rigidity of which allow it to apply it to arrange a roof

- C-44 - is different, in addition to comply with the requirements of all parameters of the roofing material, the presence of additional rigid ribs


Important! In addition to the wave height at 21 and 44 mm, other species are used, the range of parameters of which from 8 to 35 mm. These profile types are suitable for creating a light roof.
- NS-35, 44 - produced precisely as roofing material. Creates reliable protection against any atmospheric influences.


Important! When choosing the material of these categories, take into account the conditions for creating the crate - no more than 80 cm.
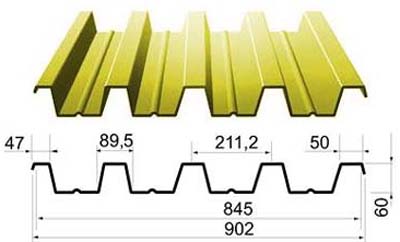
- H-60, 75, 114 - also with stiffeners. The main directions of use - the capital of the roof and ceilings intercommunication.
- RN-20 - apart from the respective indicators strength, this material is equipped with gutters for the collection and outflow of water.

Important! Price overlapping roof Decking completely depends on your design requirements and the selected material.

Tilt angle
Note the table below. 
Make the choice of material, based on the norms of the respective category of material the slope of the roof.
Other selection criteria
When buying check the quality of the material. Pay special attention to the absence of defects in the form of chips, bumps and scratches, the accuracy of parameters corresponding to the color sheet. 
Preparatory work
The volume of preliminary work is often time-consuming and takes more time than the roofing material itself installation process. The two main objectives of this process - to build a solid foundation for the frame and the roof decking to maintain the integrity of the material.
Main steps
- transportation sheeting
- The acquisition of all necessary materials and tools
- Creating crates and waterproofing layer.
Important! Before starting any work, familiarize yourself with the roof slab floorings.


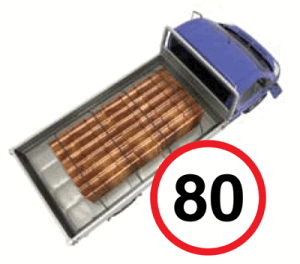
Transporting profiled sheet
To avoid damage during transport, given the size of the sheets of corrugated board, observe the following guidelines:
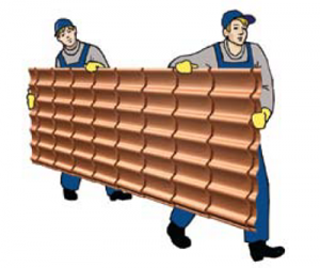
- When the hand Persons handling a single sheet - 1 for every 2m length.
- Place the smooth material only on a solid base, whose length corresponds to the length of profiled sheet or exceeds it.
- Vehicle speed during transportation - no more than 80 km / h, without sudden braking.
- Do not dispose of the sheets and avoid any mechanical impact during transport and unloading.
- Eliminate the folding over of the material.
- Transfer occurs in the vertical position of the sheet, carefully lifting it above the ground.


Materials and tools
- profiled sheets
- Mechanical, ridged strips
- Boards 30h100 mm
- Bars 50x50 mm
- Bars, whose cross section is 10-20 mm greater
- Antiseptic solution for wood
- waterproofing foil
- diffusion membrane
- water-repellent sealer
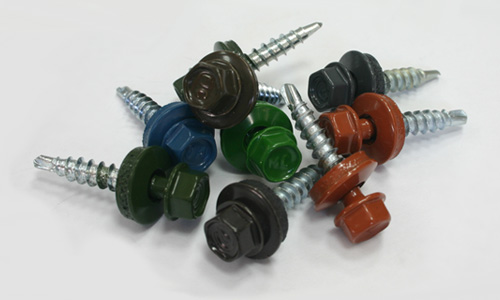
- Roofing nails, selflessness
- Self-tapping screws
- Screwdriver
- Drill
- Level
- Roulette
- Hammer
- Screwdrivers
- Mild
- Stapler with brackets
- Circular Saw
- Hacksaw for metal with small teeth or electronics.


Important! Self-tapping screws should meet special requirements:
- material - galvanized steel
- neoprene Sheers
- in the heads there are grooves for electric drills
- diameter - 4.8 mm
- length - 28-40 mm.

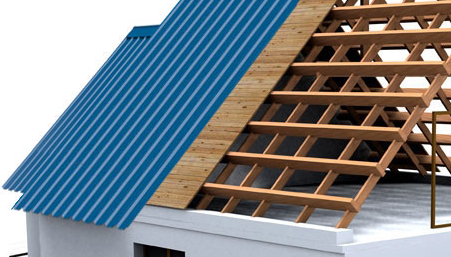
Creating a frame - crates
When covering the roof, the roof floor should be carefully carefully attributed to the process of mounting the crate. The degree of reliability and strength of the roof will depend on the quality of the work performed.
Sequencing:
- Use a weak-sparing way or solid.
Important! To increase the frame strength, perform a 2-layer design from the fragrant and solid flooring of the crate.
- Treat all wood materials with antiseptic solution.
- Wait for complete drying.
- Create waterproofing by paving the film horizontally, withsting the distance of the allen layers at 15 cm.
- Do not pull the film, but do not allow significant sagging.
- Secure the braces to the rafters using a stapler.

- Create the first layer of the crate of the bars with a cross section of 50x50 mm.

- Install the first lap of the crate on the cornice line.
- Use for this bars with a large cross section.
- Make sure the line accuracy is accurate.
- Fasten with nails and self-drawing.
- Set all the subsequent crate elements in accordance with the appropriate step (see Table above).


Important! The territory of the skate, endand, chimney, ventilation and fire holes. Substantly for solid technology.

- Fastening Perform nails and self-stairs in several places.
- Create 2 layer of crates with a cross section of 30x100 mm.
- Fastening make nails.
- Tension over the crate of the diffusion membrane.

- Fasten nails with a wide hat.


Installation of the profile sheet of the main surface of the roof
Install the professional flooring, observing exactly all the terms of the instruction. This approach will ensure the reliability of the design and a long period of operation.
Sequencing:
- Create special lags for comfortable lifting profile sheets on the roof or use the sliding staircase.
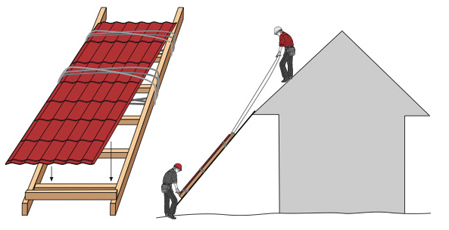


Important! Perform lift only one element.

- Remove the protective film.
- Dress protective gloves.
- Set the first roofing sheet, ranging from one of the ends.
Important! Observe the drainage groove position on each fragment - downstairs.
- Lower it at the line of the cornese sweep by 3.5-4 cm, also make a small indent for the end line.
- Align the horizontal line.
- Make a temporary fastening of 1 screw at the sink and skate.
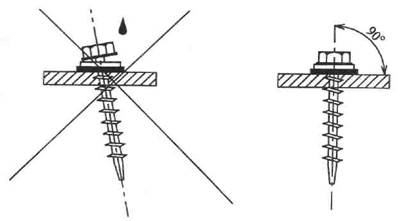

Important! After drilling, remove the resulting metal dust with a soft pile brush to prevent the appearance of rust.
- Set the following sheet by a similar scheme.

- Align over the horizontal line of the sink.

Important! If the length of the sheet does not match the skate length - first install the lower fragment. In the future, observe the direction of the allen.

- Create with self-taverns in the direction of the sink to the skate, withstanding a step of 40-50 cm.


Important! If the material thickness is small - the hole is drilled by the edge of the self-sharp (it is specifically sharpened). If a thick professional flooring was chosen - make preliminary drill holes, then screw the fasteners.
- Set 3-4 sheets according to this technology.
- Align the design along the cornice line.
- Perform the final mount to the frame of the crate at the bottom after each second-third wave.


Important! Do not create an overly tight fastening. This can lead to sheet strain and necessityrepair. Calculation of the number of fasteners - 6 pcs / m2.


- All sheets are attached to the brand, the size of which is determined by the angle of the skate:
- 200 mm - when bias up to 15 °
- 170 mm - with an indicator at 15-30 °.

- At the end of all installation work, for the creation of the most reliable attachment, additionally fill in all the gaps of the adhesive water-repellent sealant.

Important! Moving on the roof, follow by stepping in the deflection of corrugations in soft shoes.
- With the appearance of chips or other minor damage to the outer surface of the material - treat the repair enamel to restore the attractiveness of the coating and provide long-term operation without corrosion.


Installation of complex seats
Special attention in the process of overlapping the roof of the corrugation will pay the design of difficult places. 
Hearing Window Learning Technology
- Cut the sheet at the lower end of the suspension into two equal parts.
- Install the bottom.
- Put the bottom bar.
- Set the following part of the roofing sheet.
- Perform all fastenings with self-drawers.


Principle of arrangement of acts
- Prepare a 4m line bar.
- Install on the end in the direction from the sink to the skate.
- Observe the nest of 50-100 mm.
- Fall on the profiled sheet withstand at least one wave distance.
- Fasten to the ridge of roofing material and the end bar with methms step in 1m.


Circuit design
- Prepare the skate planks and the appropriate profile seal.
- Install, observing a total of 100-150 mm.
- Fastening to corrugation and skate bar.
- Fastening step - 20-30 cm.
Important! Installing the skate bar Start from the side opposite to the frequent effects of wind and atmospheric precipitation.
Important! Be sure to install snowstanders to avoid emergency situations, damage the facade of the building and prevent harm to health.


Video overlap of the roof of a corrugation
View the video applied below. This will help you in more detail understand the entire process of installing the professional flooring.


