In order to quickly and with minimal cost to repair the facade of the building, choose the material, the installation of which can be done without the involvement of specialists. Such material is siding. About his varieties and how to work with him, goes on.
Content
Why siding? Feature material
In favor of choosing such a material for cladding walls, its positive characteristics say.
- Environmental safety: Siding is chemically stable, does not allocate substances harmful and environmental.
- Fire safety. Wooden siding is treated with antipirens, vinyl does not support burning.
- Resistance to fungi, mold and rotting. Antiseptic processing increases the service life of wood siding.
- Siding is not afraid of temperature drops, it is not deformed if the installation is properly executed.
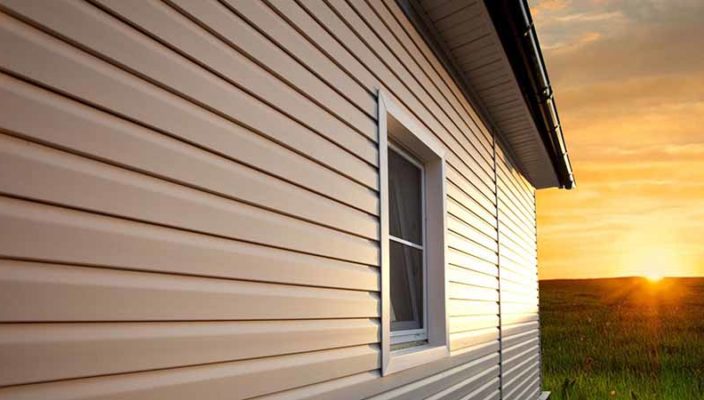
- Aesthetic attractiveness: Siding successfully imitates a wooden log house. After cladding the walls become perfectly smooth. Behind the panels you can hide electrical cables, water pipes. The wide palette of colors and shades allows you to choose a material combined with other objects located on the back area.

Manufacturers offer siding of various colors and sizes
What is necessary for cladding wall siding
Distinguish the following types of siding:
- vinyl;
- metal;
- fibro-cement;
- wood.
All listed materials are attached to the crate, mounted from wooden rails or metal profiles.
Tip: For the crate device, it is better to choose a metal profile. It allows you to create a more durable and durable frame. Such a profile is easier to mount against the wall.
If the selection of material for the crate in favor of wooden plates, it is necessary to exclude wood with the following defects:
- cyanosis;
- curvature;
- traces of damage insects;
- drumsiness;
- dissection of material and cracks.
Before mounting, wooden rails are processed by an antiseptic agent.
In order to hide all the irregularities of the base, the crate is fixed at some distance from it using the suspension.
Installation of crates

Metal profile lamp
Technology provides the following actions.
- We prepare the base. It is necessary to dismantle the elements of the facade finishing: wooden shutters, platbands, covering plaster and facing tiles. It is necessary that the lattice is attached to a solid base.
- We apply markup on the basis of the fastening of the vertical elements of the crate.
- To the base the suspensions are fixed using dowel-nails or self-tapping screws (selected depending on the base material).
- Installing vertical guides after applying. Vertical wooden rails or metal profiles are screwed to the suspension to the suspension. Mount the crate with the installation step - 0.5 m.

Wooden Retail Creek Scheme
Guides are installed subject to the rules.
- Begin installation from the corner - on both sides at a distance of 50-70 mm. This is necessary for mounting an angular profile.
- The position of the guides control the level: it should be strictly vertical. Small (up to 3-5 degrees) deviations on the parties are allowed.
- Near the angles of window and door openings, as well as the arches and niches are also set by the guide.
- For drainage, additionally install the guides.

Fastening the rail on the suspension
Your attention a video about how the walls are insulated.
Installing the starting profile for siding mounting
In order to fix the bottom panels, mounted JPRFILI (starting). They must be located strictly horizontally, as the quality of the wall surface depends on it. Work is performed in stages.

Starting profile attached to the vertical guide
- We define the horizontal from which the installation of panels will begin. I put up 5 cm from it and put a marker mark on a vertical guide.
- With the help level, we make the corresponding marks at all corners of the house.
- Between the marks stretch the cord and make marks around the perimeter of the house.
- On the vertical guides, we mark the position of angular connecting profiles. To do this, the profile is temporarily set to the place of attachment and outlined its marker boundaries.
- We postpone 6 millimeters from each border of angular profiles to the sides or cut the nail strips (they are at the edges).
- Adhering to the marked borders, secure the starting profile to the vertical frame elements.

Installation of the starting and angular profile
ATTENTION: To avoid deformation of profiles as a result of the temperature drop, between adjacent elements it is necessary to leave a gap of 10 mm.
Installation of angular profiles
The work is performed in the following order.
- Determine the level of fastening of roofing (sofit). This is necessary to designate the upper boundary of the angular profiles.
- Recovering down from the marker marker 3 mm, set the angular profiles and fix them in the upper part to the guide screws. We mount the outer angular profiles so that their lower edges are in the grooves of the J-profiles.
- With the help of a level or plunder, correct the position of the angular profiles: it should be strictly vertical. We screw the screws into the nail straps of profiles over their entire height. The distance between the self-drawing is about 20 cm (but not more than 40 mm).
- We extend the profiles if the height of the angles exceeds 3 m. To do this, cut the nail strips of the lower profile so that the upper profile is superimposed on it with the allen 25 mm. Crimping is performed by metal scissors.

Building an angular profile
Tip: Angular Profile for economic considerations can be replaced by docking two J-profiles. The loss of tightness is eliminated by the rolled insulating material, which is glued in the corner.
Mount the internal angular profiles by analogy with external elements. Self-tapping screws with a step of 20 mm and necessarily in the upper and lower part (at the edges).
How passing siding are framed
Operactions in the same plane with the facade are made in compliance with the following technology.
- The waterproofing material is stacked.
- We mount the framing of the openings using J-profiles.
- We perform connection profiles.

Design of openings
In order for the angles of the openings to be decorated qualitatively, we carry out the following.
- On all sides of the upper profiles, cut the vertical sections so that horizontal areas remain (on the profile width).
- We drive horizontal sections down: it will close the hole in the lower profile and will prevent the penetration of rain moisture.
- Cut the plastic sections on the side profiles so that they do not interfere with the dock with the platband or the window frame.
- Connect profiles.
The connection of profiles with a navigate (window frame) at the bottom of the opening is performed similarly.

It is allowed to finish the angles of openings and arches using the starting profile
If the openings are recessed in the facade, with their design we use similar techniques. It is important that the rejected bridges block the way of rain moisture to inside the elements of the cladding.
Tip: Speaks of windows in-depth no more than 200 mm, it is recommended to make up with the help of coil planks.

Siding Montage Technology
Setting the first siding panel
Using the tips for cladding specialists by siding, we begin work with the wall cladding, the most hidden from the eyes. It is necessary to learn how to fix the material correctly and avoid further errors. Adhere to the following rules.

First Panel Installation Scheme
- Siding panel insert simultaneously in the grooves of angular and starting profiles. It is important that between the panel does not rest in the grooves, and was fixed with a gap of 6 mm.
- The magnitude of the gap may vary depending on the ambient temperature: during the summer installation, 6 mm is sufficient, in winter, a distance of at least 9 mm is required.
Continuation of siding mounting
Mount the rest of the siding by analogy with the first panel. In this case, we comply with the following rules.
- Periodically, using the level of the control panels: it should be strictly horizontal.
- Cut the extra sections when lining the wall with openings.
- We use punch and hooks to reliably connect panels.
- We establish the finishing bar at the bottom of the opening lying in the same plane with the wall.

Panels set from bottom to top controlling their horizontal
How to smack siding panels
In the event that it is necessary to use cutting siding for cladding less responsible walls, we increase the panel by any of the methods below.

Siding Panel Splicing Options
- We use H-profile. We select the panel of the same length in such a way as to docile them with a common connecting H-profile. By installing siding panels in the groove, leave a minimum compensation clearance of 6 mm.
- We connect the brass. To do this, it is necessary to crop the fragments of the panels (fastening frames and locks) so that during the docking of the two elements it is formed a total of 25 mm.

Splicing of panels It is advisable to perform on an invisible section of the wall
Installing siding panels under the roof
Montage of siding under the roof is associated with the problem of the edge of the edge circumcised over the width of the panel. Installation of the top panel is performed according to the technology described below.

Installation of the upper panel under the roof
- Krepim to roofing horizontally j-profile groove down.
- We measure the distance from the lock groove of the fortified penultimate panel to the top of the J-profile.
- We subtract 2 mm from the result obtained.
- By the final size, cut the upper panel from the side of the lock connection.
- So that the cropped edge of siding well kept in the groove of the J-profile, we cut it into several places and flexing about 10 mm at right angles. Such hooks must be every 200 mm along the entire length of the panel.
- We establish the prepared panel in the lock of the lower element and, slightly bent, we bring to the top profile.
Facing the frontone siding
Mount the fronton according to the following algorithm.
- Confirm on the perimeter starter or j-profile. If the liner is also decorated with siding or vinyl sofits, the starting or J-profile can be replaced by the initial or J-profile at the top of the front.
- Cutting the left and right edges of the panels at an angle corresponding to the corner of roofing rods, mount them above the specified technology. Self-tapping screws set in the middle of the slot. Observe the rule that regulates the magnitude of compensation gaps.
- The top of the last (top) panel is fixed using self-stores directly through the material. Self-pressing cap is closed with a plastic plug, selected in color.

Panel mounting diagram when finishing the fronton
General Siding Mounting Rules
Regardless of what type of siding and what material it is made, it is recommended to adhere to certain rules during installation.
- The self-tapping screws are tightened in the center of the holes of the fasteners.
- Screw the screws are not tight so as not to deform the panel and maintain the possibility of compensating for temperature expansion.
- Panels are mounted from below.
- There are compensation gap between adjacent elements to prevent temperature deformations.
- Hilhols with zinc coating are used for fastening siding from wood. It is necessary to avoid rotting wood.
- Facing the walls of recently built buildings is performed after their shrinkage.

Your attention is a visual demonstration of the technological process - video, how to install siding from Vinyl, using the advice of a specialist.


