The decoration of the ceiling apartment is one of the most important steps of repair work. The entire appearance of the room depends on the quality of the ceiling finishes. Unfortunately, in the construction of both private and apartment buildings, the smooth of the overlaps is not given sufficient attention. Especially this "sin" houses of the Soviet building, when the construction of the quality of work was thought at the last moment. With small deviations on the plane, align the ceiling can be conventional plaster. This process is very laborious and complex. Newbies rarely get a high-quality surface from the first time. In addition, the installation work is necessary in several stages.
Content
- What is plasterboard, its advantages and disadvantages
- Materials and Tools for Mounting Plasterboard Ceiling
- Mounting frame of plasterboard ceiling
- How to mount plasterboard on the ceiling
- Primer, putty and painting ceiling of plasterboard
- Installation of plasterboard on the ceiling with your own hands: video
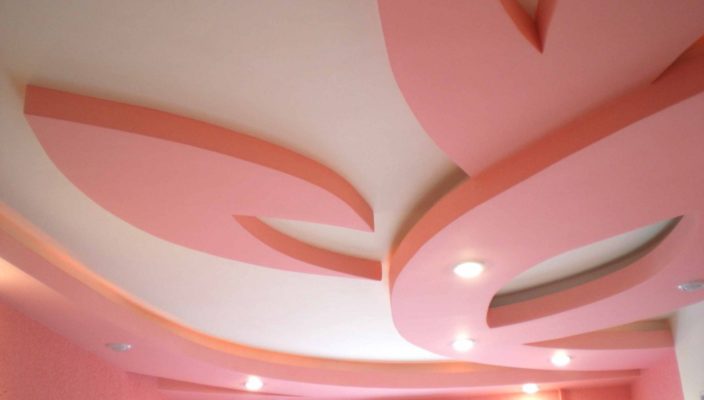
If the ceiling height differences are very large, then bring it into a normal form with dry construction mixtures will be problematic. Such a surface can be aligned only with the installation of a suspended structure. The advantage of the suspended ceiling is that under it you can hide engineering communications, make a multi-level design, install internal lamps. The disadvantage can be considered the fact that it "grows up" space, so in low apartments with a ceiling height of less than 2.5 meters, the use of such a design is not desirable. For the decoration of the suspended ceiling there are a large number of different materials. However, plasterboard is currently considered the most popular. How to properly make a ceiling of plasterboard with your own hands, let's tell further.
What is plasterboard, its advantages and disadvantages

Plasterboard is a standard sheet, which consists of two layers of cardboard and a sheet of gypsum between them. For the ceiling decoration, the so-called "ceiling" plasterboard is used. Its panels have a smaller thickness in comparison with wall, and, accordingly, less weight. Naturally, you can mount the ceiling and wall panels, but in this case the frame must be reinforced.
Like any finishing material, plasterboard has its advantages and disadvantages.
To the first one can attribute:
- Extinity of the surface obtained. With the help of drywall, you can even align the most uneven ceiling. In this case, the surface will already be suitable for finishing.
- Easy installation. In comparison with the plaster, repairing the installation of a plasterboard ceiling with their own hands requires much less labor.
- Easy processing. Plasterboard is the best material in terms of processing. It is easy to cut, breaks. From it you can cut out the figure of any complexity.
- Fire safety. Since the main part of the sheet is plaster, which does not support combustion, this material is absolutely safe.
- Moisture resistance. This advantage applies only to a special type of plasterboard - moisture resistant. Such material can be used to finish the ceiling in the bathroom.

Of the disadvantages of drywall for mounting the suspended ceiling, you can allocate:
- The device of plasterboard ceilings determines the need to mount the supporting structure. For any suspended ceiling - wooden, plastic, tensioning from PVC film requires a framework.
- Fragility material. A sheet must be treated very carefully. Otherwise, it can easily break.
Materials and Tools for Mounting Plasterboard Ceiling

In order to make a hanging ceiling of drywall with their own hands, it will be necessary to purchase some material, as well as have a simple tool. There are not too expensive materials for work, but you can not buy a tool with it, but to rent.
Materials for plasterboard ceiling will be needed:
Steel stainless profile. It needs two types:
- UD - Used to install the ceiling perimeter. The bypass profile, as it is often called, will hold the longitudinal planks to which the sheets of plasterboard will be attached.
- CD - wide profile. It makes a cream of a plasterboard ceiling.
The number of profiles is determined by the ceiling sizes. The cutting ceiling frame case is set in such a way that:
On the width of each sheet (and its width is 1.2 meters) accounted for at least 3 profiles.
The junction between the sheets of plasterboard must be on the profile.

The following materials are still needed:
- Steel suspensions. Need for mounting profiles to the ceiling. Installed in at least 800 mm increments.
- Fast mounting dowels. The most optimal option is 6 x 35 mm. We are necessary for fasteners of steel suspensions to the ceiling, and the bypass profile to the walls.
- Small screws "Seed" to connect steel profiles among themselves.
- Self-tapping screws for fastening drywall to the profile.
- Paint mesh. It is necessary for reinforcing the seam between the joints of the plasterboard sheets.
- Finish gypsum putty.
- Primer deep penetration.
- Paint is a water-emulsion.

From the tool you will need:
- Rule, level, roulette, square, greasy cord.
- Perforator or shock drill, electroretrier with a set of bit.
- Knife for cutting plasterboard.
- Spatula, a greasy rink, a trowel with a set of grids for surface grinding, painting brushes, a mixing nozzle on a drill to mix the solution.

Next, consider how working with drywall do it yourself.
Mounting frame of plasterboard ceiling

The frame is mounted in the following sequence:
- Start mounting a plasterboard ceiling is necessary with the preparation of the drawing. It will be more convenient to consider the need for materials, challenge the location of the structural elements. Next in one of the corners the zero mark is lit. It is she who will be the level of suspended ceiling. Typically, the ceiling is lowered by no more than 100 mm. This is enough to mount point lights and pave the necessary engineering networks.
- From this point with a level and pencil, a line is laid throughout the perimeter of the room. It will be an enabling profile that will be installed.
- The profile themselves are fastened with fast mounting dowels. It consists of two parts - a plastic dowel and a steel nail. First, the profile is applied to the line, through it using a perforator, a hole in which a dowel is inserted. After that, the last nail is driven into the latter. In the same way all the water profiles are attached.
- Next, the position of transverse profiles is placed. They properly located in such a way that the joints of the sheets of plasterboard were in the middle of the profile. Since the width of the sheet is 1.20 meters, then profiles are installed in 0.6 meters increments.
- The standard length of the profile is 3 and 4 meters, therefore, if the width of the room is more, they will have to docile. It is necessary to draw attention to the fact that the length of the leaf sheet of plasterboard is only 2.5 meters. Therefore, the entire width of the room may take more than 1 sheet. The transverse junction between them should also be on the profile. For this, longitudinal profiles are connected by transverse.
- On the ceiling, the installation points of steel suspensions are placed. When all the preparatory activities are finished, you can start assembling the frame. Profiles are connected using small screws. Work is simple, however, it is necessary to perform it qualitatively. The quality of the future ceiling depends on the correctness of the frame assembly. When securing profiles, you must check them in terms of level.

How to mount plasterboard on the ceiling

When the frame is ready, the necessary communications are becoming under it: wiring, ventilation channels, etc.
Although the leaf itself weighs a bit, laying the plasterboard on the ceiling must be carried out only with the helper. It is applied to the profile and is screwed with the help of self-samples. For the convenience of mounting in the middle of each sheet, spuning the screws of the screws. If profiles are installed correctly, the fasteners will accurately go into it.
In sheets where point lamps will be installed, the openings of the corresponding diameter are made before installation using a crown cutter or a simple knife.

Primer, putty and painting ceiling of plasterboard

Facing work:
- When plasterboard sheets are installed on the frame, they must be perfectly aligned and painted. With a correctly mounted design, only a thin layer of finishing putty is needed to make the surface absolutely smooth. The first thing to the joints between the sheets close up by a painting ribbon.
- Next, the ceiling is ground. Make it with a large painting brush. Pruning must be carefully without leaving dry places.
- After the primer gets free, you can start putty. The first thing is preparing a solution. Its consistency must resemble the sour cream of average yield. A solution is prepared by adding a mixture into water with constant stirring. It is worth remembering that the putty will quickly dry, so it should not do a large amount of solution.
- A spacure is applied to the spatula evenly throughout the surface. After the end of the work, she is given time to dry. Next, it is grinding with a special grid. Work is dusty, so it is necessary to spend it in the respirator.
- Then in places where there are irregularities, another layer of putty is applied, which after drying it is spoiled. On the perimeter of the ceiling glued decorative baguettes. As glue, you can use a putty solution.
- Next, the surface must be thoroughly projected and you can start painting.
- Painting is carried out using a painting roller. Inaccessible places, as well as baguettes are scratched with a painting brush. Apply 2-3 layers, leaving the time to dry each of them. The first layer is applied along the room, and the second is perpendicular to the first. The last layer can be applied in any order.


