Production of garden tiles - the process of rather laborious, but interesting. From homemade tiles you can lay out garden tracks, make a coating on the terrace, neat borders for flower beds and flower beds. In this article we will talk about how to make garden tiles with your own hands.
Content
Types of garden tile
There are several types of garden tiles depending on the materials from which they are made. Unfortunately, not all of them can be done at home. So, the polymer garden tile is in great demand. It is manufactured by pressing a special mixture of plastic and polymer additives, and for this you need the appropriate technique and skills.

But to make garden tiles, it is possible to use polymer forms to fill the cement mixture, but we will tell about it in more detail just below.
Plastic tile also requires special production conditions, but its appearance is not so aesthetic as in the polymer. It is more suitable for temporary use during construction or during seasonal accommodation in the country house.

Rubber garden tile is another kind of product, to make that with your own hands it will not work. The cost of rubber tiles is quite high, but it does not count its advantages. Not only is the coating easy to assemble like a puzzle, it can, if necessary, dismantle for transfer to another place or shelter for the winter. Rubber does not slide and absorbs blows when walking, removing the load from the joints. Usually it covers playgrounds so that children do not receive serious injuries when falling.

As an alternative to rubber, a polyvinyl chloride modular garden tile is often used. It is capable of withstanding strong constant loads, does not slide, easily mounted, and its operating time with proper laying is almost eternal. In the garden, such a tile can be seen parking space, an open-air terrace, to build comfortable tracks or lay out the porch.

But there is one type of coating, which can be easily made with your own hands - sidewalk garden tiles. She will serve not one year, even the harsh Russian winter, heavy rains, the passage of garden equipment, etc. In addition, you can give tiles any shape and harmoniously enter it into an existing landscape.
Making paving slabs
Of course, it is much easier to buy ready-made pavement tiles and lay out the tracks out of it, but much more pleasant to work with your own hands, find additional useful skills, and even save an impressive amount.
In addition, the reasons to make garden tiles with their own hands (video) can be a lot. For example, you do not need a large number of items, but only a little enough to choose a neat track from the wicket to the house, make a cozy patio or decorate the courtyard.
If you do not have a personal cargo car, then the cost of transporting and loading tiles can be unforeseen high, especially if we are talking about large volumes. Finally, if you want to create something truly original and beautiful, you can do it only with your own hands.
Tools and materials
For the manufacture of homemade garden tiles, it is necessary to stock materials and make a form for fill. Any tile of this type is made on the basis of cement-sand mix. From the brand of the cement used, the performance characteristics of the product (strength, durability) are dependent. So, in order to make high-quality garden tracks, according to which it will not scary with a wheelbarrow or accidentally drop the shovel, it is recommended to use cement at least M400.
Useful advice: If you add plasticizers to the mixture, you can significantly increase the strength of the tile, as well as improve the remaining characteristics. For decorative purposes in cement, you can add pigments, then the tiles are obtained multicolored.
A couple of words about forms for fill. Today, there is a lot of variants of polymer odds for creating paving slabs at home, but you can move and save on this moment. For example, cheap plastic trudes for products have suitable dimensions and a neat rectangular shape, so why not use them? To speed up the manufacturing process, use several molds at once.

To make garden tracks from concrete, it would be possible to simply install the formwork, but pour everything inside the cement mixture, but the plates made using forms are a number of significant advantages:
- The mixture, filled with a monolithic piece, is sure to crack, if not immediately, then over time, especially if it does not strengthen the reinforced grid.
- The tile form sharply reduces the cost of materials - in fact, you only need to purchase or make the shape and buy cement.
- You will not need to think and spend money on the delivery of finished tiles - everything can be done on a plot where construction is underway.
- With the help of a personally made form, you can make unique products, "subsidence" by them specifically under the landscape and design of your site.
- You can make the tile of the thickness and strength you need.
- Quick terms of manufacture - There are forms on sale that allow you to pour tiles not separately, but at once large segments, without loss of strength, which will significantly speed up the pace of work.

Buying a form or plastic tray for products is completely optional - you can make a frame for filling the desired dimensions using simple boards. To find out how this is done, watch the video below:
And the last version of the self-made form is a frame of leaf iron. If you have an old wooden barrel on the plot without a case, boldly shoot them and make a shape for a garden tile imitating a natural stone. To do this, unleash the metal so that its outlines are smooth and resembled the boulder by the sea. If there is no hoop, you can use galvanized iron. Put the shape on the prepared land, climb a 5 cm and remove this soil layer, then moisten the recess, pour a layer of the broken brick for drainage and pour the cement solution.

Manufacturing technology
So, back to the usual paving slabs. If you learn how to pour the classic tile, there will be no problems with the rest of the ways, and you can even invent your own.
How to make tiles for garden tracks:
- In a large capacity, mix the cement with sand in a 1: 3 ratio.
- In small portions, pour water into the mixture, stirring intensely (for this it is better to get a construction mixer). Add water until the consistency of the solution becomes like a dense dough - it should not be a lump, but not liquid to not slip from the spatula.
- Prepare forms (it is better to immediately use a few) - lubricate the inner surfaces and walls with waste machine oil. The oily oily layer will not allow the cement to stick to the form, and you can easily remove it after hardening the tiles.
- Fill the shapes with cement mortar, slightly pressing and mechanical compositions to prevent the formation of voids. Rovice the back side, that is, the one that "looks" on you, is completely optional - the rough surface will give the best grip with the base.
- Shake the shape slightly so that the concrete is filled with all the corners.
- Leave the tile to dry in the shadow, protecting from direct sunlight. It is better not to put in the house to ensure good ventilation and speed up the rates of drying.
- Tile tile will be about a week (therefore it is better to pour 10-15 forms at once). After the expiration of the specified period, neatly shake the products, turning them upside down and knocked it easily. Now they can be left to dry. This process can take from 3 to 4 weeks. During this time, the tile will acquire strength and will become the strongest as possible. It is recommended to decompose it on stainless steel sheets so that it was easier to shoot.
The process is quite long and requires patience, but after a month you can post a walkway or a terrace from a garden tile made with your own hands.
A couple of interesting forms to create a truly beautiful garden tile:


Unusual garden tile do it yourself
In this chapter we will share the secret of making the original garden tile, from which there will be beautiful tracks, perfectly fit into any natural landscape. In the process of creating even children can take part - so simple and interesting work.

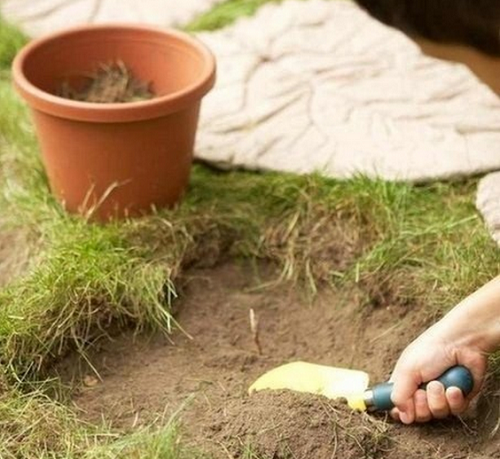
How to make garden tiles in the form of leaves:
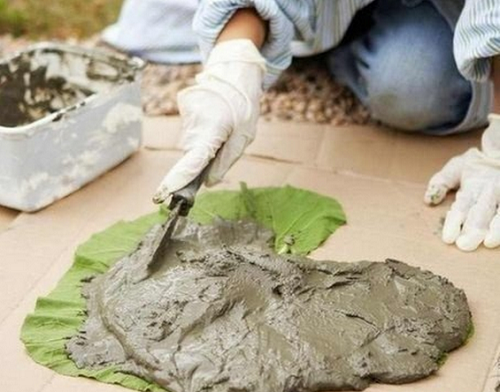
- Mix the solution. To do this, mix cement, sand and gravel in the capacity in a ratio of 1: 3: 3. We remind you that it should be pretty thick and not spread (according to the consistency as plasticine).
- For the manufacture of such beautiful plates, as in the photo, the leaves of a large burdock were used, but if it does not grow nearby, you can rush on the garden of the chrine leaves, zucchini or any other. You can use several leaflets for one plate, the main thing is that the rear of them has the most relief and dwelling. If there are no such leaves, you can make a form with improvised streaks from the twigs.
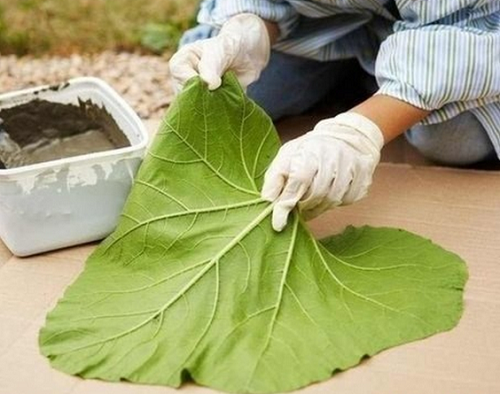
- Turn the sheet to the back to the top and cover it with a layer of cement-gravel solution. During the superimposition of the solution, slightly add it to the bodies as it should be imprinted.
- Leave the plates to dry in the shade. So that they do not crack, from time to time splash them with water from the spray.
- It is very important to separate the sheet on time. This must be done until the solution is completely dry. When he hardens about half, carefully turn the plate and depart the sheet.
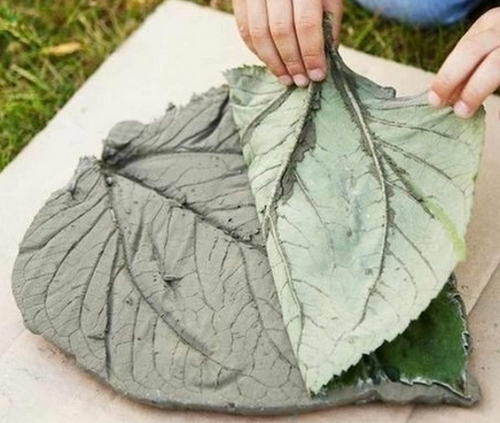
- Leave the plate to hurt.
- To make a garden path, make a recess in the thickness of the resulting plate and repeating it.
- Put the bottom of the recesses with a layer of river sand to make drainage.
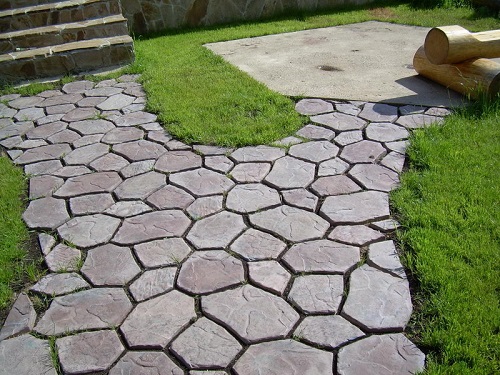
- It remains only to lay cement leaves in the pits and admire the fruits of their creativity.


Useful Tip: Add various pigments of natural shades to the solution when mixing. Thus, you can make a path from orange and red "autumn foliage" or evergreen path.

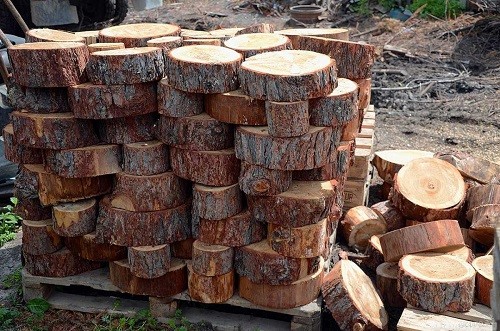
Wood-tile
Why not make garden tiles from what nature has gave us, for example, from a tree? Woodwoods are characterized by a beautiful texture, they will decorate any landscape and harmoniously fit into the design of any plot. Of course, the tree is not so durable as concrete, but it looks much more attractive.
Wooden garden tiles made of sleeps will serve as an excellent coating for the terrace or veranda, it will turn out of her good pedestrian walkways. The tree does not slide, in the summer it does not roll from the heat, and in the winter much warmer than any other material. And if you treat it with protective compositions and weather-resistant varnish, then such a tile will serve not one year.

We will demonstrate the manufacture of garden wooden sleep tiles on the example of the construction of a garden path:
- Cutting sleep - it is better to give preference to dense tree rocks. So, if you manage to get oak sleeves, then such a track will serve at least 10 years. Pine "live" about 7 years, but the best option is a larch. The tracks from her sleeps will remain strong for about 25 years. Spies are transverse segments of logs with a thickness of 15-20 cm, and the thicker the log, the thicker should be speaking. Clean all the sleeves from the bark and select those in which there are cracks - they will not serve for a long time.
- Spike treatment - cover all the spins with anti-corrosion compositions (against rotting, parasites, anti-air). Place each spice in a solution at least 20 minutes.
- Cover sleep with hot oil.
- Treat the lower part of the busbar with bitumen mastic to ensure waterproofing and protect against rotting.
- While sleep dry, designate the future track route and mark the markup.
- Remove the fertile layer of the Earth (usually 10 cm) and dig a trench in the height of the spilles plus 10 cm.
- The bottom of the trenches will easily with a waterproofing film (you can use geotic or ordinary greenhouse polyethylene).
- Put small gravel or rubble on the film to provide drainage. Thoroughly confuse this layer and align, using the construction level so that the sleeps are easy.
- If you want a carpet, fenced by curbs, install it before installing sleep.
- On top of the rubble, pour the sand layer with a thickness of about 5 cm and sink it, watering with a hose with a sprayer.
- Place the sleeve on the sand so that between them remains as little free space. During the installation process, a slightly bleed the sleeves in the sand, hacking them with a wooden cyonya.
- Check out the smooth track by the construction level.
- The slips between the sleeves can be covered with sand, soil or earth with lawn grass seeds.

Once a year, such paths should be cleaned with a metal brush and cover with oil and varnish.

Finally, several examples of the original garden tile (photo) made by hand:


