During the construction of any cottage, special attention should be paid to the floor - the comfort of all tenants will depend on its strength, durability and operational characteristics. If the floor is not strong enough, it will have to be repaired every few years. Flooring should not be afraid of randomly spilled water or beverage, not to absorb juice of berries, withstand multiple cleaning, etc. The specifics of the country's life imposes their requirements, so in this article we will talk about how to cover the floor in the country.
Content
What floor to choose for giving
The construction or overhaul of the country's house always suggests the installation of a strong flat floor. The work lies not only in laying a new coating, but also heat and waterproofing, because without them the life of any surface, whether it is wooden or even concrete, minimizing.
Cottage, unlike the apartment, where people live constantly, is much less used, so it makes no sense to make expensive floors there. Fortunately, the modern building market can offer a lot of budgetary suitable materials for the basis of the basis of the floor and for its finishing coating.
When choosing an outdoor coating, the specifics of the rooms should be taken into account, where it will be, therefore it is worth noting a few materials with different characteristics. For example, a tile, which will look great in the bathroom, is not suitable for living room or children. Warm comfortable carpet, settled in the bedroom, in the kitchen will constantly collect small litter and will erase much faster. Of course, there are universal materials suitable for laying in any room - a tree, for example. Below we will look at the options that can be used for the country house. All of them are relatively inexpensive, durable and easy to operate.
Concrete floor
Concrete does not differ in high decorativeness, but with competent laying lasts more than 50 years without repair. Concrete floor is a cement and sandy solution with a strengthened reinforcing mesh and varnishing or paint covered. Thanks to the large selection of paints, even a gray concrete can be given aesthetic appearance.
The advantages of concrete is obvious - it is very durable and unpretentious in service. Its enough to be asked once a few years to maintain a neat look. Destroy the surface in an inadvertently fallen instrument or another "household" way will not work. Another weighty argument in favor of a concrete screed is automatically smoothes all irregularities, so in some cases it is intentionally used for this purpose.
Concrete floor itself is very much dust, how much it is not swept, so it must be coated with paint or polymer varnish. If this is not done, the porous structure will absorb the spilled fluid and leave the unweight stains. Such a floor is very cold, so you will have to additionally buy a carpet carpet, linoleum or carpet. But even in this case, the floor will be quite cold in the winter, so the concrete tie is recommended to do at a time and summer houses.
Wooden floor
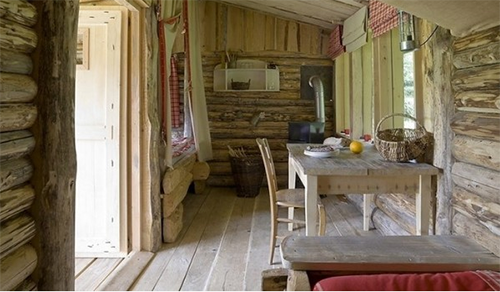
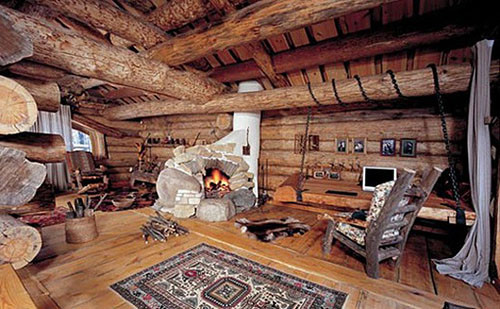
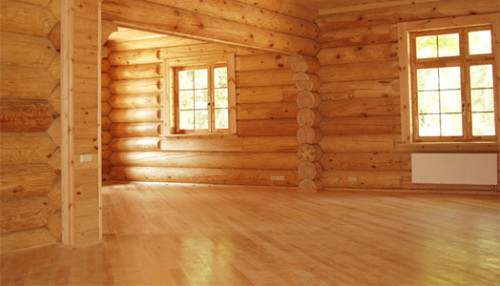
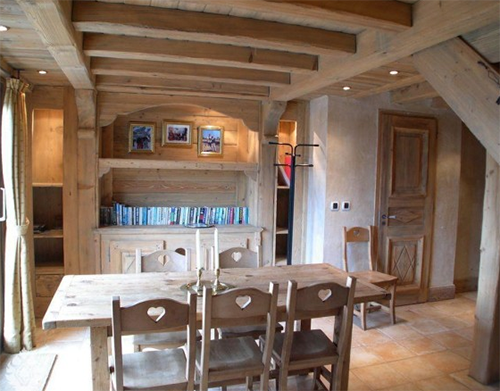
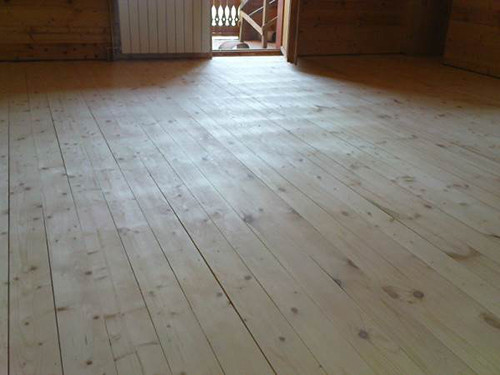
Classic and most common option. Such a floor is found at each second dacha, and earlier the floor in the house was done only from the tree. Wood is distinguished by a lot of positive qualities - it is well holding heat, does not ripen in the heat, provides natural ventilation indoors, creates a comfortable and cozy atmosphere. With good heat and waterproofing of the wooden floor in the country, such a coating will last for many years and even decades without overhaul.
Wooden floors include not only the usual boardwalk, but also a parquet board. The difference between these two materials is the sizes of individual elements and laying method. Naturally, the cost will also be different, and for the parquet board will have to pay a little more. Such a coating looks more "expensive", aesthetic and unlike ordinary flooring does not need additional processing. Do not confuse parquet and parquet board are two different material, and the cost of parquet is significantly higher.
If you want to make the boarded floor in the kitchen or bathroom, it should be covered with moisture-resistant varnish and ensure good vaporizolation, otherwise this coating will not last long. Another mandatory nuance - before laying a clean floor, the board must be treated with protective compositions (antipirens, pests and rodents, etc.). For premises with high levels of humidity, it is possible to use only dense expensive wood - ordinary pine boards will be spoiled very quickly.
Laminate on the floor
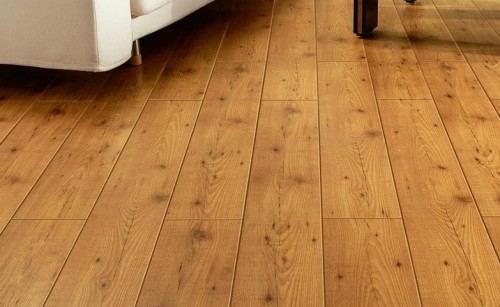
Laminate is characterized by a beautiful weathered design, high strength and durability. Another important advantage is resistance to pressure. If in the wooden floor over time, deepening from the legs of a heavy furniture can appear, the laminate can safely withstand the weight of any closet or bed.
It is very easy to care for the laminate, and since the country has to work in the ground, collect harvest, keep construction and so on, then a clean mistress will just fit together and wipe the surface with a damp cloth. Dust does not accumulate on the laminate and there are no places where dirt might be hammered - the floor is absolutely smooth and smooth.
Installation of laminate panels is very simple, and even a beginner will cope with it. The average service life is from 7 to 10 years. The only lack of laminate is that it is necessary to align the draft floor before it should be aligned. Often for this make a cement screed that requires additional financial and time costs.
When buying a laminate, pay attention not only to its value, but also on the class - it determines the operational characteristics of the material (durability, the ability to resist humidity, strength, etc.). Unfortunately, in most cases, high-quality laminate is almost the same as a good parquet. But if you certainly want to use it in the country house, you can lay a laminate in some one room, such as an entrance hall or living room.
Linoleum on Pol
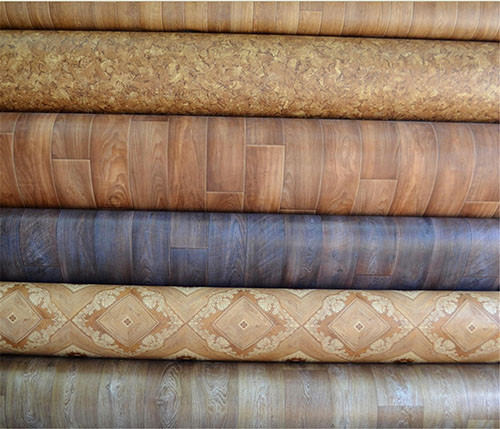
One of the most popular flooring, which is used not only for cottages, but also in apartments and public buildings. It is inexpensive and practical material that can give comfort and heat. It is easy to care for him, the installation will not require special knowledge and skills, and the design (drawing) can be chosen for every taste.
Linoleum is recommended to use for premises with high permeability, since it is resistant to abrasion. It is not afraid of moisture, so suitable for the floor in the bathroom or in the kitchen. A significant drawback of any linoleum is a journalability. Over time, dents from furniture appear on it, so specialists are recommended to install rubber lining on the legs of the cabinets and beds to weaken the pressure. It is also necessary to protect the linoleum from temperature differences - it can crack from frost, and from the heat - shriveling and swell.
Ceramic tile
Ceramic tile is an environmentally friendly, durable and durable material. A variety of forms, colors and textures allows you to create a completely unique interior. The floor tile is capable of listening from 10 to 50 years, and with careful operation even longer. It can be used in almost all rooms, with the exception of children's and bedrooms, as it is rather cold.
This is the perfect flooring for the bathroom, toilet and kitchen - the tile is not afraid of moisture, but to care for her is a pleasure. Unlike laminate, for ceramic tiles it is not necessary to level the base - this is due to the application of a greater or smaller amount of adhesive solution. Installation of tiles will not cause absolutely no difficulties, even if you have never been doing before that.
Useful advice: do not choose to give a glossy glazed tile, because it is more demanding than matte, needs to be careful and special care.
The disadvantages include the fact that ceramics can split if there is a heavy item on the floor. Also, such a coating will always be cool, so it needs to be stuck with a carpet or track, but in the summer such sex will be a real salvation from the heat.
There are a large number of all sorts of flooring, but we only listed those that are best suited for a country house. The rest or not withstand the conditions of operation, or are too expensive, or the installation requires special equipment and professional skills.
Wooden floor on lags
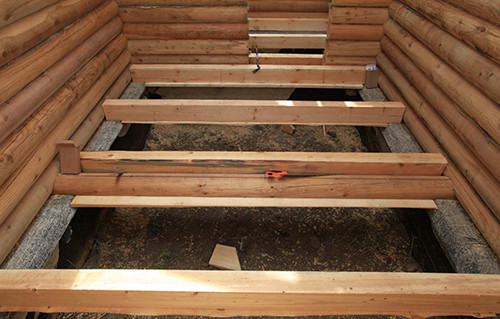
Since the wooden floor in the country is the most common phenomenon, consider its construction in the first place. Depending on the design features of the house, the finishing floor can be treated on the beams of overlapping or on lags. The beams are needed to increase strength, if under the house there is a spacious basement, or carrier walls are quite far from each other. Also, the beams put for the construction of the floor on the 2nd floor or higher. In all other cases, the floor is put on lags.
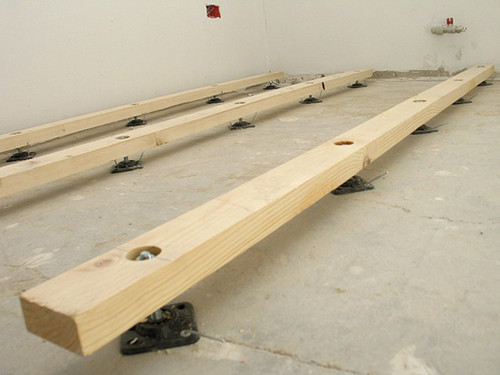
Experts recommend to give preference to lagas because they allow you to make a warmer and high-quality floor, to provide sound insulation and strength. Even if you are creating support beams for floor mounting on the second floor, you can put lags on top of them. In other cases, the lags can be installed on the column foundation poles or right on top of the concrete screed.
If there are no support beams in the house, the lags should be installed along the wall so that one element is enough for the entire length (width) of the room. It is advisable to choose a wall with a window to then put a female pure floor across the lag - so because of the features of the lighting room will look wider and more spacious.
To make the wooden floor on the lags, it is necessary first of all to determine the optimal level (height) of the floor and, based on the data obtained, select the thickness of the bars for lag, genital boards or parquet. During the calculations of the floor level, take into account the height of the thresholds at the door - ideally the wooden floor should be twisted with them (the height is not greater than 20 mm).
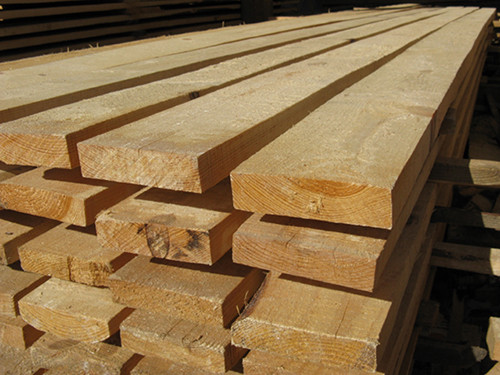
The best lags are obtained from dried boobies of coniferous trees. Dry material follows from 8 to 10 months in a dry well ventilated room. The thickness of the bars should be at least 40 mm (optimally 45-50 mm). In the length of the lags should be fitted along the entire length or width of the room, not reaching the walls by 10 mm.
How to make the floor at the cottage:
- Install 2 laugs at opposite ends of the room and align them horizontally - it will be landmarks for laying the rest of the lag.
- To lift the position of the lags, to put the barn of the necessary thickness under it. The width of this bar must correspond to the width of the lag. There is another level of leveling - when laying on the supporting beams, it is necessary to rush the corners of the beams by 8-10 mm, and in the lags there are grooves of the same size.
- Place lags in a step of 50-100 cm depending on the length of the elements of the first floor.
- Before rolling the boarding floor, you need to warm the future floor. In the article "Wooden floor insulation with their own hands" You will find all the necessary information.
- After laying heat and waterproofing, you can proceed to the installation of the board. It can be both a clean floor and the basis for laminate. For flooring you will need boards about 30-40 mm in thickness, but according to the rules, this parameter is calculated depending on the length of the element (1/20 part). If the lags are located close to each other, you can take the boards thinner, because the load will be evenly distributed and transferred to lagas. All layers of flooring should be strictly one thickness.
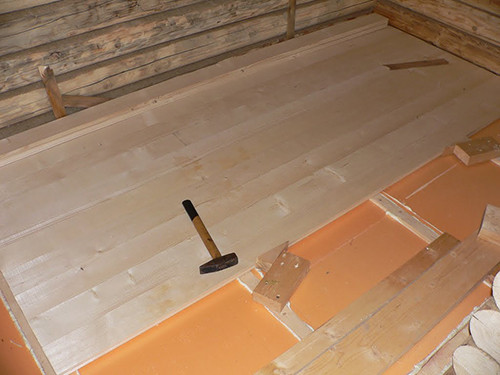
- The optimal width of the genital board is 15 cm, but you can also take a sewing - up to 20 cm. It is best to choose t-shut-off boards, because they fit very tightly and almost do not form slots.
- To fix the boards to lags, use nails with a length of 100 or 120 mm (the length of the nail must be 2.5 times the thickness of the board).
- Stay starting, having a first board at 10-15 mm from the wall so that after the shrinkage, the surface is not deformed (you will leave free space for wood movements). Subsequently, this gap can be masked under the plinth.
Useful advice: To make the floor smooth, put the boards in such a way that the adjacent elements commercial circles dispel in different directions.
Raw board
By making the floor from raw boards, you risk getting cracks and deformations on the surface, but under the conditions of good ventilating room and careful operation on the "probationary period" it is possible to obtain a reliable floor.
Work produces in two right. First, the boards put on the lags and customize each other, but so far without nails. If the last board does not fit, leave an empty place. Be sure to stock by replaceable boards in case, if during drying, some of the elements of the floor crack or deform. The female "crude" floor leaves to dry for 8-10 months, after which they replace the spoiled parts. Then it is checked again and only after that nails.
Dry board
The floor from the usual dried board is laying somewhat differently. Each element is naked to the lag with two nails, the distance between which 1/3 should be equal to the width of the board itself. It is very important to drive the hats to the end so that they are not sticking out.
The maximum allowable gap between the boards can be 1 mm wide, so they need to be customized very tightly to each other. It is easy to do as follows: scam from the board of a bar 40-50 cm from the board and saw it in half diagonally, retreating from the edge of about 10 mm - two identical wedges will turn out. With these wedges, you will press the boards. To make focus, learn along the lags of the bracket, but not deeply - about 20-25 mm - so that after laying it can be removed.
Shoot the wedges between the bracket and the board so that the sleepers "watched" each other. Hammer pick up the wedges over the ends, pressing the gender. When she gets as close as possible to the neighboring, lift it with nails. For long genital boards, it is recommended to make two struts with wedges to simultaneously take up two points.
Useful advice: In order not to "exist" a lag with multiple driving and pulling out the brackets, lay at once 3-4 boards.
Chubbed board
As we have already spoken above, the floorboard floor is more preferable, since almost no cracks remain between the elements. Experts are recommended to connect boards into a spool, a quarter or a plug-in rail, since these types of compounds are able to ensure the most dense adjacent.
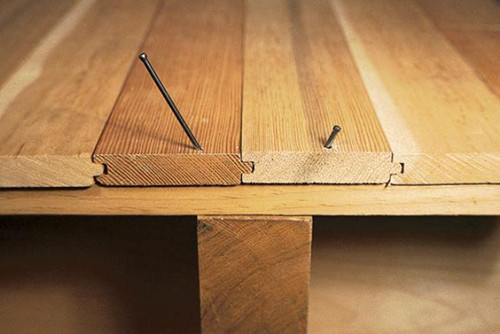
At the tipped boards, different side parts - the comb on one is located, on others - the groove. When the board is naked to the lag, the nail is inserted slightly at an angle so that it goes into the ridge and ensured a reliable connection.
Screwed boards are also customized to each other, but you should not beat the hammer on the sidewall - you can damage the smooth surface. Use for this wooden bar - attach it to the board and hit the hammer slightly, then the grooves will firmly in the ridge, and the board will remain a whole.
Setting the last wooden floor board
This is a particularly delicious moment that can cause newcomers from newcomers and difficulties. Installing the last floorboard occurs in a special way. Usually she, as for evil, it turns out a little wider than necessary, and what to do in this case - cut off the surplus or try to squeeze so?
To calculate the correct width of the last boards, measure the remaining opening in 3-4 places along the entire wall (the walls may also be completely even), and then deduct 10-15 mm from the width resulting. Remove the placled piece of the board with the reference and adjust it to the lag close to the neighboring.
To ensure a tight connection, vague wedges between the wall and the last board. The remaining gap Cover the plinth around the perimeter.
Important: Plinth should be installed only after you are finished with the interior walls of the walls, the ceiling, and also installed door swaps.
The final stage of laying any wooden floor is a squabble. After cyclishing, all the dust should be carefully removed, the slots and holes from the dropped bitch should be embedded with a wood powder in the tone with the color of wood. After drying the putty, the floor is covered with paint or varnish in 2 layers.
Concrete floor
Despite the fact that the concrete floor is cold and requires additional insulation, many have preferred exactly this option. You can make a finish concrete coating or use it as a basis for laying tiles, lag, laminate, or other finishing flooring. In addition, the cement screed is sometimes the only possible economical way to level the surface.
Make concrete floors in the country with their own hands much more difficult than wooden, but the result will pay off every effort. - You will forget about the need to repair the floor for many years or even decades. Just once in a couple of years to update the paint layer, and the coating will become like a new one! If you get tired of "naked" floor, it can be used as an ideally smooth and finished base for cladding with ceramic tiles, flooring of parquet, etc.
In the apartment concrete floor to pour very simple - it is only necessary to remove the old coating and clean the base. In a private house, everything is much more complicated, since in most cases you have to work directly on the soil, and this requires additional costs of money and time. Consider this case in more detail.
How to make the floor at the cottage from concrete:
- Prepare the base and mark the markup. If the fill of the floor takes place during the construction of the cottage, everything can be done quickly if the cottage is already built, you will have to disassemble the draft floor to get to the soil. From this follows the logical conclusion that the concrete floor is better to pour in houses without basements.
- Put the label in the meter from the base of the doorway and, focusing on the testimony of the construction level, transfer it to the rest of the walls of the room throughout the perimeter.
- Source from these labels to 1 m and mark the "zero frontier" - this is the level of your future concrete floor. For more convenience, learn in the "zero" marks of the carnation and tension the thread between them.
- Remove the 25 cm of the soil, lift the bottom and thoroughly sink. The easiest way to break the vibropilet, but if not, use the usual log, hitting the end on the ground.
- Put a layer of gravel with a thickness of 5 cm on the aligned ground, pour it with water from the watering can or from the hose with a sprinkler. Stick again and check the levels of mortality.
- On top of the gravel pillow, pour 10 cm of fine river sand, it also pour it with water, sink and check evenness.
- The next layer of 8 cm thick is from rubble fractions of 45-50 mm. Pour it with a small amount of sand, pour and confuse to get a relatively smooth surface. Thus, you will create a drainage pillow through which all the excess moisture will be leaving, and the concrete floor will not reck on the back side.
Useful advice: If you have never been involved in the preparation of the base for concrete floor, you can make a label for each of the "pillows" layers to be easier to navigate and accidentally do not overdo it. The thickness of the floor itself should be at least 2 cm, otherwise it cracks. - Now it is necessary to pave waterproofing so that the humidity coming from under the ground through the gravel pillow has not reached concrete. To do this, you can purchase a conventional thick polyethylene film in 200 microns or use specifically designed for waterproofing materials - membranes, rubberoid, etc. If you have chosen a film, keep in mind that it will need to be put in 2-3 layers, and materials specifically designed for such purposes - only in 1 layer. Therefore, before buying a film, calculate how much it will cost - perhaps it is cheaper to buy an ordinary ruberoid.
Regardless of the selected material, lay the waterproofing of a 15-20 cm waterproofing, fastening the segments with a wide adhesive tape. Be sure to leave approximately allowances for the walls at the edges so that they reach the "zero line" (so as not to interfere, stick them to the walls of the tape). - So that the concrete floor in the country is not too cold, you should take care of thermal insulation. Ceramzit itself was well established as an inexpensive and efficient insulation for concrete. You can also use foam, mineral or stone wool (plates), extruded polystyrene foam, perlite granules, etc.
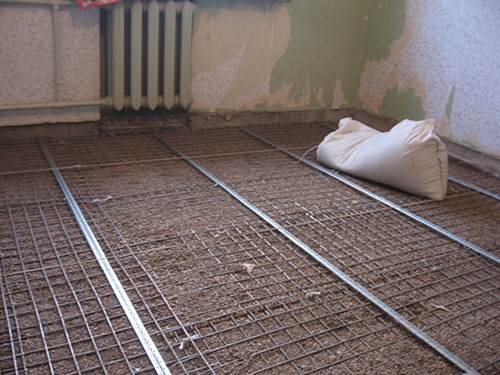
- As for reinforcement, it is recommended to do it for the sexes that will be shown a strong and constant load, for example, in a garage or in stock. For the cottage to lay the reinforcement, it is not necessary or can be limited to the "Light" -varita - a soft reinforcing grid for greater durability of the coating. To lay it in the base, you need to score several pins, which subsequently pull the grid itself and then pour concrete.
- In rooms with width of walls from 4-5 m for filling of smooth floor, use formwork. Visually divide the space on the same rectangles of such sizes so that the concrete can be pouring at a time. For the manufacture of formwork, use conventional boards or thick moisture-resistant fane. Place the guides that will share the room on equal fragments. The height of the guides should be limited to the "zero frontier". Usually they are made of metal pipes or ordinary boards. Place the guide on the base and fix thick cement mortar. Between them, install the formwork so that approximately the same rectangles. Do not forget to check the evenness of each cell by the construction level.
Useful advice: When you board the concrete, formwork and guides need to somehow get. So that they are easily removed from the viscous solution, lubricate them with a special oily substance for formwork. You can buy it in any construction store.
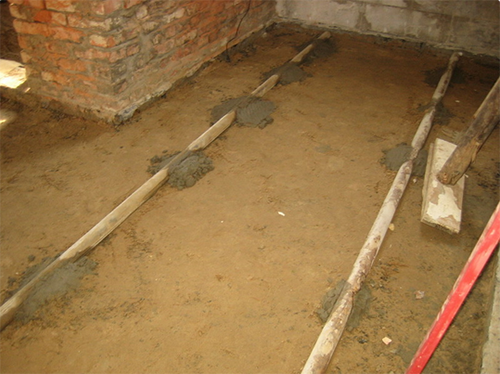
- Ideally, the concrete floor should be poured at once - two or more layers will make it less durable and durable. But at home it is impossible to make the necessary amount of the mixture immediately and quickly pour it the base, therefore it makes sense to order a finished solution at the factory. It will be delivered in the concrete mixer in the required quantity.
If you want to save, then all the work will have to do it yourself. Rent an electric concrete mixer (or building mixer), cement, crushed stone and river sand. It is not worth saving on the cement - choose a brand not less than M400, since it is precisely that the strength of the future floor depends on it. - Prepare the solution, mixing cement, sand and crushed stone in a 1: 2: 4 ratio. Gradually add water until the consistency of thick is sour cream.
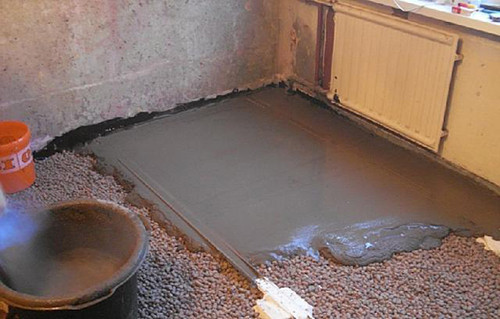
- Fill the solution into one of the cells and stretch over the entire surface. Attention - to start the pouring of concrete is always needed from the corner opposite to the doors so that at the end do not drive yourself into the trap. Pass the concrete in several places to eliminate the formation of air emptiness, then crumple it with a shovel or board. To certainly avoid the appearance of "bubbles" inside the floor, it is better to use a building vibrator. Make a shrinkage (singeing and alignment) until the so-called concrete milk appears on the surface - bleeding liquid. In the same principle, fill the remaining formwork compartments.
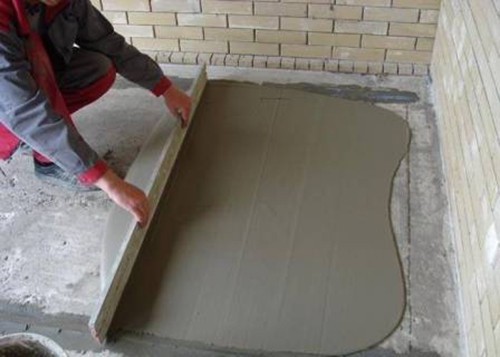
- When you fill out several cells, take the construction rule (emphasis on "and") a minimum length of 100 cm, hide it on the guides and stretch to yourself to align the surface. Surplus the solution place in empty compartments.
- From the aligned areas gently remove the formwork and fill in the emptiness with a solution. Thus, continue to work until you reach the door.
- After that, cover the concrete floor with a polyethylene film and leave to dry for 3 weeks. Film is needed in order to prevent too fast evaporation of moisture, as a result of which the surface can crack. If the weather is too dry and hot, once a day you can lift the film and spray the floor with water.
When the floor finally hardens, fill it with a liquid cement solution or self-leveling mixture with an admixture of polymers or dyes for greater aesthetic. Start from the corner opposite door, as with the pouring of concrete. After drying, the screed can be attached to painting the surface or laying the finish flooring.
As you can see, pour concrete is much more complicated than to make flooring on wooden lags, but it will last 5 times longer than any boards. Which floor in the country to choose, only to solve you, however, before you find the final verdict, consider that an additional load will be rendered to the foundation of the already built house, and in the case of a concrete floor - very strong.

