Over time, each owner comes to the fact that there is a need to make repairs in the bathroom and update the plumbing. Then people are faced with such a question - buy a regular bath or give preference to a more modern design - shower boxing. And then the majority of consumers are beginning to think, to deprive themselves pleasure to soak half an hour in warm water or take a shower, standing in the shower. There is a simple solution of the dilemma - you need to buy a shower box.
Content
What is a shower box
Boxing for the taking of the soul is the simultaneous combination of the shower and bath. For small bathrooms, shower boxes will be the most profitable solution. Boxing cabin is equipped with a deep pallet, it allows you to take a shower and soak in the bath.
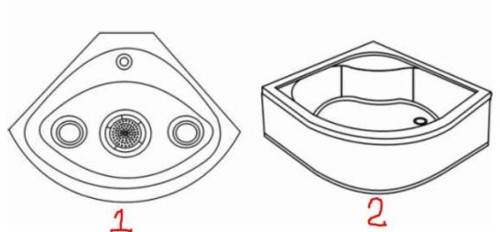
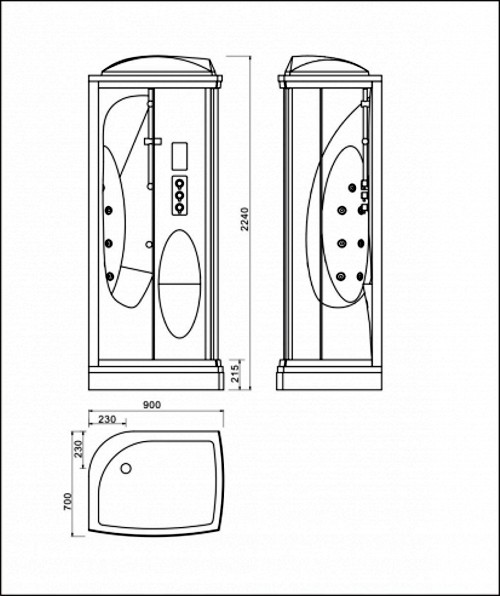
The plumbing market has a large selection of various models of shower boxes. You can find shower boxes of different sizes, corner and rectangular models, flat or with a deep pallet, in which two adults can be accommodated at the same time. Such rectangular hydrobocoxes require space in the bathroom. In addition, most models have an extended feature set.
The hydromassage boxes simultaneously combines several possibilities - bathaking (you can dial water into the deep container of the pallet) and the soul, as well as the additional - built-in water massage system and even the steam supply function.
Regardless of the cost, each model of shower box is equipped with a panel that allows you to independently adjust the water temperature and the intensity of its feed. Built-in nozzles make it possible to obtain a stream of water of different intensity and even get the effect of presence in the sauna, because steam can be highlighted from the nozzle.
If you decide to purchase a shower box and enjoy the water procedures, do not deny yourself in such a pleasure. Installation of such serious equipment is better to entrust specialists. But if you are confident that we can handle the box assembly yourself - it's worth trying.
Materials and tools
So that work on the assembly of hydrobox gives you pleasure, you need to prepare all the necessary tools and materials in advance. Usually, the required fasteners are supplied with the shower box, but sometimes, especially when assembling Chinese models, there is a need to drill holes and using self-tapping screws.
What you need to cook:
- A good quality sealant marked with a tube "Sanitary".
- Construction knife.
- Screwdriver.
- Spanners of different sizes.
- Rag.
- A pair of fabric gloves.
Cheap boxes produced in China are usually shipped, so you should additionally purchase a high-quality siphon, as well as washers (hole M16). A distinctive feature of the Chinese hydrobox from the European version is that the marking of all parts for the convenience of the assembly is indicated by explanatory inscriptions - "bottom", "top".
According to numerous reviews of those people who independently collected a shower box, you can immediately schedule the assembly plan. In the first case, the pallet comes in the assembled form and remains only to install it and collect side panels, and in the second case, there is a need to build a pallet, which takes longer time and effort.
Assembling shower box
In the case when plumbing comes in assembled, the assembly of the shower box is carried out according to this principle:
- Look attentively pallet. Tighten the fastening element - nuts and bolts.
- Check the reliability of the siphon connection.
- Put the pallet to the place where the shower box will be located. Such pallets are fixed using special devices - M-shaped hooks.
- Make holes in the wall. Then screw the attachments into the pallet, but do not fix it yet.
- Now you should move the pallet from the wall to be able to assemble and install the rear box of the box. In the event that the panel consists of several elements, each of them should be connected with self-draws or screws.
- After assembling the rear panel, you can attach it to the pallet. Perform the installation carefully, since in most cases the panels are made of fragile material - thin glass, which can crack from the slightest pressure and divided into thousands of smallest fragments. When installing glasses, use special rubberized seals and clamps.
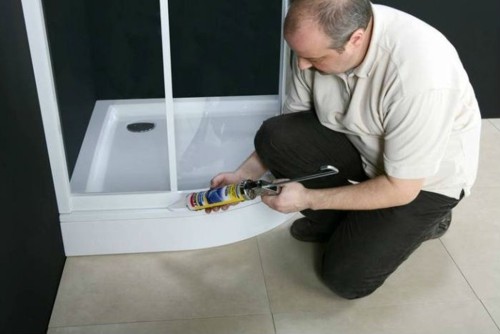
- All places of connecting panels with a pallet need to be treated with silicone sealant of white.
- Lastly, the roof of the shower box is installed, which is attached to the self-tapping screw.
- Now it remains to set the pallet in place and align it. For these purposes, each boxing model is equipped with adjustable legs. Use the construction level to make sure the boxing is correct.
- Pre-check the shower in action, connect it to the sewer and tap pipes.
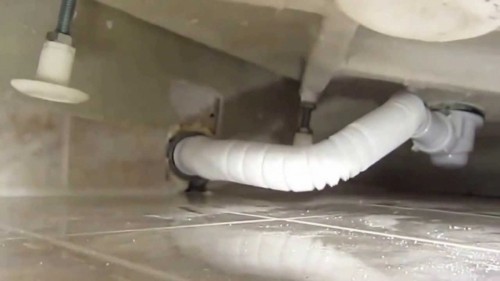
- You can connect a shower box with a flexible hose to the sewer tube (a corrugated hose bundled with a siphon). Do not forget to check the compounds for tightness.
- Secure boxing doors. Screw the rollers and set the handles. Rollers are inserted into special factory grooves, which subsequently need to install limiters.
- Inside the shower box you need to wash the joints with a white sealant.
- The collected design is left for drying for 8-9 hours.
Installation features
When installing the shower box, you need to adhere to such recommendations:
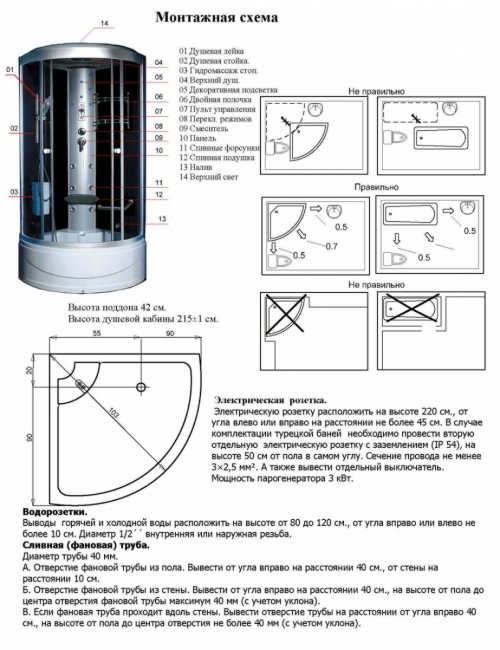
- installation always starts with the installation of the pallet. It is placed on a flat surface (tile or cement floor). The pallet cannot be put on the rug;
- if the base is close to the wall, then pre-leave the place to install the rear wall;
- in the event that you have an angular box (or the economy class model), then the rear wall in the kit will not be, it is replaced by a wall of the bathroom, so it is pre-attached to attach a tile and carefully seal all the cracks of the waterproof sealant;
- in the event that you do not have a tee on the sewer system, it is necessary to purchase it (buy the production of Russia) and establish;
- to make a seal of all connections, when connecting a tee to the sewer unit, you can use the "FUM" tape, and all seats are thoroughly wrapped with sealant;
- boxes are designed for both water procedures and relaxation. There is a need to install a socket - for listening to music, additional lighting, functions of the sauna and hydromassage. Install the waterproof socket should be on the room wall and conduct grounding. Connect boxing is necessary through a voltage stabilizer.
How to collect shower box
If you bought a box with a disassembled pallet, then first it must be collected.
Step-by-step actions:
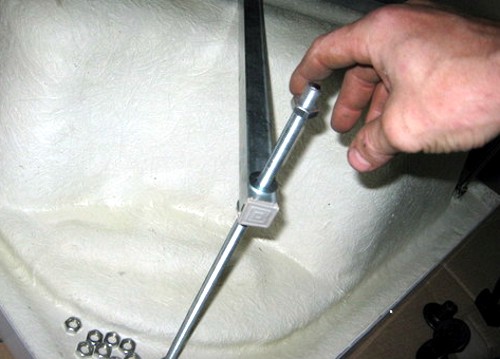
- Turn up the bottom of the pallet so that it is convenient to install the fastener with the feet of the support. You can adjust the height to such a level until all the items coincide.
- We carry out the installation of the pallet screen, well tightening the fasteners. All screws are pressed, only the lower legs are needed. They will be adjusted in place.
- Put the pallet in place and adjust the screws. Check horizontal building level. If everything is done well, the nuts can be finally tightened.
- Collect the rear panel. In the location of the pallet and panel, it is necessary to apply a bit of sealant and install an item. Combine mounts (M6 x 20 fasteners). Finally, they are not pressed, so that the panels can be adjusted.
- We collect a glass frame. This is the most responsible task in the assembly of a shower box, as often even professionals are bred and wondered where the crack appeared on the glass. Connect horizontal guides with a vertical profile and secure the design by self-draws. Usually the factory holes are enough, but in some cases they may not coincide, and there is a need to drill additional holes for the fastening element.
- It remains to install panels. Here you need to try to all the holes coincide. The panels are connected to the screws and are additionally sealed with silicone. Then you need to hang the sliding design and adjust the panel.
- The ceiling panel should be combined with screws, jokes to handle sealing.
- Then you need to connect the shower box to the water supply system and sewage, check the correctness of the connection and tighten all the nuts well.
- It remains the most important thing - carefully and slowly it is necessary to inspect the quality of the connection of each element. To check the tightness of the compounds, you can use the shower. If the holes are detected, they must be additionally treated with sealant and leave for night (or day) for complete drying. Then you can check all the seams again for tightness.
Faults. Prevention and repair
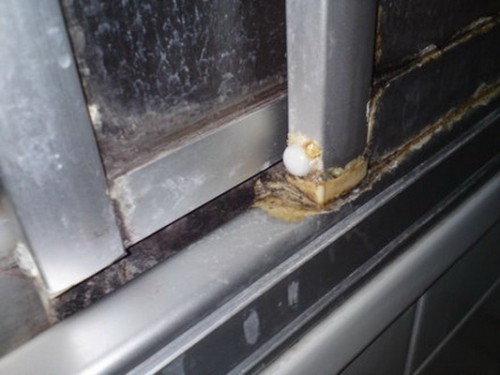
Over time, any shower cabin can start leaking. It depends on how qualitatively all the seams were embedded. A frequent cause of the flow can be the formation of a waterway, damage the sealant and incorrect care of the shower box. To avoid this, it is necessary to maintain boxing clean, and also timely serve the work of all elements.
To prevent the formation of plaque and breakdown the details of the shower, it is necessary to install water purification filters and change them in a timely manner.
Careful for the shower box should be regularly. The surface treatment is not allowed by abrasive means. Consultants of plumbing stores recommend cleaning glass and metal surfaces with special means for cleaning shower boxes.





In our city, the cost of installing the shower box is 10% -15% of the cost of the box itself. Calculated with her husband, the sum is decent, as they took Witrovsky hydrobox with different bells, and we will decide to install themselves. My owner coped in the day. Already checked - everything works as it should be 🙂 And as they say saved money - this is also earned.
I do not want to offend your husband, of course the hammer, I coped myself, but the day is a lot, I will install the master cabin in a few hours. True, if you have a Viter Aura, then you still need to add time to electronics.
I myself installed the shower box of Boh, there is no electronics in it, but, too, almost a day passed. The work is not difficult at all, but there is no practice, therefore the whole process is delayed.
yes, what's the difference in 3 hours will install masters, but for money, or for 1 day myself, but for free !! I also install himself well for a couple of days !!