Features of the climatic conditions in which we live, and not always a stable and timely heat supply of our homes and apartments more and more require ingenuity from ordinary people.
Content
One of the most popular procedures for today is an additional insulation of the walls of the penplex outside and inside the building. This approach not only retains the comfort in your home, but also protects the design itself from inevitable damage as a result of temperature drops and air humidity.
Of course, most practical if the insulation is produced in the construction process, but quite often such work performed on ready-made buildings. How to do it with your own hands, how to choose the right heat insulation material, where to start and how to finish the work you will learn from this article.
Advantages and disadvantages of insulation of walls by penplex
Extruded Polystripolitrol, or Penoplex, despite the fact that it appeared on the construction market relatively recently, managed to conquer a solid niche in this area.
Justifies his so high popularity a large number of advantages that are as follows:
- environmental purity, due to which it is completely safe for health and is suitable for living space;
- high density that allows him to practically not pass heat outward;
- counterancy, which eliminates the accumulation of condensate in the thickness of the walls;
- moisture resistance;
- good indicators of noise insulation;
- perfectly opposes the appearance of mold and rot;
- excellent strength indicators;
- elasticity, which ensures preservation of tensile or compression integrity under the influence of temperature and humidity;
- fire safety due to the presence of flame retardants;
- durability of operation - up to 50 years without the need for repair work;
- high level of wear resistance;
- easy processing, which allows you to quickly cut the necessary parts even for structures of complex geometry.
Important! With such a long-lasting list of advantages of this material, the price of the insulation of the walls of the penplex price is quite acceptable and perfectly suitable even to solve the problem in the economy version.
Penoplex has two insignificant drawbacks:
- low absorbability of adhesive compositions, which creates some difficulties when mounting;
- exposure to rodents damage.
Important! It will be fair to note that rodents are capable of damaging even concrete or metal, so that this minus insulation of the insulation is relative.
Areas of use
The spectrum of the permissible use of this material as the insulation is very wide. It is great for such purposes:
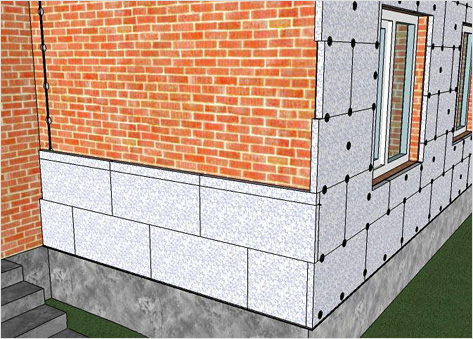
- outdoor insulation of the walls of the house of the Penopleks;
- roof arrangement;
- strengthening the foundation;
- insulation floors;
- warming of walls by penplex from the inside.
Important! The principle of laying for each direction is one, but in each case it will take into account the surface features and subsequent operating conditions to select the right view of all consumables. Such an approach will certainly provide high performance in the form of high-quality insulation of the walls of the penplex, the feedback about which is inspired by trust.
Types of Penoperance
In the modern market there are several types of fasteners, each of which is suitable for certain purposes.
The main features for the classification are some of the material parameters:
- Thickness. The range of sizes varies within 0.5 to 3 cm.
- Density. Available indicators - 31-45 kg / m3.
- Length. Standard value - 120 cm.
- Width. Typically, manufacturers supply plates of 60 cm.
Important! Even with the choice of the largest fastener plate with high density and thickness indicators, its installation practically does not change the area of \u200b\u200bthe room.
Selection of high-quality fasteners
To purchase a really high-quality material and ensure that the insulation is compliance with the specified requirements, when buying plates for the insulation of outer walls by the penplex, internal or other parts of the house, be sure to check the indicators indicated on the price tag.
Do it as follows:
- Squeeze the material between your fingers to make sure in high compression strength - you should not stay dents.
- Pay attention to the packaging of the fusion - the film must be high quality and holistic.
- Make sure there are certificates for products with marked characteristics after checking the fastener.
- Be sure to have a bar code.
- Find the protective labels.
- Check the presence of the manufacturer's hologram.
Important! Check thermal insulation and moisture-current properties and density if they cause you doubt, do with specialists in the respective laboratories.
Features of outdoor insulation
In the external thermal insulation, it is worth considering exactly the factors that the penplex poorly absorbs glue.
The creation of "wet" facades involves the fact that the walls can be exposed to the aggressive effects of the external environment. The absence of an air layer between the insulation and the finish contributes to the additional destruction of the adhesive, on which the finish is attached to the warming layer. As a result of this, over time, the appearance of the building is not aesthetic, and subsequently there is a damage of the building in the form of cracks on the bearing walls.

In order to prevent such troubles, the penplex is placed only in the area of \u200b\u200bthe base. There is the ability to create ventilation space.
Important! With a competent outer insulation, the Penoplex perfectly protects the foundation from the freezing and withstands the numerous temperature differences, from deep frosts to the summer heat.
Video
Browse the video example of the insulation of walls outside the penplex or foam in order to present a complete amount of upcoming work in advance.
Features of the internal insulation of the premises
Penoplex for internal insulation use more subtle, as it will fully provide the necessary level of heat conservation in the building, but it is much easier to work with it. This work is easy to perform with your own hands at any time of the year, since there is no need for scaffolding, insurance and the stage.
The penplex often insulate only certain parts of the walls - those that are most implanted in winter at the expense of a strong straight wind:
- end parts;
- corners of the apartment;
- places of adjoining loggias and balconies, especially if they are not glazed;
- walls between neighboring apartments, especially in panel houses with low noise insulation.
So that the insulation of the inner walls has become really high-quality, follow the following recommendations:
- Steam barrier Create with a special foil film using a special material, securing it to the insulation with a shiny side into the inside of the room.

- Thinking in advance the way to create artificial ventilation in rooms with constant moisture drops that you are going to insulate the penplex.

Wall insulation from within the penplex - video
Check out the course of working with the proposed video - this will make it possible to understand the entire process in more detail.
Technology of insulation walls by penplex
The entire procedure for additional wall decoration consists of a sequence of certain stages. To perform insulation correctly, work as follows:
- Prepare tools and consumables.
- Prepare surfaces to work.
- Place the ground profile.
- Install insulation plates.
- Secure sheets.
- Spend decorative surface finish.

Tools and materials
- perforator;
- drill with a special nozzle for mixing;
- hammer;
- building level;
- spatulas 80-100 mm and 350-450 mm;
- toothed spatula 20 cm with tooth 1 cm;
- smooth spatula;
- emery for grinding;
- several plastic buckets;
- knife;
- malyary roller;
- penoplex in the required quantity;
- mounting foam;
- 5x5 mm reinforced fiberglass;
- aluminum corner perforated;
- adhesive composition for inferno;
- plaster;
- primer;
- putty;
- dowels and a wide plastic hat.
Important! Depending on the preliminary state of the wall surface, you may need a construction hairdryer or antifungal agents.
Preparation of the foundation
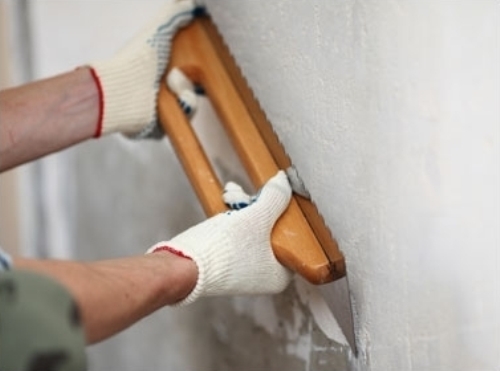
- Clean the walls from dust, diverse contaminants, finishing materials, particles peeling from the surface.
- Paintings Remove manually with a spatula or remove with a construction dryer.
- Places where mold or fungus has already been manifested or excessively exposed areas, treat a special antiseptic agent.
Important! If there are places with vegetation - before starting work, be sure to treat the surface of the wall with a special fungicidal sanituing agent with bactericidal properties.
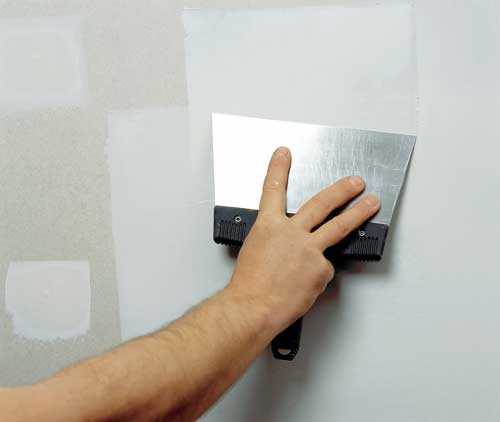
- Put the problem areas with cracks or irregularities.
- Sand the base using a metal brush or sandpaper shallow grain paper.
Important! Tool Select, considering the type of base material.
- Sprouter the surface.
- Make technical pause until complete drying.
Installation of the base profile
For even gluing plates and protect the fasteners from aggressive external influences, be sure to mount the ground profile as follows:
- Sequentially lay the profile on the marked areas.
Important! The width of the plates of the polyplex must match the profile width. If necessary, cut the plates under the desired shape with a knife. - Attach the profile with the help of a dowel in such a way that it lowered the wall tightly.
Important! If problems arise with density problems - use lining washers. Note that the use of such lining requires certain skills in the installation work. If you doubt your skills - seek the prompt to the specialists. - Connect the profiles with each other using docking plates, leaving the gap between parts in 2-3 mm.
Rules of installation of Polymphax
Directly when laying fasteners, follow the following rules:
- Prepare the glue composition.
Important! Use only special glue for this work, the preparation method is specified on the liner-liner applied to the pack with a mixture. Do not be adhesive to dry up, otherwise it will later turn the heat insulation will break. Therefore, prepare at once the number that can be used to rejection of the solution. Consider the weather conditions when mixing the composition. Suitable temperature - not lower than +5 degrees Celsius. - Apply the glue around the perimeter and the center of the leaf of the 8-10 cm strip.
- Install the sheet on the ground profile.
- With the help level, control the correctness of the installation of the sheet.
- Align the plates with easy clicking towards adjustment.
- Remove the excess glue from the docking seams between the plates of the fastener.
Important! Sometimes the plates have a too smooth surface. In this case, process the sheet with emery paper for better clutch with the profile. - Fill in all formed slit pieces of material in the form of wedges.
Important! Do not use the mounting foam for this. When expanding, it can provoke cracks. - Fastening on the wall carry out in a checker manner from below-up.

Important! The glue dries about three days. After its complete drying, continue working on the trim. - Secure the penplex using a dowel with a big hat with such a calculation so that they combine the two adjacent plates vertically and horizontally. Attach the dowel in the center and from four sides.

- After installing all the plates, the distance between the base profile and the base of the material fill in the mounting foam.
Important! Be sure to make sure that the glue is dry! To choose glue, come with special care. It should not contain solvents and hardeners, since the basis of the foam - foam, will certainly be damaged. - After completing all the works - proceed to finishing and decorative work.

Important! When painting a warmed wall in no case use oil-based compositions - they dissolve the polyplex and damage it. If you want to make staining - choose alcohol based options or water.
Conclusion
Penoplex - high-tech, environmentally friendly modern material. He will perfectly protect your home from dampness and cold weather, as well as from excess annoying noise. It will save your walls and support a favorable climate inside your housing, and will also help prevent groundwater to the foundation. The main thing is to accurately follow all the above recommendations when working with your own hands and the result will certainly please.


