Any overhaul should begin with the installation of new reliable doors. Today metal doors have become particularly popular than the demand for the installation of this kind. You can carry out such work independently, and the ability to handle the standard set of construction tools, here will have to be likewise.
Content
Input metal doors for home
The question of strength and durability, and most importantly, protection is that first of all is a priority when choosing an input zone. Most consumers today install doors made of metal, because they have a number of advantages compared to analogs from other materials. Consider the features more.
Metal door: Construction Benefits
- Strength. Such quality allows you to be completely confident in the safety of your property.
- A wide range provides the ability to choose the most suitable option in each individual case.
- The variety of prices allows you to choose the doors to consumers with excellent income.
- Metal doors with proper operation and high quality of execution are extremely durable. This material does not affect such factors such as fungus, mold and even rust due to special coating.
- In the manufacture of such doors, modern materials are used to create high sound and thermal insulation.
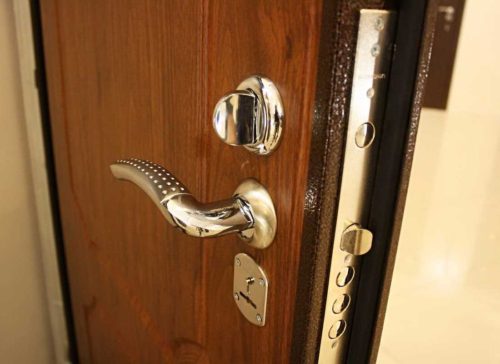
- Metal doors are usually equipped with multi-level locking mechanisms, as well as some other protective means. They interfere with hacks of locks and even banal removal of doors with loops.
We choose the inlet metal doors: what to pay attention to
Before installing the door, you must first choose to choose. Consider a number of moments that it is important to ask and to pay attention to the selection of the model.
- Ask sellers to make all the necessary documentation, which confirms the quality of products.
- Carefully inspect the selected product. Metal elements located in the trim should be from 2 mm wide, but in no case is no less.
- When closing the door, from the loop side in any case, the gaps should appear, which are found to be covered with the seal. In the absence of these lumens, problems with tight closure of the door may occur after some time.
- In the locking system there must be pins for locking the design. Their presence is mandatory for each of the four sides. Such mechanisms are needed to prevent loops and push up the door from the jet. In some situations, cheapest options are equipped with non-steel pins, but plastic. Such a fact must be checked so that in the future it is not encountered with unpleasant situations associated with the direct functional purpose of the door.
- Also before buying, be sure to make sure that the used anti-corrosion coating is high-quality.
Installation of metal doors with your own hands: Recommendations
Even if the door model was chosen correctly, it is impossible to be completely confident in its safety. An important component is also the correct installation. If the design was mounted incorrectly, the inventive scammers will have a chance to remove it from the walls.
- To install the door you need to be able to work with a hammer. If a person has this skill, then in the process of installation problems should not occur.
- Remember that there are sellers who do not provide warranties on their doors in the event of their independent installation. In such a situation, we recommend looking for another place where this component will still be observed.
- During the installation process, it is necessary to pay enough attention to all, even the smallest, items. Only in this case, it turns out to perform the installation really qualitatively.
- Before you choose your choice on any door model, you need to perform the measurements of the opening. It is important to pay attention to the fact that the gap formed in the space between the box and the wall should be made up of at least 25 mm throughout the perimeter of the structure.
- Today in the network you can find many videos in which the entire process of installing the doors is described in detail. Thanks to such benefits, the user will be able to disassemble step-by-step instructions and clearly see how the doors are installed with their own hands on video. It is easier to work on an order easier and more convenient, because theoretical knowledge will be completely shown clearly. This will allow you to install more clearly, spending less time, and be confident in a great result of your work.
Preparing for installation with your own hands: We remove the old door
Before starting the installation of a new input structure, it is necessary to get rid of the old door. Consider step-by-step dismantling instructions, starting from the list of necessary inventory.
Instruments:
- wedges of wood;
- hammer;
- bulgarian;
- scrap;
- level;
- anchor mounts;
- plumb;
- foam assembly;
- perforator;
- roulette.
Dismantle process:
- The first step is the fact of removing the old door with the loops. In case the attachments refer to a hinge folding type, open the door to the maximum latitude and scrap it below. Do not stop until the design is removed from the loops yourself.
- If the mounting of the door frame is in-nozzle, then you will first have to unscrew all the screws, and then begin to dismantle the design.
- The second stage, follow the door box parsing. If it is made of wood, first remove all the anchors along with nails. Then take the hacksaw, with which they saw the side racks on the equal parts, and then scrap gently press them from the wall surface. Next, remove all parts of the box. If you eliminated the details of the old mounts completely, the process of retrieving the lodge will pass without additional effort.
- To disassemble the metal box, you need to first cut the rods that perform the fixed function first, and then remove the entire design. This process usually entails the defeat of plaster in the immediate vicinity to the dismantled lodge, which you need to be prepared.
- At the end, clean the opening of the remaining parts of the insulating substance and cement.
Installing the input metal door of Dobrynya with your own hands
Today, the designs of the input and interior doors of the Dobrynya brand are in great demand in the materials market. These products are distinguished by high quality and durability. An important nuance is that their installation does not take much time and is extremely simple for a private builder.
Before starting replacing, disassembling the old door, and prepare the opening to install a new design.
Installation process:
- Install the selected model of the Dobrynya doors in the prepared opening. Pull out the design to the desired location and open at an angle of 90 ° C - it will not allow her to fall and will give the opportunity to work quietly.
- Control so that the upper part of the box does not move away from the wall all the time of installation. To do this, it is recommended for the bottom of the canvas to substitute the control backup.
- Now take the level and proceed to level leveling. It is important to orient it in such a way that each of the door planes occupied a clearly defined position regarding the top level.
- After that, run the level of the level on the door of the door with the loops. To do this, take wooden wedges and substitute them under the bottom corner of the box from the opposite side. Thus, it is necessary to achieve the right position of the block and level level. If the door was initially assembled correctly, then after an even location of the stand with the loops, all other parts of the design should become like the vulnerable, the deviations should not be observed.
- Of course, it is best to install the door on the wall. This method is considered more reliable, however, inconvenience may occur with different structures in the form of, for example, spontaneous opening of the door under the action of its own weight.
- Then the door box is fastened. It is best to start the installation process from above. Find the eyes and drill holes through them in the wall. Put an anchors there, but do not rush to delay. Go to the other side and perform the same thing from the other side of the door box.
- Then, with the help of the level, hush the anchors from the other side where the canopies are located. It is important to clearly withstand all verticals. After completing work on the one hand, go to the other and do all the same. The installation level should be constantly under control. The result of the work done at this stage should be a block, which on anchor screws, as it is hanging in space. If the door is slightly stunned, then there is nothing terrible in it. With the help of a mounting foam, this small problem can be easily eliminated.
- Now close the doors and check the locks of the locks. If there is a clutch of the casov during passage in the feed holes, then the installation of the door was incorrect. With the help of the level, it will be necessary to make additional adjustment to a clear work.
- The last stage of the installation will be the sealing of the structure. It will take a fairly large cylinder with mounting foam. Before use, it is necessary to shake it before using it, and then fill it all the space between the wall and the door, starting with the side sides and only then start processing the upper part. Under the bottom component does not need a foam door. Instead, cement mortar is usually used for the gap seal. Such an approach is considered more reliable compared to foam, since it can eventually spoil under the loads of human weight.
- After completing the last stage of the installation, it is not recommended to touch the door for about 6 hours. Foam should have time to frozen and finally fix the design in the wall.
Installing the inlet metal door with your own hands: video
For the proper installation of the input door, it is recommended to view a video clip of the installation. It tells in detail and clearly demonstrate all the details and tricks of the installation process, which can cause certain difficulties in inorrevary builders.
Installing the interior door with your own hands: Step-by-step instructions
Before starting the installation process of such doors, try to find the assistant. Because of the greater weight and dimensions of even the smallest design, it will be quite difficult to work alone and much longer.
Make the installation of interroom doors with your own hands in step bypass in several ways. The first applies if the door must be installed on the same level with the wall. The other is useful when there are slopes.
Method 1: Location Door in the same plane
The most popular way to install interior door structures was the fastening of them to the surface of the walls. This is done using special metal plates. Usually they are located on the side parts of the box. From all sides is 3 such mounts. This method is used when mounting the door design at the same level with the wall.
Installation process
- Clear the opening and insert the doors into it.
- Align them in accordance with the necessary level, as well as plumbers.
- Fix the correct position with wedges from the tree and check everything with the level.
- In places walls selected for fasteners, drill do holes.
- In the drilled places to score metal rods. Their length should be about 15 cm, and the remaining ends of each of them need to be split. If the rods can be replaced with anchor attachments.
- The next step is important to check, determine the degree of free closure of the door, as well as to control how dense the design is obtained to the door box. This is important to do at this stage, since the wrong position often leads to a violation of the work of the entire mechanism in the future. That is why latch and all locks are also required before the use of foam. You can begin to this step only if all operation processes occur easily and effortlessly.
- At the end, a little moisture the opening around the perimeter, and well fill out the empty space of the filler. Try not to fall on the product, as construction foam is extremely difficult to believe with such surfaces. Experienced builders are recommended before the transition to this stage to glue the necessary parts of the construction of the mounting ribbon, so that it is painlessly removed.
- Now leave the design at a certain time to dry. It is not recommended to open and close, as well as change the position of the door somewhere around 5 to 6 hours.
Method 2: Door location in recess
This method is applied when the product is set in such a way that the door can be "drowning" in the wall space. In this situation, apply the plates, as in the first version, will not work.
Before making installation, you must carefully examine the box. Often manufacturers produce products in which the holes required for installation are already provided. Often, anchor bolts and plastic caps are already supplied. In the absence of these elements, the installation will require a welding machine.
Installation process
- Perform the placement of the door on the struts.
- In the door box, from all sides, drill in 3 holes.
- Take metal rods whose length is from 12 cm, and take them into the holes made.
- Then the ends of the rod must be connected to the frame. Welding is made exclusively in holes divided in the box on the sides. This process will prevent the emergence of "Slops", due to which problems can appear with the opening and closing of the door in the future.
- If the "native" attachments in the set are present, then you need to drill holes at the site of the fastening groove, and fix the anchors.
- The next step fill the required space between the louds and the door by the filler. Be sure to wait for the complete drying of the construction foam.
Installing the interroom do it yourself: video
To visually consolidate the installation plan for the design of interroom doors, you can additionally watch a video clip with a full installation plan, drawing attention to the door type and its features of its installation.


