For recreation in the country or on a section of a country cottage, you need to create conditions so that it is possible to hide from the rain or the scorch rays of the sun. Options of a gardening corner for recreation assume the construction of a gazebo or veranda, the installation of garden swings, as well as the stationary manga zones. Throw out how to build and make such a corner for recreation, spending the minimum of funds.
Content
How to make a corner for holidays in the garden. Construction Gazebo for the garden do it yourself
First of all, you should choose a suitable place: it should be closed from the wind and is not too far from the main structure. A simple design, without glazing, the gazebo in the garden can be built according to the following technology.
Preparation of the site and the construction of the frame arbor in the garden with their own hands
A family-type gazebo involves the construction of a structure of at least 3 × 3 m. For this stage, work is performed from the following list.
- The working circuit is manufactured: it is indicated on it all important dimensions. The location of the benches and the table is taken into account. The distances between them should be such as resting and eating food was comfortable.
- The necessary material is purchased. We will need profile steel pipes (4 pcs. 3 m) cross section 80 × 80 mm, pipes with a cross section of 50 × 50 mm - 20 m, bars 100 × 50 mm - 7 pcs 3 m and edged board for crate device. In addition, it will be necessary for metal soil, paint, wood protection agent, roofing material, fastening and so on.
- Plot preparation is performed. A bushes and trees cut down on the selected platform, they remove the turf, align and the ground is lunged. Place the place of construction of the arbor, driven the pegs and pulling the cord between them. It is necessary to check the diagonals: their lengths should not be different than 50 mm.
- In the corners using a manual drill, the wells with a diameter of 250-300 mm and a depth of 1 m are prepared. The pipes are installed in these wells (with a cross section of 80 × 80 mm) and are fixed by temporary backups in a strictly vertical position. The wells are poured with concrete solution prepared in proportion: 5 buckets of gravel (rubble), 3 sand buckets and 1 bucket cement. Water is added in such a quantity to obtain a mass of sour cream-shaped consistency. Further work can be carried out after harvesting concrete - 2-3 days later.
- With the help of a water level, the height of the columns is checked: it must be the same. The differences are eliminated by cutting off the excess grog.
- Mounted upper strapping. Corses for installing wooden bars are welded to the tops of the support columns. The latter are attached to the corners of self-drawing through pre-drilled holes.
- Over the sides are set to rafting farms, which are connected in the upper part of the skating timber. Farms are pre-assembled on Earth, and then rise to the place of installation. In the middle part of the arbor, an additional farm may be needed. The bars are connected in the corners using metal or wooden linings. To the bars of the upper strapping, the mount is made with bolts. At the same time in the wood make a pressure for a stable compound.
- For the bottom cutting of the frame at the height of the seats of the bellows (about 0.5 m from the Earth) along the perimeter of the arming to the support posts, profile pipes are welded with a cross section of 50 × 50 mm.

Frame gazebo
Installation of crates and roofing material gazebo in the garden with their own hands
It is better to choose such as roofing material for roofing so as not to be heated from the sun's rays and not thundered during the rain. Such are ceramoplast, ondulin, cellular polycarbonate and slate. The latter is quite heavy, which will require significant physical effort during installation. The best value for the price and quality of ondulin, which is preferred.
Construction work is performed in stages.
- The lamp is mounted: for it, it is necessary for a cross section of 50 × 50 mm or a thickness of 20 mm thick. The step of the crate depends on the corner of the skate: up to 10 degrees. It should be solid (only boards are used), for the angle of the slope in the range of 10-15 degrees. The bars are naked to rafters with a pitch of 450 mm, for a skate with an angle of more than 15 degrees. The shadow step can be increased to 600 mm.
- The roofing material is stacked. Neighboring sheets of Ondulin in one row are mounted onto one wave, in different rows - with an overlap at least 100 mm. Ontulin nails nails with wide hats, on a sheet.
- Skate elements are attached at the top of the top.

Important: All wooden parts are processed by an antiseptic agent. Details of the metal frame are covered with soil with anti-corrosion additives and then two-three enamels.

If the gazebo is spacious, it can be provided for the jugla zone or barbecue. In this case, you will need to install an exhaust and chimney.

Gazebo with mangalom
Final part of the construction of the arbor in the garden with their own hands
Gazebo - a cozy corner in the garden. In order for your structure to be so, you need to install the table and seats. To do this, do the following.
- In the central part of the arbor, drill the wells and concrete T-shaped table supports. Their height should be about 90 cm. The countertop can be made of 100 × 50 mm with a cross section, putting them with parallel rows and crossing it from the bottom with transverse bars.
- For seats from the profile pipe 50 × 50 mm, a frame is manufactured, which can be attached by welding to the bottom of the bottom strapping. Across the frame in the seats and back zone is stacked and bars are attached to the screws. Between the bars can be a gap of about 40 mm - for the flow of rainwater, which will fall into an open-type gazebo with lateral wind.
- A decorative grid is mounted from the mounting rail to the cross section of 20 × 40 mm, which is installed along the perimeter of the arbor. Such a lattice will create a shadow and comfort.
- A concrete screed poured on the floor of the gazebo or paving slabs.

Decorative fence arbor
IMPORTANT: Wooden parts of the table and seats must be sharp and polished with finely abrasive sandpaper. Sharp corners need to round.
How to make a corner for holidays in the garden. Construction of a terrace in the garden with their own hands
The terrace can serve as an alternative to the arbor. It is attached to the main structure from the entrance. For a light terrace, it is not necessary to pour a monolithic ribbon foundation. The terrace in the garden is constructed according to the following technology.
- Places places to fill the support columns. The distance between them should not exceed 2 m.
- A playground is prepared: the turf is removed, the pits for the supports of a depth of about 1.2 m (below the level of soil freezing).
- The formwork is constructed from boards and sheets of plywood. For strength, it is necessary to install side backups.
- At the bottom of the recesses, the sand layer (100 mm) is poured, which is moisturized and tamped. The crushed stone layer is embroidered and the waterproofing material is placed in two or three layers (can be replaced by molten bitumen).
- Reinforcement is performed: rods are used with a thickness of 8-10 mm.
- Concrete mass poured. The level of fillings should be the same.
- In the upper part of the fill mounted a mortgage detail for fastening the lower construction of the structure.
- After hardened concrete, the bars of the lower strapping with a cross section of 150 × 150 mm are stacked. For this, wood is used wood resistant to moisture (oak, aspen, linden, walnut, aspen). Under the bars laid waterproofing.
- Mounted vertical supports from a bar with a cross section of 100 × 100 mm. For their attachment, steel connecting corners are used. Temporarily supports fixed lateral stops. The places of installation of the supports - in the corners, as well as on both sides of the entrance with the condition of compliance with the distance - no more than 2 m one of the other. Supports installed close to the wall of the main building are attached to it with screwdripes.
- Lagged laid, flooring floor. To do this, use pine rocks and pine breed boards with a thickness of at least 40 mm.
- Mounted bars of the upper strapping and a doom. Waterproofing and roofing material is stacked.
- Side fences are constructed. To do this, you can apply frame-boiled technology using siding, block house and insulation (mineral wool, extruded polystyrene foam sheets).
- The porch with steps and railings is constructed.

Stamp Foundation and Lower Vent
Important: During the concreting of the support columns from the finished solution, filled into the formwork, it is necessary to remove air bubbles to avoid the formation of voids. For this, concrete is repeatedly poured by reinforcement or compact with vibropress.

Frame terrace
For the terrace you can envisage glazing. In this case, window frames are inserted between vertical supports. On such a terrace will be well resting in windy and rainy weather.
Decoration and furniture Corner for recreation in the garden
After the main construction work is finished, it is necessary to install furniture, close the terraces windows with curtains, decorate the walls and porch with flowers.

Furniture for the garden can be made of various materials and items. Such may be:
- pallets for transporting bricks;
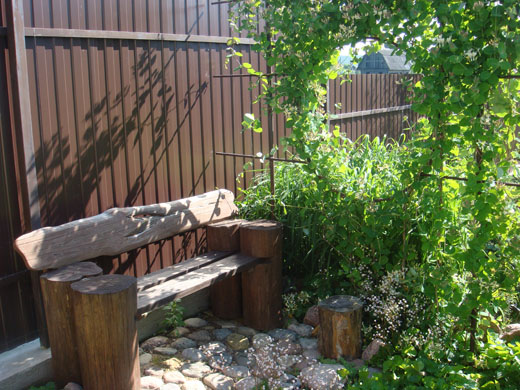
- wooden logs, painted along;
- wood lamps;
- cable drums;
- auto strokes;
- concrete blocks.
Cozy corners in the garden: photo will help borrow the idea for your site.


The main condition - the material should be resistant to rain moisture. Wood needs to be carefully treated with an antiseptic and coat with moisture protection.
Textiles for the garden should be practical, not marked. On the chairs there must be soft pillows, from the sun over the beads and swings - the canopy and tents of cotton fabric.


Designers recommend not to forget about the design of an area for recreation in the garden. It is necessary to competently plan the garden tracks, around which setting decorative lighting lamps.

Artificial reservoirs and fountains, Altanka, swing and benches under a canopy - all this creates a cozy atmosphere.

In conclusion, we offer the material about the design of the garden: video with specialist comments.


