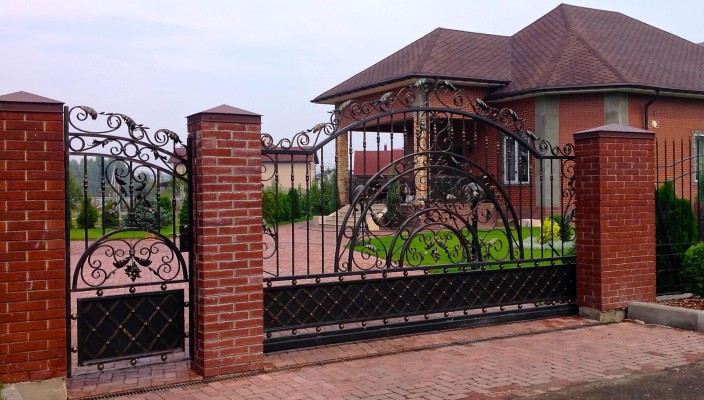
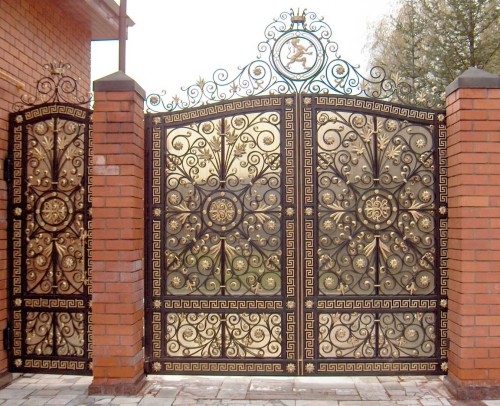
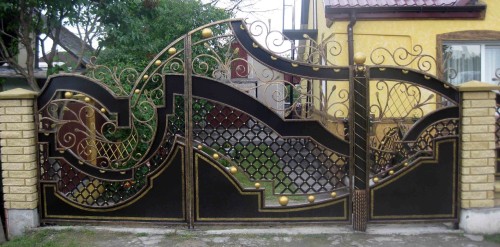
Forged wicket has always attracted a view with its exquisite and romantic look. It creates the impression of luxury, refinement and ancient charm. Forging elements immediately adversely emphasize the taste of the owner, oblige to the appropriate exterior of the yard and at home.
Content
An adhesive gate can be made and installed with your own hands. This is a time-consuming process, requiring patience and accuracy, but in addition it is also very creative.
Types of forged wickets
- Forged elements of fences can be attached at various options of the gate with the gate. Forging can decorate both sliding and swinging gates and wickets, as well as fencing equipped with automation.
- Swing fences can be fully made of forging elements, and can simply be decorated with separate adhesive elements. In retracting structures, the decor can be located only on the carrier frame.
- By type of manufacturing forged wickets, design can be deaf open and combined.
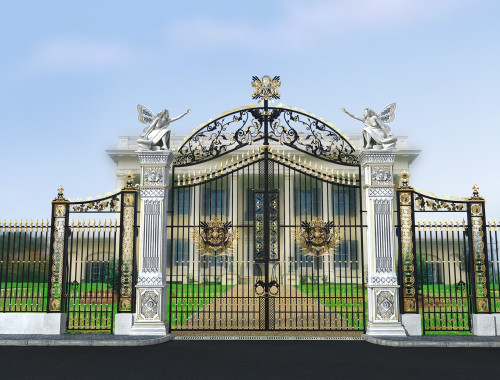
- Open fences are very elegant, make it possible to demonstrate the beauty of the household plot, planting colors and shrubs. They perfectly complement the sophisticated architecture and exterior. Rights from metal patterns are light, but despite this, they have endurance and resistance to wind pressure.
- However, not everyone loves an excessive openness of such fences, because they do not completely defend from curious views.
- Therefore, often adhesive elements decorate a deaf wicket or a fence with a professional flooring. In this case, forging elements can be beneficial to emphasize the contrasting painting. The metal sheet additionally protects the territory behind the fence, and is also a background for a forged decor of the wicket.
- Combined fences consist of both closed areas and from openwork metal elements that are not burdened with metal rear.
- Viewing photo The wickets with forged elements can diversify your idea of \u200b\u200btheir views, as well as become a starting point for creating your unique pattern on the fencing of the site.
Style solutions forged wickets
- Metal wickets containing forged elements can benefitly emphasize the general style of manor. They can be performed in the Gothic, classical design, as well as express the modern owners preferences. To start creating an adhesive wicket, you must first view the various sketches and determine the choice.
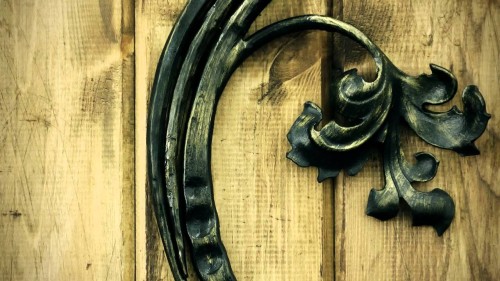
- The classic implies the presence of asymmetric ornaments containing leaves, fruits of plants and flowers. Gothic fences usually have sharp spiers. Baroque can demonstrate animal figures, coupling curls and other intricate decorations. Modern has ease, fermentation. Hi-Tech contains strict straight line lines, not burdened with figure ornaments.
- All this variety of styles and creative decisions of the design of forged gates can be easily in large quantities to consider on numerous photos laid out on the Internet.
- It is worth paying attention to the adhesive gate, an additional decorated arch. Such a decorative solution looks very stylish and sophisticated. The arch can be the basis for beautiful curly plants that will be bullied in the warm season or made of metal, bricks, wood and other materials. In addition, it can help in creating a shadow and, accordingly, coolness on your site.
- The wicket with adhesive elements on the arch perfectly emphasizes her style and attract admiring views.
Preparation for the manufacture of adhesive wicket
- To boldly begin the process of creating and installing the wicket with forged elements, you must first display the future wicket to the paper as accurately.
- The drawing should include the following details: The symbols, a list of components with the refinement of their quantity, the position numbers of the elements. The specification discloses the essence of the process in more detail and the need for materials and additional details.
- The more details the whole process and everything you need on paper will be described, the easier and faster it will be a creative part of creating wicket with your own hands.
- Special attention deserves the indication of permissible loads, the design of the concepts of ECC and GOST. It will simplify the task of the ability to use special computer programs.
- The standard height of the wicket is about 1.5 m, taking into account the gap of 10 cm above the surface of the Earth. Then the height of the carcass of the wicket will be about 1.4 m. The width of the wicket is usually about 1 m.
Required tools
- To work, a lot of specific tools will be required: grinding machine, welding machine, vice, cold forging machines, Bulgarian.
- Bulgarian is designed to cut the material on parts of the desired dimensions. Additionally, this tool can be pulled out the angles and connections, clean the rust before painting. With the help of a grinder, you can easily make neat cuts on elegant forged elements.
- The welding machine is required to fasten all elements into a single system. Since it is necessary to deal with decorative adhesive trim, the welding machine will need to use accurately and confidently so that the welding seams do not spoil the appearance.
- The compressor pulverizer is useful for the coating of the wicket paint. Painting with a tassel in this case can delay due to a large number of small patterned parts, so it is better to use a more advanced device.
Cold Forging Equipment
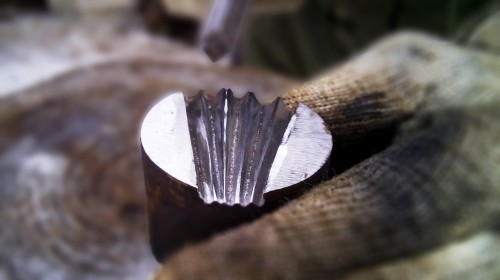
- Forging is a metal processing in order to give the product of the desired form. Forging can be cold and hot. Cold forging is creative, and it is quite possible to do at home, having special devices at hand to create metal masterpieces.
- With the help of cold forging devices, you can create beautiful suitable parts of the wicket. Moreover, these simple and understandable tools are able to create completely different decorative elements.
- Gnutik is one of the sought-after Cold Forging devices. It is used to perform bending of metal blanks, and the bending angle of the product can be adjusted.
- Snail - tool for twisting spirals. To create a spiral, it will take a blank with a certain diameter suitable for this machine. Most often, the diameter is 12 mm.
- The flashlight allows you to create products from twisted rods.
- The wave is a tool with which you can create wave-like bends on forged parts.
- Twister is a tool that is essentially similar to the "flashlight". It allows you to twist metal rods around the longitudinal axis.
- All of the above tools are very easy to use. To get the necessary product, you just need to apply a little strength and adapt to this skill.
- But after all, with the help of cold forging tools, not all your fantasies can be realized in reality. Flowers or other complex figures will not be done. Decorative elements can be purchased in the store and attach the wicket in the right places with the help of a welding machine.
- But if you are determined, then if you have the necessary equipment, you can mask the skills of hot forges.
Hot forging process and equipment
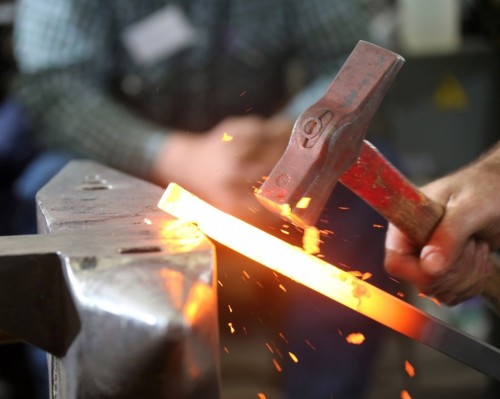
- If you are performing details with hot forging, you will have to use the mountain, hammer and anvil. It is worth considering that in the process of hot forging, you will need an open flame with a temperature of more than 1000 ° C.
- Forging elements takes place in several steps: heating, crimp, blank, final finish. Initially, the material is to be heated to 300 ° C, then heated to the ovens to maximum values.
- After the seizures of the element from the furnace, it is compacted using a hammer. As a result, the part will be cleaned from the scale, which appeared during the processing of high temperature.
- The hammer is used to give the part form, and then the final design of the element.
Creating composite parts wicket
- The wicket in the creation process will be manufactured in parts. These constituents will be:
- the frame - the base of the wicket, which is made from the profile pipe;
- sheds;
- forged parts;
- squares;
- supports - mounting for wicket;
- locks.
- The framework will consist of 4 metal profiles. In the process of cutting the pipe, a tape measure is useful, with which it will be necessary to check the evenness and correctness of the assembly of the base.
- The size of the frame should be less than the distance between the columns by 5-8 cm for the unimpeded movement of the sash. The distance to the land from the bottom of the carcass, the wicket must be from 15 to 20 cm in case of precipitation.
- Forged elements are parts of reinforcement, which are pre-cut according to the drawing calculations. If you have the skills of hot forging, then you know that after cutting the reinforcement is subject to warming up for 5 minutes in a special gas mountain. After that, with the help of the machine "Eccentric" or similar to it, the bending of the reinforcement rods in the form of the selected pattern is performed.
- Curls are formed on the snail machine, which works with cold materials, but to give a more correct form the pattern, the part is still worth rolling.
- It is not necessary to make a mistake and lower the part to the water in order to cool, since the result of this metal will temper, and further work with it can fail the equipment.
- The manufacture of the tip parts can be done using the machine "Eccentric", and you can give peaks a surround view after cutting the triangular parts with a grinder. Also products can be heated with gas welding and give the desired shape with a hammer.
- Peak details are beautifully looking at the top of the spirals. They can also be created independently, pre-applying marks every 10 cm, which will indicate the sections of the future spiral.
- The detail is fixed by the visk in the place where the spiral will be formed. With the help of rotational movements of lecturated tes along the axis of the workpiece, the product is twisted in the form of a helix.
Assembling all parts of the wicket in the finished design
- First you have to install wicket supports. If they are made in the form of brick masonry, then you need to make metal inserts for wicket loops.
- The length of the metal columns should be greater than the total height of the wicket per 1 m for the glueness of them into the ground. In the ground using a bera, we do 2 wells to 70 cm deep. The distance between the columns is at least 1 m. The pillars are placed in the recess and are additionally driven by a sledgehammer.
- You need to make sure that the pillars are strictly vertically, after which they need to fill with concrete. At the top of the pillars are connected using a welding transverse profile.
- After making the frame and individual forged elements, you can go to the welding process, as a result of which all parts of the wicket will be combined into a single integer. It is necessary to make an effort so that the welding seams are located on the back of the wicket and were neat.
- Cut the lock of the wicket and its handle. The handle can be included with the lock or separately. The popular option for gate is a mortise lock. It is placed in the sash of the wicket and with the help of the plank is attached to the design of the fence. On the forged wicket, as well as any other, it is better to choose a lock with a cylindrical cylindrical shape, as they are more reliable.
- You can also use the valves that are triggered when the door slam. They have a simple design, but do not close the key.
- After that, it is necessary to deal with all the inaccuracies and errors. With the help of the Bulgarian, you need to fix the welding seams, corners and bursavar. Also worth saying about rust.
- After the cleaning process, you can move to painting the wicket, pre-covering it with the primer. With the help of sandpaper, you can breed errors. Most often forged fences paint black matte paint, highlighting forged parts for gold or silver.
When the wicket is collected and installed, it remains only to admire the fruits of his work. Forged decorations of such fences created by hand create a unique impression and inspire further improvement of their skills.

