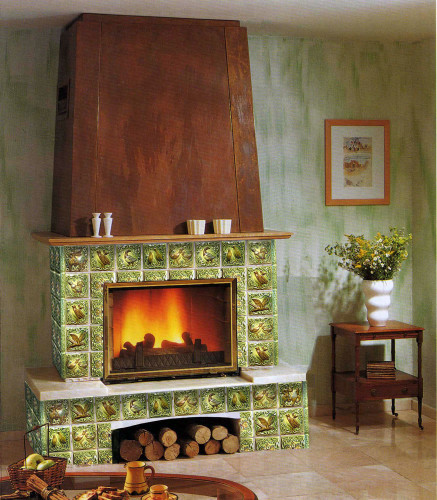
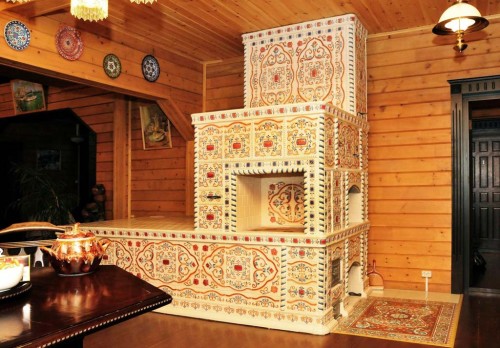
The furnishing of furnaces allows you to solve two tasks: improve their aesthetic indicators and increase the heat transfer. Facing material will prevent the flow of burning products through the seams in the masonry. In addition, it is much easier to care for such a furnace, because pollution and soot from its surface are removed without much difficulty through a conventional veto. Features of materials for finishing and facing methods Consider more detailed in this article.
Content
Varieties of stoves
Choir designs are divided into several types. These include such types:
- Heating furnaces whose function is heating the room. For the most optimal heat transfer, they are placed in the center of the room.
- Heating and cooking structures. In addition to heating, they also apply to cooking.
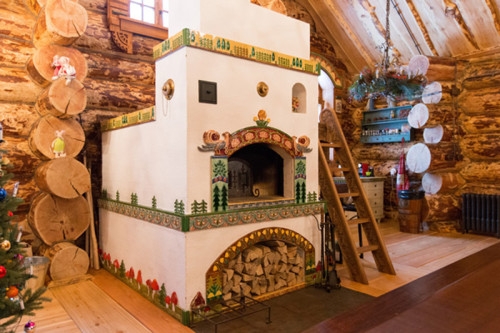
- Russian ovens. These designs are distinguished by the presence in the upper part of the laying and large cavities, which makes it possible to bake bread in these furnaces.
- Caminoxes - combine the furnace and fireplace. Due to this, this design is capable of accumulating heat and quickly heat the room.
- Bath furnaces. The task of such structures is heated by steam room and creating steam.
- Barbecue stoves are furnace complexes with a variety of functions that combine the cooking plate, oven, a Russian oven, smokehouse, a cauldron, a working desk, a niche for firewood and washing.
Finishing stoves. Photo:
How to choose a suitable material
The furnace of furnaces with their own hands should be carried out with the help of materials that meet certain requirements:
- Resistance to the effects of high temperature.
- Good heat transfer. This property depends on the thickness of the cladding. Do not use the material with a glossy surface. Such a coating is achieved using small particles of glass, which in the heating process begins to expand. As a result, cracks are formed on the surface, and the cladding loses the appearance.
- Material must have sufficient strength.
Consider each type of material in more detail. Tile is divided into several varieties:
- Terracotta products are made on the basis of natural material - kaolin clay. Thanks to this, products are environmentally friendly and suitable for residential premises. Color gamma varies from beige to brown. Also, the advantages of this material include simplicity of laying, affordable cost and resistance to temperature differences.
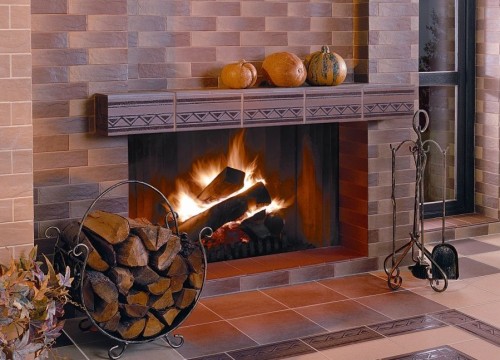
- Clinker tiles retains its operational qualities not only under the influence of high temperature, but also with open fire. The furnace lined with this tile is pretty simple in care. To remove the dirt from the surface and soot just wipe with a wet rag without any detergents. The material is characterized by a significant variety of color solutions.
- To finish the furnaces also use ceramic tiles, majolica, as well as porcelain stoneware.
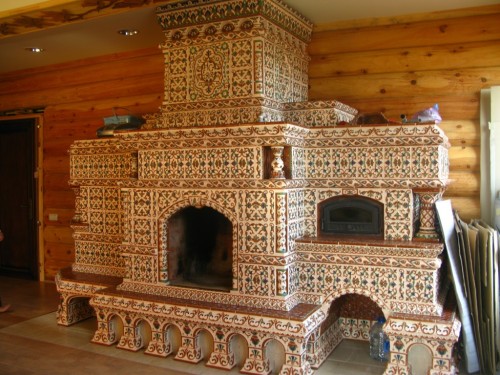
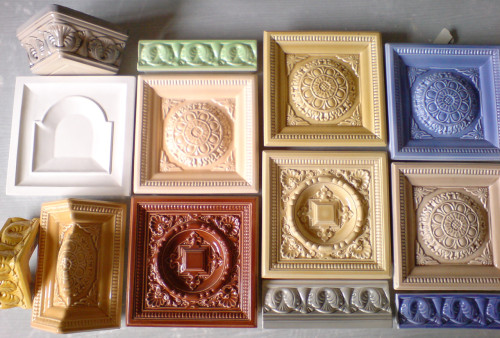
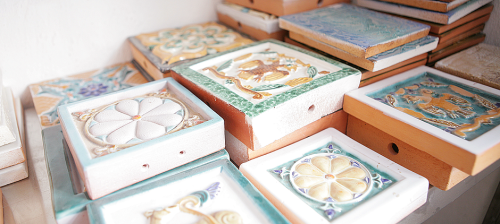
- For decorative finishes, tiles are used - clay tiles that have been treated with high temperatures. These products have a facial surface, which is decorated with a pattern or icing and an irons, resembling a box.
Finish Furnace Tile
Tile significantly increases the heat capacity of the furnace. This material on its operational properties is similar to a brick, so the room warms up quickly, and the heat is saved long enough.
To work, you will need:
- tile products;
- cement-sand composition;
- glue with thermal properties;
- rabitz. It can be replaced with wire with a cross section of 1.5 to 2 mm;
- dowels;
- spatulas (smooth and toothed);
- master OK;
- hammer;
- level;
- bulgarian.
The process of cladding is made in such a sequence of actions:
- First, it is necessary to remove the former cladding, carefully processing the entire surface.
- The finishing material also need to be removed from the seams, penetrating 5-10 mm. This can be done with the help of a grinder equipped with an abrasive circle and brush.
- Then the grid is attached to the furnace. Its use is not a prerequisite, but with this element, the finish is more durable.
- To mount the grid, it is originally necessary to score nails or dowels in the seams so that a space of 10 mm remains between the caps and the surface of the bricks. Fasteners should be scored at a distance of 50 mm from each other.
- The grid must be fixed using a wire, taking it around the tops of nails.
- Next you need to apply plastering material on the furnace. This can be a special adhesive composition for tiles with thermal effect or cement-sand composition. When working with a thermoclaim, it is important to clearly follow the instructions. Working with this composition may have certain features, such as pre-primer or multiple glue, while drying each layer.
- The cement-sand mix also have the requirements:
- for its preparation, it is necessary to apply the components of extremely good quality;
- the sand should not contain clays, and the cement used brand should be 400 and higher;
- when preparing the mixture, the ratio of cement and sand 1: 3 should be observed;
- in the process of applying a plaster layer, it is necessary to check the vertical of the angles and the surface of the walls through a plumb.
- After drying the plaster composition, it is necessary to install a wooden slaughter along the stove wall. The distance between its top and the floor level should not exceed the width of the tile. The rail must be located horizontally, check it with a level.
- Next you need to prepare thermocons. It should be prepared in small portions, since it has the property of lose its plasticity.
- Stop the tile is needed from the second bottom row on the rail. Work starts from the corner. The finish is simultaneously performed in the upper direction and to the side. Apply the adhesive composition will be more convenient to a flat spatula, and tool to use for alignment. Recommendations for layer thickness are included in the instructions. To achieve identical space between the rows, you can apply cross, but before the grouting they need to be removed.
- The grout is also performed using glue. Features of this procedure are indicated in the instructions. In some cases, the manufacturer recommends pre-trotting the oven.
- A rubber spatula is used to fill the seams. When finishing glue, you can not apply, and lay the tile, pre-closed in water on the raw plaster. The advantage of such a cladding is low cost, but according to the strength indicators, it is inferior to the decoration with the use of glue.
Decorative furnishings
The decoration of the furnace with the help of decorative elements (tiles) must be provided in advance at the structure of the structure. To do this, the masonry placed the ends of the wire and the pins, which they are fixed with the opposite side. Features of using such a facing comes down to such aspects:
- Tiles can be of different sizes. For this reason, after the acquisition, you first need to divide them by parameters, then with the help of the tool, the products are given the desired shape and size.
- A regular knife is used to create direct forms. And in order to give the material curved lines, you need a curved steel plate and a segment of the pipe that need to be powered by a plate.
- After giving the products, you need to pass them away. An abrasive fine-grained stone is used for this purpose.
- In the process of grinding the front side of the material should be shortwritten.
- If there is a need to cut the tie to this, you need to use steel wire. Pulling the product using a grinder, saws or a gear knife is not recommended, since these tools will damage the facial surface.
- The material is cut as follows:
- first, in the appropriate place, the product is powered by 4 mm metal ruler, then the wire is used;
- its end of her end is tied around a firmly installed subject, and the other end is winding a wooden stick, which then stacked on the stool;
- the cut is carried out in the following order: you need to take a tile of two hands, put it on the wire with a furrower and thus cutting, making the corresponding movements.
It is necessary to carry out the cladding of the tiles immediately after the construction of the furnace, since as the wire fasteners are inserted into the masonry. Before starting finishing works, it is necessary to wet, it will contribute to the best grip of the material with the base. Next steps are made in such a sequence:
- Start the laying of tiles should be from the bottom row.
- A thin layer of the clay solution is applied to their edges, and a large amount of mixture falls on the middle of the wrong side.
- Using a level, it is necessary to monitor the smooth location of the tiles in the horizontal and vertical direction.
- After the tile tiles are laid in the corners, there should be a series between them without the use of a clay mixture in order to check how tightly connected to each other. Such an inspection must be carried out before each new next.
- Then this row should be disassembled and lay out again with clay mortar. The size of the seams between the rows should correspond to 3 mm. In the course of work, you need to monitor the verticality and horizontal of the rows. The solution is filled with only horizontally spaced seams.
Laying tiles in the interval between the angular tiles is carried out in the following order:
- The product is located close to the angular tile, then the cavity from the reverse side is filled with a clay mixture, which needs small fragments of the furnace brick.
- It is impossible to form cracks or gaps. If there are such defects, the finishing coating will not be heated.
- After laying two tiles, it is necessary to turn wire pins in their hole. So that they do not move, above them should be hooked.
- The ends of the pins of two tiles should be wrapped three times, then put the nail between the wire rods and perform a twist. This will avoid the formation of cracks.
- In the lower and side parts of the RMS, steel brackets are installed. Their ends need a little dilute to the sides to create a spring effect.
- Next, the tiles in the masonry must be consolidated. There are several pieces of wires in the form of loops, which then fall bricks on the pins. Ends are becoming for the masonry. It is impossible to allow emptiness in rums, their cavities are completely filled with clay composition.
- During the construction of the furnace, the first row is located densely with rows of tiles, all existing voids are filled with the composition. Next, the hinges are attached to the pins, come to the laid out bricks and are fixed by the next next.
- The fastening of the liners should be performed in the height of the decorative tile on each row of bricks. After completion of the work, the surface should be cleaned of pollution and clay traces.
- Then the facing should be treated with liquid plaster test. When the plaster starts to push it, it is necessary to remove it with the help of the vehicle from the entire surface except the seams area.
- Brick oven, the finish of which was performed using tiles, on this ready.
Features of the preparation of a clay mixture
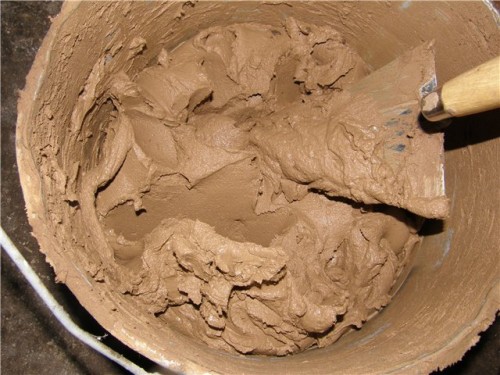
For a solution, it is necessary to choose the clay of the appropriate quality. First you need to determine how fat and dry it is. For this, a small amount of material is placed in water, after which it is stirred. If clay stick is observed to the blade, this indicates its excessive fatty. In this case, the solution should add fine-flow sand. If the adhesive is only a thin layer - the clay is dry and it must be mixed with a fatty material.
You can judge well about the good quality of clay if she is fragmentary to the shovel. For the preparation of the mixture, a wooden or metal container will be required. It is necessary to fall asleep clay, pour water to leave for three days. Then the mixture should be remembered, it can be done with your feet. As a result, a solution of sour cream-like consistency without lumps should be obtained.
Conclusion
Facing coating along with a decorative function improves the heat transfer of the furnace. Today there are many varieties of facing materials. To obtain a qualitative result in the process of choice, you should pay attention to their operational characteristics. The process of cladding implies several uncomplicated stages that can be performed independently without the help of specialists.
Finishing stoves. Video:


