Are you a happy owner of a country house or a plot and are going to figure out how to lay a platform from paving slabs? This will not require a special working qualification, since the process is under the power to fulfill everyone who has the minimum skills and the most common set of tools. Due to the widest choice, the small market value of the material, as well as the uncomplicated technology, lay out the pavement tile with their own hands. This will save on hiring workforce and achieve the most desired result.
Content
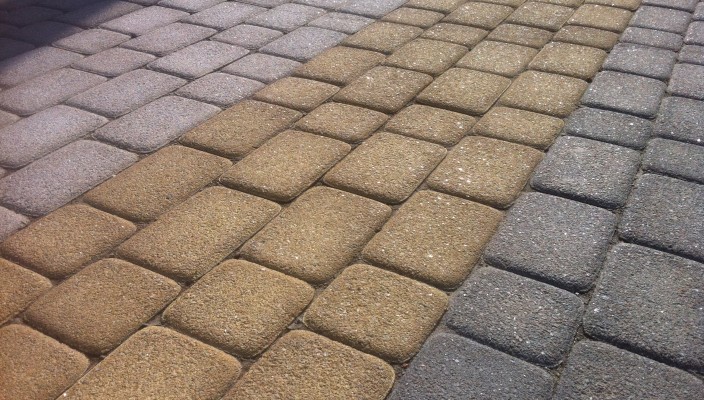
How to choose the sidewalk
Laying the paving slabs with their own hands will allow to equip the landscape of the site, whether it is a garden track, a breakfast or just a playground. A huge selection of forms, sizes, color and design solutions puts paving slabs to the list of the most popular finishing materials. It will help in the shortest possible time to equip the cottage or estate. Before starting work, it is worth considering that the larger the surface area that needs to be covered is the harder the installation process.
Before you choose the tile you like, it is worth considering all the tasks and functions that it will perform. It must be done in order to correctly pick up the thickness of the tile, which will become a solid base.

To pay attention to when choosing a tile thickness:
- if pedestrians or cyclists are the main power of exposure, then the thickness of 40 mm will be enough;
- thickness in 50 mm will allow the tile to save strength, if the car will ride it;
- when operating the surface of the tile trucks are sufficient thickness of 60 mm and above.
Paving slabs Plants manufacturers are manufactured not only in the classic (rectangular, square, polygonal), but also the prefabricated version (mosaic). Starting work is better to lay in a small area, such as a path. Subsequently, this will avoid incorrect actions and decisions when working in the territory of a larger area. In addition, at a narrow section, the learning process will pass as efficiently and does not harm the future platform.
When the choice is made and you can proceed to buy and delivering the material, it is always worth considering that on the road part of the tile can crack or just have a factory marriage. To do this, when calculating the required amount of material to the resulting result, add 10-15%. This will avoid additional trips to the store. In the event of a damage of one of the elements of the mosaic, it does not have to be replaced with another (if at the time of replacement the tiles were removed from production).

Do not forget about the borders. Their choice is small compared to paving slabs, but they have one very beneficial property. The border will serve as a natural boundary limiter, and will not allow the tile to crawl, performing the role of a kind of frame.
In the case when the laying is performed in a circle or diagonally not to avoid the material. This is due to the complexity of docking and cutting the elements of paving mosaics, which have an uneven shape. The tile for the sidewalk has a relatively inexpensive cost compared, for example, with a cafeter.
The main indicators affecting the price formation of such a material as paving slabs are:
- impact strength;
- wear resistance;
- color solution;
- design forms and complexity of the picture.
Shot tile laying technology
With the laying of paving slabs, you can easily cope with yourself, especially if we are talking about the paving a small area in the backyard or laying the neat garden tracks on the site. In this part of the article you will learn all the features of the styling.
Required tool and consumables
In order to achieve a better performance, you need to use special tools. Fortunately, get them quite simple - you can cheap in the store or rent.

The following tool will be required:
- power tools (Bulgarian, concrete mixer);
- hand tool (rubber hammer, trimming, trunk, shovel Soviet, shovel pin, rule, construction level);
- consumables (river sand, crushed stone, cement, cord, lighthouses, veser, diamond disc).
Preparation of the foundation
The first priority when laying paving slabs with their own hands can rightfully be considered the preparation of the base of the surface. If you consider this stage as much as possible in compliance with all the necessary technologies, the installation process will not cause any difficulties, even for a person who does not have experience in conducting such work.

The following actions do carefully and does not hurry:
- Place the future platform. With the help of a peg and cord, we indicate the shape of the site, as well as turns and bends, if necessary. Carefully examine the surface on which there will be a base. The presence of stumps, roots or stones underground and partially discovering on the surface can significantly complicate the work. All problem zones need to be eliminated. This will subsequently avoid repeated adjustments.
- We carry out drainage work. This type of work is required for any type of laying paving slabs. It serves to remove excess moisture, allowing to extend the life of the site. However, it is worth considering that for a different type of surfaces, use their way of performing drainage work. Drainage is internal and outdoor. Internal applied when working with clay and viscous soils. In this case, first break through the trench, pre-setting the angle of inclination, and then install drainage pipes. An external relevant when paving slabs are located at an angle of 2-3 ° to the edge of the site. This will help moisture not to linger on the surface of the tile. In addition, during precipitation, part of the water is leaning through the tiled seams.
- We draw the foundation. Armed with scrap and bayonet shovel, start clearing the soil along the places marked. The depths of 20 cm will be enough. Special attention is paid to vegetation, which over time can germinate and spoil the tile. In the future, this will avoid a very difficult and time-consuming correction process. Having achieved the desired depth, all unwanted soil should be collected using Sovkov's shovels. As a result, it turns out something like the ditches.
- Now you can install one currency on the bottom of the ditch and pour a layer of fine rubble (fraction 10-20 mm). Note the installation of the next curb should be on the opposite side parallel to the first, pre-taking into account the size of the paving slabs and the thickness of the seam (2-3 mm).
Important information: Perform measurement distance between the curbs extremely accurately. The accurate measurement will allow you to put the paving slabs without additional overruns of the material. - Both bordours are fixed with a cement-sand solution in a proportion of 1: 2. Cement is better to use no lower M400 brand. In addition, a frost-resistant plasticizer can be added to the solution, which will avoid the appearance of cracks in winter. Crushed the crushed stone and, if necessary, to remove or shine so that the thickness of the layer was 10 cm. Then, on the pillow from the gravel from above, fall asleep with wet sand, and moreover, it is necessary to make it up to the edge of the border as a result, a distance equal to 1.5 tile thickness remains. Sand to ravibly with a manual tamper, rolish and leave for a day.
When the borders are firmly installed, and the base is prepared, you can start the lays down the paving slabs with your own hands.
Laying paving slabs with their own hands
So the last stage comes, requiring patience and clarity of action. From the correctness and accuracy of the compliance of the algorithm will depend on the strength, durability and aesthetic beauty of your site.

Professional advice: the process of laying a platform from paving slabs with their own hands without being on the surface of the base layer. You need to move on the already mounted tile so as not to break the lining layer. It is very important to do work in dry weather.
Next, we will try to accurately figure out how to put the tile in the courtyard with their own hands:
- We prepare the mixture needed for laying tiles. If the design site in the future does not understand, then the best solution will become cement-sandy. The solution is mixed in a ratio of 1: 3 or 1: 4. For the site subsequently could be disassembled, we use as a mounting mixture of sand. The thickness of the layer in 3-4 cm in this case will be enough.
- Depending on the size of the site, we exhibit beacons at a distance of 1.5-2 m away from each other. The lighthouse is placed on sand pillows, previously armed with a construction level. UD27 profile can be used for replacement beacons. It has more hard characteristics, thereby a little simplifying task. It should be borne in mind that, on average, the height difference must be consistent and equal to 1 cm for each meter of platform width. This will make it possible to achieve the desired slope required for the moisture lead.
- We begin to lay the first row. This procedure should be taken to all attention and caution. It is from the first row that the accuracy of the further process and the strength of the site will depend on. Do not be afraid to disassemble several times and collect design, because the first rows set the accuracy of the direction of the entire site. To do this, in the transverse direction of the tile movement, pull the thread. Take the first tile and set at a distance of 3-5 mm from the edge of the border. Using the level, check the quality of the longitudinal installation. Armed with a rubber hammer, start to sweep the tile so that it is installed in the height level. Each bar, install it tightly to each other, not forgetting to withstand the interc seam in 2-3 mm. Performing similar actions with the rest of the tiles is also painstakingly and accurately, you will achieve the best results. If you can see that the tile bulges - remove it and remove the excess sand. In the case when the tile fails - plunge the sand.
- When the tile is laid, the next step will become a trimming. When laying paving slabs, one-piece slices of tiles are first mounted, and only then proceed to trimming and filling the missing segments. This allows you to slightly accelerate the installation process by focusing at the level plane level.
- When the process of trimming begins, you can use the easiest and most convenient way. Laying of sliced \u200b\u200bparts will be faster if each tile is simply attached to the site to which it will be laid. The cut line should be noted using a pencil on a stone and a ruler. You can measure the measurement in advance and then transfer to the tile, however, our method will be faster and no less efficient. To cut the desired piece, use the grinder. As a cutting material, take a segment disk on a stone with a diamond spraying. Do not forget about safety techniques and always use safety glasses, gloves and a mask when working with cutting material.
- As a mixture for sealing small seams, use a solution of cement with a high content of liquid glass. This will help protect the lining layer from sediments. The remaining seams fill in a mixture of sand. Also for a more dense connection in the sand you can add a little cement. To do this, pour some amount of dry sand onto the site and with the help of a broom or broom, which will be found in the farm, evenly distribute the mixture over the entire platform. When all the seams are filled, take the garden hose with a narrow nozzle for spraying water and carefully pass through the previously filled seams. This will allow the sand to apply moisture and settles even deeper between the tiles. Do it for even more dense filling of the seams. Such a procedure will increase the service life of the area.
- Now the whole structure must be finally grabbed (1-2 days in this case will be enough). Do not forget to periodically remove the surface of the site. If there are embossed patterns in the tile, which over time are clogged with mud, then cleaning will have to produce more often.
Useful information: For greater clutch with the surface of paving slabs in the winter period, in no case use chemicals and mixtures containing abrasive materials. It can significantly spoil the paint layer. Better use ordinary sand. With the onset of heat, it can be easily removed by the broom.
Paving tile do it yourself
If the form, the size or color solution of the paving slabs in the store did not suit you, or just want something special and original, then the manufacture of tiles will be a great solution to the problem.
For this we need the following tool and material:
- drill with a nozzle mixer for kneading solutions;
- concrete vibrator;
- trough, bucket, shovel, Kelma;
- forms for future tiles;
- special pigment for the color of the solution (if necessary), frost-building additive in concrete.
To make paving slabs to your taste, you need to do the following:
- Fall asleep sand and cement in the proportion of 1: 1, pour water.
- Each time you add a frost-resistant plasticizer and pigment in accordance with the dosage proposed by the manufacturer.
- With the help of a bucket, overcome the finished solution into a large tank type capacity.
- Now we take the construction vibrator, dip in the trough and leave the inclited to obtain a more dense consistency. This will help avoid hollow formations inside the finished tile.
- The resulting mixture is poured into in advance prepared forms and with the help of the cells evenly distribute the solution. This will help achieve the necessary plane and match the sizes of each tile.
- It will take about 2 days to frozen the solution, after which, the finished product can be removed.
You can also use ready-made silicone or plastic forms for the manufacture of sidewalking tiles handicapped. They can be found in any construction supermarket. However, this will require additional costs. A good alternative will be old food containers and other plastic forms.
As you can see, in the theory, put the platform from paving slabs is not much difficult. However, proceeding to work, you will face a number of difficulties and nuances that cannot be avoided. We hope this article will help you to overcome all the difficulties, and the process of mounting the pavement tiles will pass imperceptibly and pleasure.
Photo of paving slabs


