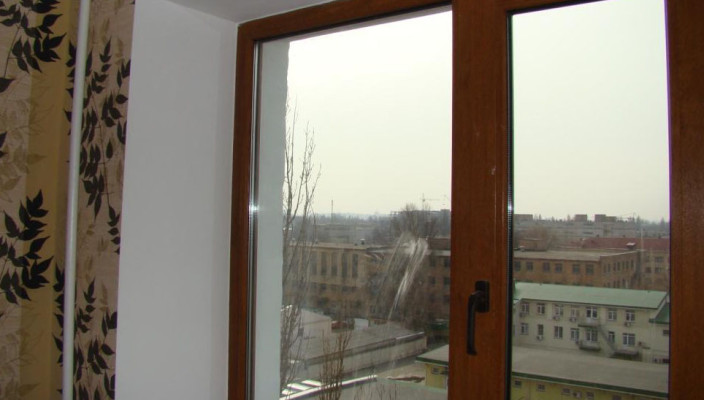
After installing windows, no less complex and responsible stage occurs - the creation of beautiful slopes. For this work, you can hire specialists and pay them money, but you can save and do everything yourself. It's not so difficult to perform work is not so difficult, in this article we will give recommendations for you on the plastering of window slopes with your own hands.
Content
Is it worth plastering slopes
The coating of window slopes is the most common method of their finishing, which allows you to get a beautiful and tidy window opening. Consider the advantages of this design:
- Finishing with plaster allows you to give slopes any size and shape. So you can make not only square or rectangular, but also arched, round, curvilinear opening.
- The solution used to work, environmental and racks to many operational conditions.
- Sunshine made of plaster composition looks aesthetic. If you wish, you can paint in any shade.
- If necessary, you can spend a quick repair of window slopes with plaster.
- Plaster has good heat and sound insulation characteristics. She closely closes all the gaps and cracks of the window opening, protects the room from the cold, wind, moisture.
Among the disadvantages of such a method, you can allocate such:
- The complexity and complexity of the process, which consists of many stages.
- If during the laying of the solution not to comply with the right technology of work, the slope can crack and demand repair.

Tools used in finishing window slopes plaster
To place the window opening like this way, you will need the following:
- plaster carbon;
- building level of approximately 1 m long;
- master OK;
- roller and brush of several sizes;
- roulette;
- malka;
- several aluminum rules of different lengths. It is desirable that one of the ends of each rule has a sharp angle, then the tool in the process will not be cling to the frame;
- simple pencil;
- grater for leveling cement-sand tie;
- water tanks and mortar;
- hammer;
- spatulas of different sizes;
- sponge for plaster plaster.
Consider in more detail what is a tool called low. When the window slopes are used, you may need a special template. It will help make the window opening not just straight, but slightly expanded towards the room.
Malka can be bought or made to order from metal, but you can make it yourself from plywood. The length of such a device must exceed the depth of the slope by 5-10 cm, the making width is approximately 15 cm. On one side of the tool there is a cut, it is this edge and will move along the window to the coating process. The second side will move around the lighthouse.
During the work, the Malka removes the surplus of the solution and the slope is flat and neat. If you make a tool from plywood, rounded its corners with a file, so that the material does not roll off during shuttering.

Than plastering window slopes
To separate the window slopes inside the room, the cement-sandy solution is most often used. It can be made with his own hands from the corresponding components, and you can purchase in the finished form. If you decide to prepare a mixture yourself, connect 1 part of cement with 3 parts of the sand, add the desired amount of water and mix that it turns out thick and elastic mass. The amount of water can be adjusted during the preparation of the solution.
Supported types of plasters are used to align the window slopes, which include additives in the form of plaster and various polymers. For finishing windows outside the building, it is necessary to choose special mixtures that are characterized by good moisture tolerance and low temperatures. These compositions include perlite, perlite-gypsum, vermiculite solutions.

Watching the slopes with their own hands
Preparatory stage
It is best that before starting finishing window slopes, the windowsill was already mounted, then you do not have to shock the slit after installation. So as not to damage the windowsill and do not swap it with a solution, it should be closed something. For this purpose, cardboard is suitable, dense paper, drywall fragments or something like that.
Before starting shuttering, the surface of the slopes should be cleaned of paint, old layers of plaster, oil spots, dust and other contaminants. The working base should be smooth, clean and durable.
In order to carry out the plaster of slopes, the window profile and glass is also desirable to protect the film by fixing it with the help of painting tape. In principle, all objects located near the window should be closed: batteries, windows handles and other surfaces.
Cleaning the slopes, seal all the slots, which is in the window opening. Wait for a complete frosting of the sealant, then remove all surplus with a knife. Note that the mounting foam can be applied only on a dry base.

Technology of work
- Before laying a plaster mixture, it is important to ensure its good adhesion with the surface. For this, the primer of deep penetration is used, and the desired composition is chosen depending on which solution will be used when plastered. There are primers for concrete, drywall, bricks and many others. Some masters prefer not to primure the slopes at all, if the cement-sandy solution is used for their finish, in such a case the working base is simply wetted with water.
- The next stage is the vaporizion of the mounting foam, which grits are embedded between the slopes and the window frame. Parosolation is an important procedure, without which the mounting foam can come into disrepair rather quickly, having intimidated by moisture. Steam barrier is carried out by applying silicone sealant to the mounting foam. Instead of sealant, sometimes a vapor barrier film is used.
- After vaporizolation, you can mount the corner plastering profiles that play the role of lighthouses. When they are installed, it is important to ensure that profiles stood exactly and relative to the wall, and in relation to the slope. If there are several openings in the wall, the profiles are first mounted on the extreme right and extreme left slope, and then intermediate elements are installed.
- The next step is the installation of a coil profile. This procedure is not necessary, but if you decide to use a plastic profile, then much simplify your work. The coil profile is a bar, on both sides, equipped with adhesive tape. The back of the profile is installed on the window box, and on the outer side you can stick a protective film for glass. On the front side of the plank there are 2 shelves. The one that is located with the edge is attached to the edge of the window box and subsequently attached, the second shelf serves as a beacon when solving the solution. After soaring the plaster mix, the edge of the plank that will go outside, it is necessary to tear down gently.
- When the coil profile is mounted, you can start shuttering the surface. The process is convenient to start with the upper horizontal zone. When the solution is dry in this place, you can process the other parts of the slope. The plaster mixture is applied by a trowel or a spatula of a suitable size, then the pattern is then attached to the angular profile and the window plank and remove the excess solution. Thus, the entire window opening is treated, if necessary, adding a mixture to the right places and adjusting defects.
- After a few minutes, the surplus is once again removed with a smoother, and then align the surface with the rule.
- After grapping the cement-sand mixture, it is watched by a special grater. If you are plastering the slopes with a gypsum composition, then after its drying, the surface is wet sponge with a small pressure.
- To make Sunshine perfectly smooth, it can be processed with a wide spatula, and then cover the finish putty layer and polish.

Subtleties of outdoor plaster window slopes with their own hands
External slopes are also necessary as internal. They protect the window from adversely surrounding factors, strengthen the mounting seams, provide better sealing of the window box, and also additionally heat the window and prevent moisture penetration into the room. Among other things, the outdoor slopes make the whole design more neat and attractive.
As mentioned earlier, special compositions are used for the plastering of window slopes: pelite, vermiculite or perlite-gypsum mixtures, which provide better hydro and thermal insulation of windows.
It is very important to pay attention to the sealing of the mounting seams, because they are considered weak places of the window opening. If you do not protect the mounting foam from moisture ingress, it will be soaked with water and collapse, and this, in turn, will provide you with drafts. Waterproofing mastic or polyurethane-based sealant is used to seal seams.


