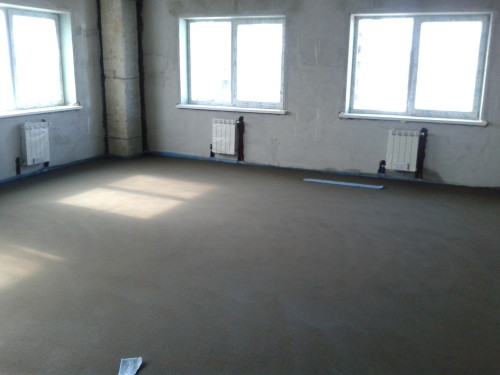
Quite often this situation occurs when it is necessary to create a concrete screed, however, wood as a basis is far from the best option. In such cases, "dry" methods of floor leveling are very often used. However, even in this case there are some limitations associated with the creation of a screed.
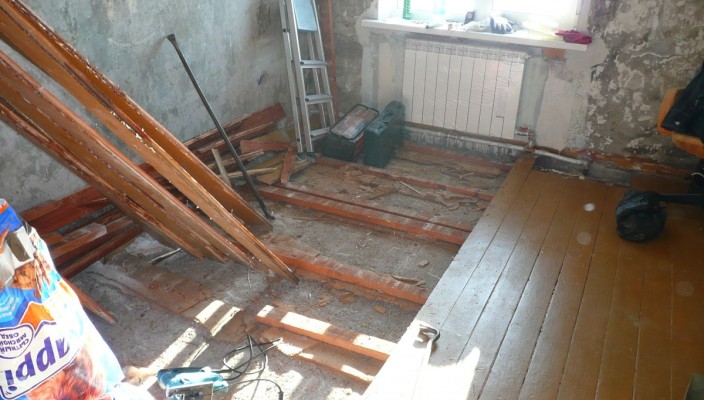
As for the classic screed, it is also created on the basis of wood. It is worth considering the fact that the process itself includes a number of unpleasant details that can significantly complicate this procedure. If possible, of course, it makes sense to remove the wood basis, and then the obstacles for creating a high-quality screed will not be exactly.
Surely the most serious problem that may occur during the creation of a screed on the wooden floor, this is a door level. When pouring, you need to control so that the concrete mixture does not go beyond the specific area.
Also on the floor of the floor there can be various pipe connections and some other communications. All this can seriously affect the creation of a screed.
It should be noted in advance that all possible scenarios must be pre-coordinated with specialists. Perhaps the consultants in construction stores will also help in certain matters. However, you need to know exactly exactly what the process of creating a concrete screed is very serious. In the same material, only common situations and ways to solve them are indicated.
Content
Key details of the process
First of all, it should be borne in mind that the process of creating a screed is quite simple in itself, however, the most attention should be paid to the preliminary assessment of all possible problems with which you can encounter. It is interesting that unpleasant situations can be really a lot. As already mentioned, it all depends on the particular room.
Right at the floor level can be present pipes. This is a fairly common phenomenon, especially in old buildings. As practice shows, in most cases the owners just slightly shift the pipes. However, everything is just only in words. In some cases, this may be a rather laborious process, for example, if the pipes are used at a specific point. If possible, of course, it is best to get rid of the pipes, as sooner or later they will still be felt anyway.
There is much more difficult situation in cases where the heating systems are located at the floor level. In this case, we are talking about batteries. Of course, just so shift them will not work. However, if there is an urgent need to create a concrete screed, then the output can always be found. Probably can help replace batteries. In a specific situation, you can purchase more compact heating elements that will be located significantly above the floor level.
It is especially serious to treat the doorway. The creation of a concrete screed should be carried out in such a way that this does not affect the use of the door. Well, if the door opens out - here you can simply limit the spread of the concrete screed when pouring. If the door opens inside the room, then we are faced with a number of problems. In this case, you can replace the door to such that would correspond to a new floor level. It is also possible to resort to more original solutions. For example, you can get rid of the door at all, or put it in such a way that it opens out. If all the above tips are too complex, you can cut the door, but at the same time you need to qualitatively treat the scaled surface so that the results of the work are not thrown into the eyes.
In addition, it should be borne in mind that the wooden floor is a fairly specific basis. With drops of temperature, wood is expanding, it is narrowed. The same, in turn, can negatively affect the quality of the screed. In such cases, the wooden floor should at least 2 years have complete freedom from the pressure of other construction resources, and only then you can create a screed on top of natural material. Obviously, after 2 years, wood will change its dimensions depending on the temperature indoors, but this process will be far from being so active.
Thus, throughout the entire period of operation, the wooden floor is a serious threat to a concrete screed. However, there are some tricks that avoid trouble.
Flooring Flooring
A floating screed technology is very often used, which reduces all negative phenomena associated with the expansion of wood to a minimum. In this case, you will have to create a special layer between the layer of screed and mobile wood. From the side of the wall, it is necessary to apply a damper tape, which is very often used in similar construction work, and the base itself will be separated from the horizontal surface of the wood floor with polyethylene.
Thus, it turns out an "independent" screed, which is not connected with either wood base, nor with walls.
Practice shows that such a flooring is rather durable, as well as practical. If necessary, the concrete screed is easily removed. Also, this method of creating a concrete basis cannot be called costly, in contrast to many other tips, which often conclude in the use of fairly expensive construction resources.
The main advantages of the polyethylene layer
It must be said that many people perceive polyethylene sufficiently negatively. This is due to the fact that it actually affects the wood is negative, but in this case polyethylene has many positive parties.
First of all, the wood, and the screed itself, will be able to "slide" along the available floor boundaries. Moreover, the polyethylene layer is a kind of line that does not allow a woody basis to accumulate moisture, usually incoming from the whole room. Accordingly, the tree will only be minimally deformed during the temperature differences. Similarly, the concrete will not absorb moisture from wood, and this is a fairly common phenomenon in cases where the concrete screed is created directly based on the wooden floor.
Before such construction activities, it is necessary to understand that there are negative aspects of the use of polyethylene. Most often it is that this layer creates a kind of vacuum for the wooden floor, so it is necessary to handle the wood with antiseptic means, which will easily resist the moisture.
Step-by-step instructions for creating a floating screed
Despite the relative simplicity of ideas, the process itself is quite laborious.
- First you need to remove the wood base and carefully check the entire design. If the floor is old, then you will probably find deformed lags, as well as cracks in the boards. Obviously, all this needs to be replaced, as it is later that everything can give themselves to know. If, after replacing some elements, the floor has become too cocking, you need to increase the number of lag. The step between these elements should be up to 40 cm.
- After the wooden floor was back assembled, you need to arm the sealant and close all the cracks between the boards. This is a mandatory stage, since during the creation of a screed can occur various troubles associated with the slots. It is also necessary to make sure that the surface of the floor is actually smooth and does not have special flaws.
- After use, the sealant needs to wait some time before continuing any manipulation with the floor.
- Often the screed layer is 5 cm. At the same time, it is necessary to understand that in such conditions there is a tremendous pressure on the wooden floor, therefore it is necessary to make sure that the wood surface is able to withstand a larger load.
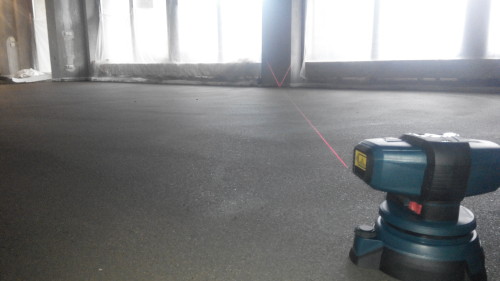
- Previously need to mark the markup for the future screed. This will allow not only to evaluate the scale of work, but also visually analyze all possible obstacles. In this case, you can use special laser devices that are more precisely the rest of the accessories. You can also create some marks with a pencil.
- Now it's time to create a floating floor. To begin with, we will need a damping tape. In this case, it is best to use polystyrene-based material. This tape must be stretched along the walls so that the future screed is with it at the same level. The thickness of the damper should be up to 2 cm. No need to worry about the fact that the tape will be slightly higher than the screed. After all works, part of the damping material can be cut off.
- It should be noted once again that with the help of the above tape, we not only create the so-called floating floor, but also provide a high level of sound isolation. The fastening of the damper to the wall occurs with the help of ordinary tape.
- Now it's time to use polyethylene. It is necessary for a large cloth, which, to all, will be 20 cm to enter the walls. If it is used several cavins (most often it happens), it is necessary to have their own flashes.
- It is necessary to carefully check the surface of this layer in the absence of even the most minor flaws, because after the fill of the floor with concrete they can give themselves to know. After discovering some problems, it is necessary to immediately replace part of the synthetic web. All joints are sickling with scotch, so that under the polyethylene it does not leak.
- Do not forget about the reinforcement of the concrete layer. This is especially important in cases where the screed has a sufficiently large thickness. Reinforcement will significantly strengthen the building material, while creating an additional load on the wooden floor. Often, fittings are used as reinforcement, but in this case it cannot be applied (absolutely inappropriate scale). However, in concrete conditions, microfiber will show perfectly, or basalt fiber. At first glance, these materials are incredibly light and useless, but they are used in large-scale construction, where it is necessary to strengthen the concrete.
- Lighthouses will not prevent themselves to evaluate the screed layer.
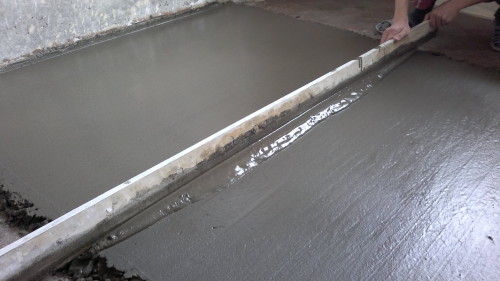
- Pouring screed is an incredibly simple process. It is fairly uniformly pouring a concrete mixture in such a way that all the lighthouses located in the binding material on the same level. Running the screed must be carried out with a large spatula or long and smooth boards. This stage of work is very responsible, since any deviations from the designated level may adversely affect the integrity of the coating.
Final stage of work
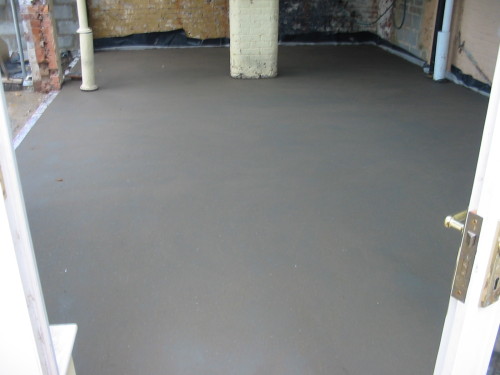
Now that the most difficult stage will pass, it is necessary to control the status of the screed. Concrete is a sufficiently arrogant material, which under some conditions can begin to crack, or rapidly lose its original properties.
Thus, the concrete layer must be constantly moistened. This process should continue during the day. Further, when the most responsible stage has already passed, you need to spray water on the surface of the screed. This procedure must be done during the week. Again, it is worth saying that splashing should be carried out evenly so that the concrete is in the same room in one state.
It is also very important to create conditions at which the indoor temperature will be at one level. No sharp oscillations can be allowed. Moreover, this applies not only to the first days after creating the fill, and several weeks, during which concrete is a fairly vulnerable place in the dwelling.
In addition, high humidity may affect the condition of concrete. It is worth protecting the screed from this phenomenon. Already a month after the creation of the concrete layer, the surface can be fully used. In the event of any problems associated with the screed, you need to react immediately, since the huge area of \u200b\u200bthe dwelling may be under threat.

