Plasterboard today is one of the most sought-after building materials. This is explained by its excellent physical and hygienic properties. This material is actively used to equalize the ceilings, walls, as well as a roughing floor under the laying of flooring, including ceramic tiles.
Content
Features of the installation of ceramic tiles on plasterboard
If we talk about the technology of installation of ceramic tiles on plasterboard, it has its own characteristics. As you know, plasterboard represents a building material that consists of natural gypsum plated by sheets of cardboard. On the one hand, it made it possible to producers to get a light environmentally friendly material that is able to "breathe", and on the other hand, it is very sensitive to high humidity.
- Therefore, it is best to use water-resistant plasterboard for laying the tiles.
- In addition, it must be pre-mounted on metal, and not on wooden profiles, which are also afraid of moisture.

But even in this case, laying the ceramic tile with the help of the usual method on the adhesive basis, plasterboard can over time to lose its shape and deform. To avoid such unwanted consequences, it is necessary to strictly adhere to the correct technology of laying ceramic tiles on the surface of the drywall.
Installation of ceramic tiles on plasterboard
Preparation of the surface under ceramic tiles
In order for your efforts to lay a ceramic tile on plasterboard with success, experts recommend in advance how to prepare the surface to which actually styling will be made. This depends on the adhesion strength of the adhesive mixture with sheets of plasterboard.
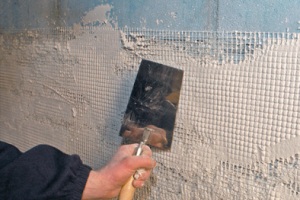
- Therefore, many experts recommend to apply a plaster mesh that is fixed to drywall sheets using conventional PVA glue, and after reliably fix the mounting brackets.
- In addition, many also use special rail guides, leaving a distance between them no more than 40 cm. The thinner is the drywall, the more often they must be installed.
- After that, the entire surface must be braced well. The primer is applied twice with a toothed spatula, thus racing so that horizontal strips on the ground layer are formed.
Choosing a suitable glue
Before, go to laying ceramic tiles on plasterboard very important to choose the right adhesive mixture. For these purposes, a conventional cement-sandy solution cannot be applied. The optimal option can be considered a special tile adhesive for working with plasterboard in rooms with high humidity. In addition, when it is prepared, it is important to clearly comply with the recommendations specified on the manufacturer's packaging to avoid any defects in the work.
- Most often enough to dissolve the finished dry mixture with water, observing the correct proportions.
- In order to obtain a homogeneous consistency apply a special nozzle on a drill.
- The adhesive mixture is immediately prepared in small quantities so that it is approximately enough to lay 1m2 tiles. Then the new portion is also prepared again.
Wall markup
- Before starting the process of mounting the tile, it is necessary, first of all, to navigate the horizontal bar, which will indicate the bottom edge of the first row of tiles. This is done if the ceramic tile needs to be put up to the floor itself, otherwise the plank is not needed.
- In addition, the length of the wall is not always painted tiles, which leads to an imperious trimming of the facing material. So as a result of getting a beautiful appearance of the wall, you need to think about the laying technology in advance.
If the tile trim should remain with length less than half of its width, then start mounting from the middle of the wall. If, on the contrary, the most part remains, then such trim is laid in the corner of the room.
Installation of ceramic tiles on plasterboard
- Then, on a plasterboard surface, we apply uniformly adhesive composition, gently sprinkling it with a toothed spatula.
- We press the tiles one by the other to the plasterboard. If necessary, you can use the rubber hammer.
- When the first tile is installed, exhibit plastic crosses on top and bottom to keep the same distance between two adjacent tiles and get a smooth seam.
- In the process of laying the tile it is very important to constantly control evenness using a level.
- After laying the first row, we make a little break for 30 minutes so that the glue time to grab. And so continue every 5-6 rows.
- After completing cladding with ceramic tiles of drywall, leave the walls to dry about 48 hours.
- Then the crosses are taken manually or with pliers.
Shutdown of seams
After completing the plasterboard cladding, ceramic tiles and complete drying of the glue go to the procedure for the grout of intercutric seams. Depending on what room work was carried out and choose one of the grout methods.
- Namely, in a conventional dry room, for example, in the kitchen, hall and others, the seams are customary to lure the fugue.
- In wet rooms for this, a special varnish is used, which is applied by a thin tassel. It will help protect the seams from the negative impact of high humidity and temperature drops.
More detailed about laying ceramic tiles on plasterboard on video:


