The ceiling finish is one of the most important stages in the repair of all housing. This detail of the room is most noticeable, and that it does not spoil the overall picture, it must be done perfectly. To do this, it is initially required to prepare the surface of the ceiling to further facing work.
Content
Fundamental rules

Currently, the ceiling finish is carried out by several technologies:
- Casting with a special ceiling tile. This is the cheapest and easiest type of repair. It looks like this ceiling is not too presentable, so from the tile gradually refuse.
- Stretch ceiling. This is a relatively new technology. It is in the mounting of the suspended ceiling from the vinyl film. Thanks to the heating, the film is stretched and fixed on the ceiling. Then gradually cooling, it narrows and thus stretches. So, it turns out perfectly smooth ceiling. The disadvantage of stretch ceilings can be considered its vulnerability to mechanical damage. After all, there are quite often situations when, for example, a tube from under champagne, an inadvertently released from the bottle, has caused problems with the ceiling.
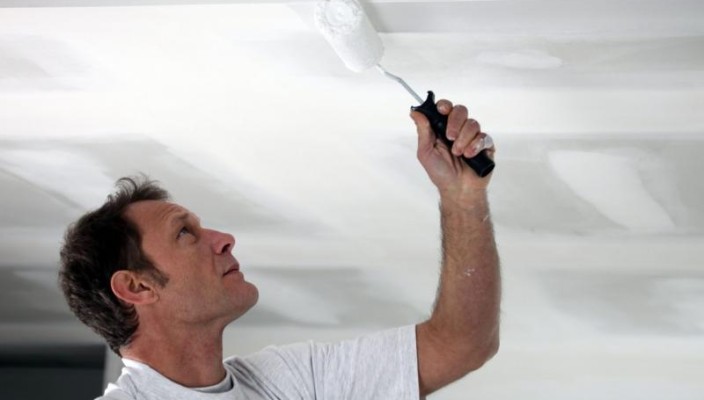
- Painting ceiling. This is the most common type of finish. Painted water-colored paint, it looks unsurpassed. However, it is worth noting that before the painting ceiling must be prepared. The unprepared surface of the walls and the ceiling under painting, on which all flaws will be seen after the end of the work, it is guaranteed to ruin all the impression of repair.
About how to prepare the ceiling under painting, then.
Type and condition of the surface

Depending on the type of ceiling surface, the method of alignment is selected. The most commonly encountered surfaces are:
- Reinforced concrete slabs overlap. Typically, such plates are installed in apartment buildings.
- Clean ceiling. In private houses, as well as in old buildings, in which the overlap was a wooden structure with a printed layer of a clay solution, it is quite difficult to work. Such a ceiling is poorly leveling, so often in such cases apply the technique of suspended structures.
Also, a very important criterion in the choice of equipment for the preparation of the ceiling to paint is its condition. The height of the ceiling, which is very often found in the houses of the old building, can make it impossible to align with a putty. If the ceiling has problems in the form of spots from water, mold, fungus, it will need to be treated with special compositions.
Ceiling trim under painting putty

If the ceiling surface does not have large height drops, it is possible to align it under painting with a putty. This process is not too complicated, but requires greater experience.
To put the ceiling in the room of standard sizes, you will need:
- Grounding of deep penetration (5 l).
- Putty starting (25 kg).
- Spacure finish (25 kg).
From the tools are necessary:
- Set of spatulas (wide and narrow).
- Mixer for the kneading solution.
- Stretch with replaceable grinding grids with cell sizes from 240 to 400 (for coarse and finishing grinding).
- Roller for applying primer. You can use a wide brush, however, in this case the consumption of the material will be much larger.
Procedure for conducting work:
- Works start with removal of old coating. If it was a chalk whitewash, it must be washed with water. If there is a tile, it is completely removed, while the spatula is cleaned with the remnants of glue. If necessary, you need to knock down peeling pieces of plaster, so that new layers of putty do not disappear due to them.
- After cleaning the surface of the ceiling, it must be primed. This is usually done with primer deep penetration based on PVA. In the presence of traces of the ceiling mold or fungus, it is necessary to use special formulations of antifungal additives. Otherwise, the risk of protrusion on the repaired surface will remain high.
- After the primer has dried start plastering the ceiling painting. First with the starting filler align the strongest irregularities. The fact is that it has a coarse structure, which is capable of applying a thicker layer without the likelihood of cracking.
- Prepare putty in the usual bucket on water. First, some water is poured, then poured several trowel mixture and stirred with a mixer until smooth. Tool for typesetting mixture from the bag should not be used for other purposes, so that it was no debris or moisture. After the required amount of dry material scored, trowel can be left in the bag.
- The solution putty consistency should resemble a thick cream, then it is easier to work. If the experience in the production of such works is not enough, do not cook a lot solution. He quickly freezes, then it can not be used.
- You need to take care of good lighting in order to see all the flaws and irregularities of the ceiling.
- Apply the plaster ceiling by painting a wide spatula, carefully, so that the solution lay down evenly. If the ceiling is very uneven, it will have to align in multiple layers. After drying, each of the layers it is sanded and primed before applying the next again.
- Putty surface grinding must be carried out using PPE (respirator). Dust from the dry mixture and the fine can bring problems to the human body.
- After the alignment of the ceiling plane, which checked the level or rule, start to finish putty. Operate it from a special mixture of fine gypsum based. Consistency finishing putty solution should not be so thick as at home, because it is much thinner layer.
- After drying putty sanded it "under the lamp." In simple terms a portable lamp illuminate each area, so as not to miss potential flaws. When you see them, they buried a small spatula.
- Particular attention should be paid to the corners, that they are the first to catch the eye. Polished "on the net" the ceiling is primed and painted with latex paint.
Ceiling of plasterboard under painting

In the houses of the old construction, in which the slabs of the overlap lie on special concrete beams, to align the ceiling by the usual putty will not work. In addition, as a rule, during the construction of such houses, attention did not pay the plates to lie correctly. Sometimes the edge of the previous plate appears above the subsequent by 10-14 mm. Naturally, impose such a layer of plaster is unlikely to succeed.
The suspended ceiling of plasterboard can become an excellent alternative if it is supposed to be separated the surface under painting. The installation of such a design will save on putty, place the wiring and other communications in the space between the main and suspended ceiling, which will save time and means to the device of special channels. In addition, this type of ceiling will allow the use of point lamps for additional lighting.
For the suspended ceiling device, you will need:
- Metal profile (CD and UD).
- Mounting for a metal profile.
- Fast mounting dowel for profile mounting.
- Self-tapping screws for fastening profiles.
- Plasterboard ceiling.
- Self-tapping screws for drywall.
From the tool:
- Perforator / drill.
- Screwdriver.
- Scissors for metal.
Procedure for work:
- The first thing is set to the frame from profiles. To do this, on the perimeter of the room at a certain height, the UD profile is mounted, the so-called waterway, which is attached to the wall. It is necessary to install it strictly by level, because it is this profile that will become the basis of the suspended ceiling.
- Then there is a CD profile lamp for fastening of drywall. The profile is inserted into opposite parts by the waterproof and is fixed with the screw. The lamp is installed in a pitch of 600 mm. The fact is that the width of the leaf of the plasterboard is 1200 mm and the cheek must be made so that the joint is between the sheets on the profile, and not hang in the air.
- After the profile is installed, they must be attached to the ceiling with special P-shaped mounts. They will not give the profile to fame under the weight of plasterboard.
- When the metal ceiling design is mounted, the required wiring is installed on it. After that, plasterboard is mounted. This procedure is quite complicated, since even a thin ceiling leaf has a rather large weight, and if you add here it sizes, then the task is not made out of the lungs. Therefore, it is better to do it together.
- Sheets to profiles with special self-draws with a step of 200-300 mm are attached. On some types of plasterboard, you can find applied labels for installation. It must be remembered that the joints between the two sheets must lie on the profile.
- When the ceiling is already sewn, join the special ribbon, so that the putty was held on them. Then the ceiling is ground and put off. If everything is done correctly, and the ceiling does not have special flaws, then one layer of the finish putty will be enough. After completion of the work, the surface is ground and color.
- When priming the ceiling under painting, experts advise to make a solution based on primer and water-emulsion paint. In this case, the surface will be snow-white. Recently, when finishing the premises often use wallpapers for the ceiling under painting. However, with strong surface irregularities, they will not fit.
Painting prepared ceiling

Important rules:
- Collect the ceiling is better in two layers. Then the divorces will not be noticeable in places where the putty lay unevenly.
- Paint before work it is necessary to mix thoroughly so that there are no clots and lumps.
- Apply the paint with a roller with a long pile and rocked well that the layer thickness is minimal.
- Each layer is applied perpendicular to the previous one.
- Layers must be applied to one reception. If you give the paint to dry, the stripes will be visible on the border.
- If baguette is installed on the ceiling, it must be painted on the same scheme as the main surface, otherwise the shades will differ.
How to put the ceiling under painting: photo


