Inexpensive furniture items that can be made with their own hands, always attract many contemporaries. The drywall cabinet is one of the most economical solutions that you can really create yourself without much effort.
Content
Is it worth making furniture from plasterboard?
This question is tormented by many. However, a number of advantages made the selected material for truly universal. Its elasticity and simplicity of processing make it possible to make products of any form, and the ease of finishing makes it possible to embody even the most unusual design solutions in just a couple of hours, without applying special efforts. In addition, there are no any harmful and health components in the drywall, which makes it one of the best materials for creating interior and furniture items.
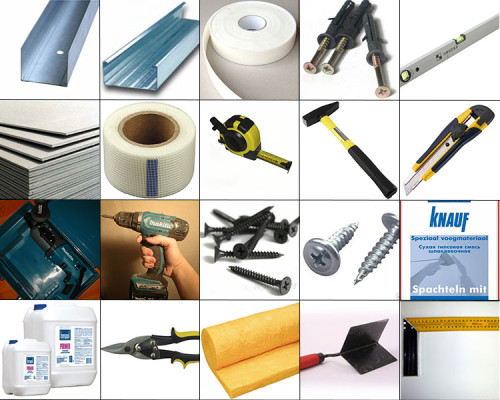
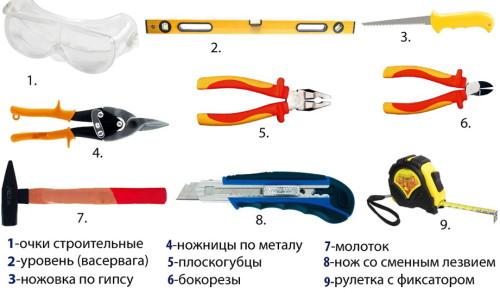
Tools and materials for creating a cabinet made of plasterboard are shown in the photo:
Therefore, before you start, select the main features and advantages of material and working with it:
- Price. Modern plasterboard costs much cheaper than many other materials.
- Treatment. You can saw it and give the right shape can be ordinary jigsaw, without applying special efforts.
- Ease. Plasterboard furniture has a small weight, which makes it possible to carry it out of room into the room yourself without any problems.
How to make a wardrobe from drywall? Getting to work
To proceed directly to the point, you need to decide where the closet will be, what will be its dimensions and shape, and make a sketch of the design.
We offer all the work to divide into several stages, to clearly struduce the work:
- Marking. If you ordered furniture from plasterboard, then the instructions have all the necessary parameters. You will only remain designating them on the floor, the ceiling (if the cabinet will stand backwards) and the walls. We advise at this stage also to designate, at what height the shelves will be and what thickness they will be. At this stage, you will need to use the construction level so that in the end the whole design was smooth. We also recommend making a detailed list from which elements a wardrobe will be, and which accessories will be used, and also draw the drawings of those details that will have a non-standard form.
- Preparation of the surface. The cabinet frame will have to be fixed to the surface to ensure reliability and stability. Therefore, you need to completely clean the selected area from dust and debris. In some cases, you will also need to remove old wallpapers and sharpen the surface of the walls. Please note that unwanted vibrations can be transferred from the walls and sex. Therefore, we advise you to initially acquire a special depreciation ribbon, which you can buy in construction stores. It will need to be punctured in those places where the wardrobe will touch with walls, floor and ceiling.
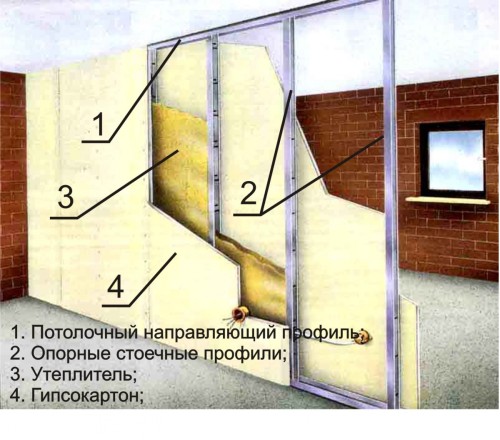
- Making a frame. It needs to be done strictly on the finished drawing. Accuracy must be up to millimeters. It is best to use wooden slats or a metal profile for it. Working with them is the easiest and not required for additional tools and expensive equipment. But if you work with a tree, initially note that it is dry and perfectly smooth. This will help avoid the deformation of the cabinet in the future. Based on this, it can be stated that the metal profile is more practical material. Yes, and fasten it an order easier. The only drawback - profiles cannot withstand a large load. However, in practice, this deficiency is almost impaired. But still we recommend initially determine what exactly you will be stored in the closet and what will average loads on its framework.
- All items must be fastened using a dowel. Screws and nails will not fit, because they will not provide sufficient strength. But for a small cabinet you can use them. There is no accurate steps between the mounts. But the larger and the wobbice will be, the closer to each other they should be. Usually, the distance is 20-30 cm. If it is a built-in drywall cabinet, it will additionally be held in the wall of the wall and the need to additionally fasten it.
- Now it is required to mount the suspensions to which rack profiles are attached. They need to be inserted into guides and fasten with screws when necessary. It will also not be superfluous to use the sealing tape in places where the frame will come into contact with the wall. It will keep it from the appearance of cracks and significantly increase its life. To further strengthen the design, we advise you to set horizontal elements from the same bars or profiles. Please note that any similar design must be mounted from the wall to the corners.
- Next you need to install the shelves. If they are ready, then you only need to drive them into guides. If the frame is strong, it is not necessary to fix them further. They will be tightly lying. In addition, it will be possible to remove the shelf at any time if necessary or replaced with a new one a couple of seconds.
- To strengthen the framework elements, we also advise using wooden plates, metal plates and shockproof glass. It will increase the endurance of the structure and will give the opportunity to fold the closet of more heavy items.
We are trimmed by plasterboard
When the frame and its basic elements are ready and securely installed, you can proceed to its trim. In order to secure sheets, you will need drill and screws. In addition, it will be necessary to process edges by the edge of the plane. Please note that the plasterboard itself is a rather fragile material. You need to work with him extremely neat.
- All cabinet corners need to be strengthened with reinforcing paper, metal corners or plaster grid. The wardrobe should be squeezed both outside and from the inside. When you install sheets, do not forget to leave a place for future doors.
- All joints that appear after installation are best embedded with plaster plaster.
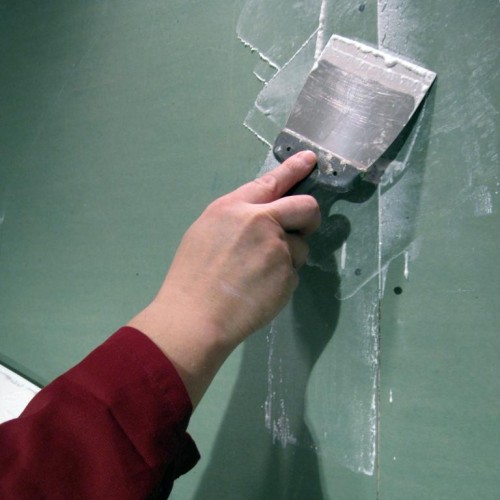
- After that, on the entire surface, apply one or more layers of putty. Especially important when applying the first layer, pay attention to the joints and fill it tightly with their composition so that there are no voids. To do this, you just need to jump over a larger amount of the composition and stronger to press the spatula in problem areas.
- Preferably after the first layer of putty also apply a reinforcing ribbon on the surface. Watch it to go strictly parallel to the seams and exclude the possibility of air bubbles, swirling and row.
- When the first layer solves completely, clean the explicit defects and apply the second layer along the same technology.
- Now engage in finishing finish. Here is the choice of you: paint, wallpaper, special film, etc. The main thing is to correctly choose a material that will not damage the basis. It is best to use acrylic paint or dense wallpaper. But in the second case, do not forget that the end result will largely depend on the quality of the selected glue. Therefore, it is better not to save, but choose from options for more expensive.
It is very important before applying the finishing coating to the quality of the surface and hide any small defects. When applied, the paint is easiest to use rollers and make several layers, each of which is applied only after the first will dry.
If the cabinet will be in the bathroom, we advise you to put it with tiles and use only moisture-resistant plasterboard. But note that under the weight of the tile design can be saved. Therefore, it is necessary to initially strengthen the transverse elements between the main racks.
Cabinet compartment made of plasterboard
By and large, the creation of a full-fledged wardrobe occurs almost by the same scheme as described above. The main difference is the depth. It must be at least 60-70 cm so that the shoulders are placed on which your clothes will hang. In this case, the depth of the side panels, the floor and roofs should also be a little more. On average, it is about ten centimeters. This is very important because the coupe itself occupies about 10 cm of the inner space in the depth.
Initially, make all the actions that are provided to create a conventional cabinet, and proceed to additional steps:
- The panels that are at the top and bottom of the cabinet are fixed by screws or corners. In order not to spoil the visual view of the future cabinet, they can be closed with special plugs. Side panels are also fixed in the same way.
- When plastering the entire surface, fasten up and below the guide profiles by which future doors will move.
- Now install the doors. They must be fully adjusted along the angle of inclination and height.
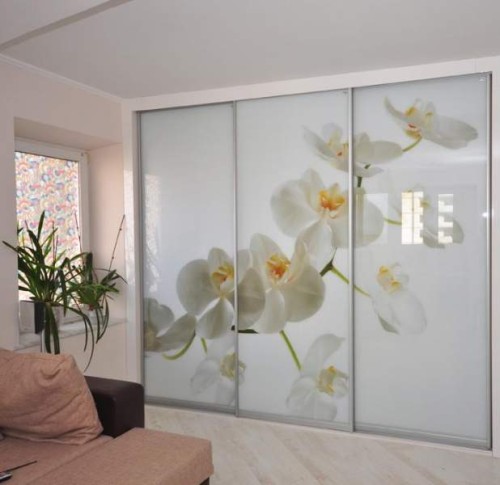
Doors advise to buy ready-made. It looks very good and distinguished by good mirror functional. They are sufficiently lightweight and get rid of you from the need to buy additional mirrors in the room or in the corridor. In addition, the mirror doors visually significantly increase the space indoors.
As you can see, in order to make a drywall cabinet with your own hands, no additional skills and experience are required. Simple drawings, an elementary set of tools and free time is all you need. We offer to explore the video about the manufacture of plasterboard cabinets.

